102
EN
OXYWAY
WM 66
611 07/
202
1
Repairs to OXYWAY Fast I, OXYWAY Fast I+, OXYWAY Fast III
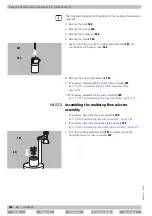
3. Remove the balls
4. Remove the springs
.
5. Remove the sliding ring
.
6. Remove the needle
7. Use the Allen key to push the orifice plate assembly
the inside of the housing cover
8. Remove the orifice plate assembly
.
9. If necessary: Disassemble the orifice plate assembly
(see "14.20.1 Disassembling the orifice plate assembly",
page 106)
10.If necessary: Disassemble the cover assembly
(see "14.27.1 Disassembling the cover assembly", page 113)
.
14.17.2
Assembling the multistep flow selector
assembly
1. If necessary: Assemble the cover assembly
(see "14.27.2 Assembling the cover assembly", page 114)
.
2. If necessary: Assemble the orifice plate assembly
(see "14.20.2 Assembling the orifice plate assembly", page 107)
.
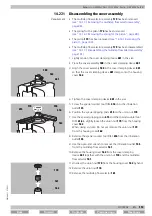
3. Pick up the orifice plate assembly
and place it onto the
clamping device for cover assembly
.
The balls and sliding ring on the bottom of the multistep flow selector
may stick.
Back
Forward
Previous page
Next page
Summary of Contents for OXYWAY Click
Page 271: ......


