186
EN
OXYWAY
WM 66
611 07/
202
1
Repairs to OXYWAY Fine I
7. Remove any adhesive residue from the threads on the housing.
When doing so, note:
• No dirt must get into the housing during cleaning.
• A brass brush must be used for the external thread.
• A thread tap must be used for the internal thread.
16.13.2
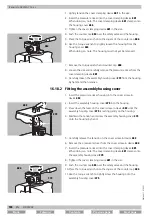
Fitting the inhalation outlet
1. Pick up the inhalation outlet
.
2. Apply Loctite
to the thread of the inhalation outlet
.
3. Insert the inhalation outlet
into the housing.
4. Use the torque wrench to tightly screw in the inhalation outlet
in the housing.
When doing so, note: Loctite
must harden according to the
manufacturer's specifications.
5. Loosen the hand-screwed connection
at the top part of the
counter tool
6. Unscrew the hand-screwed connection
from the bottom part
of the counter tool
by hand.
7. Remove the hand-screwed connection
of the pressure reducer
from the counter tool
8. Remove the top part of the counter tool
from the bottom part
of the counter tool
.
9. Loosen the bottom part of the counter tool
from the vise and
remove.
10.Fit the sealing disks
and nozzle plate
in the inhalation
outlet
(see "16.6.2 Fitting the sealing disks and nozzle plate in
the inhalation outlet", page 179)
11.Fit the pressure screw
in the inhalation outlet
(see "16.5.2 Fitting the pressure screw in the inhalation outlet",
page 178)
12.Fit the O-ring
in the connecting bolt
(see "16.8.2 Fitting the O-ring in the connecting bolt", page 180)
Risk due to adhesive in the gas flow!
If the first two threads of the inhalation outlet are moistened with
adhesive, this adhesive can get into the gas flow to the patient and
lead to airway irritation.
Do
not
moisten the first two threads with adhesive.
Back
Forward
Previous page
Next page
Summary of Contents for OXYWAY Click
Page 271: ......


