The Weir Group PLC
Weir Industrial Gateway setup guide rev 0.5
Copyright © Weir Minerals Australia Ltd 2017. Commercial in Confidence. All rights reserved.
Page
14
of
46
11.2.210.2.2
MPM & PSM
11.2.2.110.2.2.1
Equipment and materials required
• Tools
o
Allen keys, wrench/spanner to cover sizes 6, 8 & 10mm cap screws and nuts
o
Side cutters/scissors or similar to cut self-amalgamating tape
• Consumables
o
Self-amalgamating tape : Nitto No 15
o
AC supply cable : PN# TBD (note that the mains cable has open wires to
allow connection to a fuse box or the appropriate connector to suit the
customers power outlet)
o
DC out cable : DELL SKU: LFS04875-012M00
o
4 - M5 self tapping screws for mounting
• Provisioned SIM card
11.2.2.210.2.2.2
Hazards
-
The MPM is relatively heavy (16kg) and requires 2 people to transport and assist
each other during mounting.
-
If dropped from height this module is a potentially deadly hazard hence the area
below the installation must be cordoned off with danger tape.
-
Mains power is a potentially deadly hazard and hence must only be modified or
connected by a certified Electrician.
11.2.2.310.2.2.3
Installation
1. Ensure the serial number on the MPM and PSM correspond with the equipment to be
monitored and installation location
2. Ensure the protective caps remain on the MPM & PSM connectors until cables are
installed
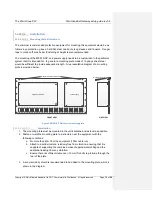
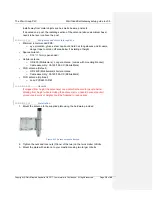
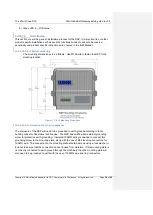
3. Install the MPM & PSM in the arrangement shown below in Figure 6.8. Ensure a
fastener is used for each mounting hole. The mounting of the PSM is done using M5
self tapping screws.


