OPERATION
WARRANTY
SIX-SIDED SPANNER STORAGE
When the six-sided spanner isn't in use, it can be stored
conveniently in the base of the tool
OPERATION
It is recommended that you first mark your intended
cutting line with a pencil or appropriate marker. Start the
tool and wait a short moment until the blade achieves
maximum speed Put the bottom base on the work piece
and move forward slowly along the cutting line.
Take extra care when cutting curved lines. This reduces
the stress on the blade and avoids breakage.
CUTTING ANGLES
Use the six-sided spanner to adjust the base plate and set
the required angle Loosen the bolts and slide the base
backwards away from the blade. Use the angle markings
on the base plate to accurately set the angle then slide the
base plate back to position and re-tighten the bolts.
While the tool is made to precise settings we recommend
that for cutting requiring extreme accuracy. a checking
device such as a protractor is used. Adjustment of the base
plate is critical for precision cutting. The base plate can be
tilted from 0 to 45° left or right.
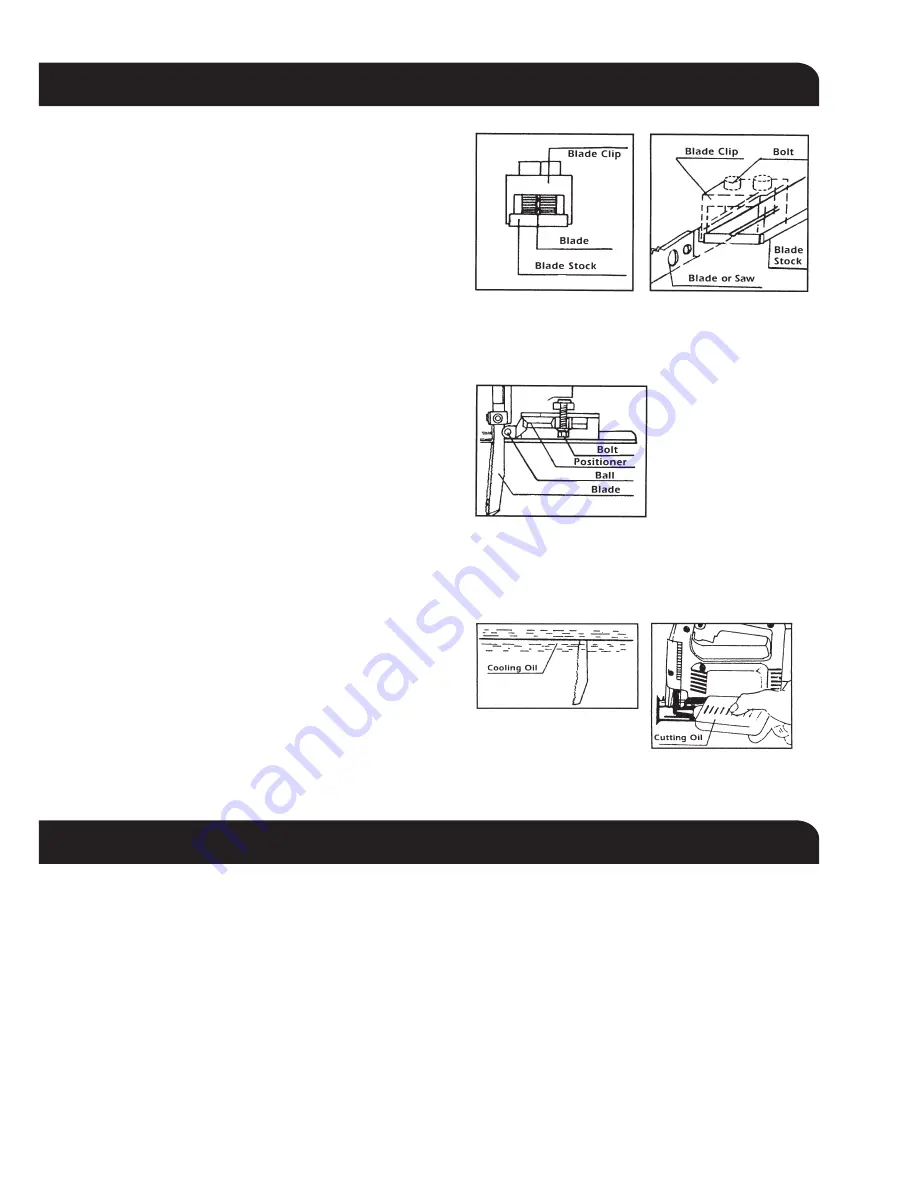
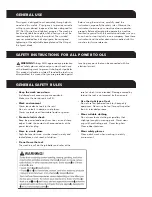
JIGSAW BLADE MOUNTING
Remove the power plug from the socket before
changing blade.
Various kinds of Jigsaw blades fit into the stock of the
tool. Please check with your retailer to ensure proper fit
before purchasing new blades. Use the six-sided
spanner to loosen or tighten the stock and mount the
blade according to the following diagrams.
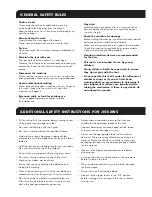
USE OF THE BALL (or ROLLER GUIDE)
Loosen the bolts which fix the base plate and positioner
with the six sided spanner. Slide the positioner so that
the ball touches the blade then
tighten the bolt.
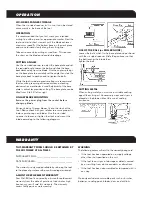
CUTTING METAL
When cutting metal you must use a suitable cooling
agent like cutting oil. Unnecessary wear and stress is
placed on the blade without the use of cooling
assistance.
THIS WARRANTY FORM SHOULD BE RETAINED BY
THE CUSTOMER AT ALL TIMES
PURCHASED FROM:_______________________________
DATE PURCHASED: _______________________________
The warranty is only made available by returning the tool
to the place of purchase with a confirmed register receipt.
6-MONTH REPLACEMENT WARRANTY
Your Wel-Bilt tool is covered by a 6-month replacement
warranty from the date of purchase. Industrial or high
frequency use will void this warranty. The warranty
covers faulty parts or workmanship.
WARNING
The following actions will result in the warranty being void.
• If the tool has been operated on a supply voltage
other than that specified on the unit.
• If the tool shows signs of damage or defects caused
by or resulting from abuse accidents or alterations.
• If the tool has been disassembled or tampered with in
any way.
Warranty excludes consumable parts such as brushes,
batteries, sanding pads, blades, discs and drill bits.


