background image

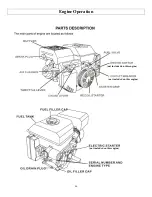
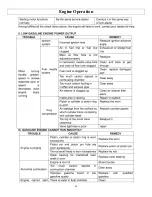
Engine Operation 

46 

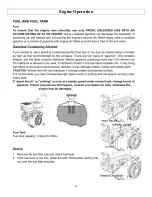
(not included on this engine) 

(not included on this engine) 

(not included on this engine) 


Summary of Contents for M141300A

Page 1: ...raulic system regularly for possible leaks Never check for leaks with your hand while the system is pressurized Seek medical attention immediately if injured by escaping fluid Fire Hazards If your log...

Page 2: ...Hazard Signal Word Definitions 2...

Page 3: ...pection Maintenance 15 Step Two Refueling 17 Step Three Work site Selection Set up 18 Splitting Operation 19 Storage 24 Periodic Maintenance 25 Troubleshooting 27 Specifications 28 Assembly Instructio...

Page 4: ...ystem to generate a very strong splitting force Read the manual completely before using the machine to understand how to safely operate and maintain it Follow all safety precautions presented througho...

Page 5: ...ion Add Hydraulic Oil Decal 1 6 Wel Bilt Logo Cylinder Decal Large 2 7 Never Disassemble or Repair Image Decal 2 8 Warning Towing Hazard Decal 1 9 Wel Bilt Logo Tank Decal Small 1 10 Warning Burn Haza...

Page 6: ...Safety Label Locations 6 1 7 2 3 4...

Page 7: ...Safety Label Locations 7 8 5 13 12 10 11 14...

Page 8: ...Safety Label Locations 8 15 16 19 18 17 9 6...

Page 9: ...Plate Assembly 10 10 in Flat Free Tire 3 Cylinder Assembly 11 Beam 4 Hydraulic Oil Dipstick Breather 12 Support Leg Towing Coupler 5 Hydraulic Tank 13 208cc Wel Bilt Gas Engine 6 Split Control Lever...

Page 10: ...feet long with your hand at one end and passing the other end over the suspected area wear eye protection Look for discoloration of the cardboard or wood NEVER adjust the pressure of the pump or valve...

Page 11: ...Initial Set Up 11 Note If the log splitter will be running for long periods of time in outdoor temperatures above 70F we recommend changing the hydraulic oil to DEXRON III...

Page 12: ...nt carburetor flooding and reduce the chance of fuel leakage Refer to Engine section of this manual for fuel valve location 3 Dipstick Always tighten the dipstick before moving the Logsplitter 4 Move...

Page 13: ...an appropriate work site Important safety instructions Towing This machine should not be towed on any street highway or public road Added length Be aware of the added length of the splitter Backing up...

Page 14: ...from hitch Disconnect log splitter from vehicle hitch 1 Remove the lock pin to disconnect the support leg from the vehicle hitch See below for proper UNLOCK position 2 Remove the support leg from the...

Page 15: ...Relieve all hydraulic system pressure by moving the Split Control Lever back and forth several times 2 Remove debris Remove debris from engine muffler and moving parts 1 Engine debris Debris on a hot...

Page 16: ...other components NEVER check for leaks with your hand Leaks can be located by holding a piece of cardboard or wood at least two feet long with your hand at one end and passing the other end over the s...

Page 17: ...oved container NEVER pump fuel directly into engine at gas station Static charge can build and ignite fuel Use a UL approved fuel container to transfer gas to the engine Don t overfill DO NOT overfill...

Page 18: ...u may have carbon monoxide poisoning 2 Fire precautions Take the following precautions against fire 1 IMPORTANT If your splitter will be used near any unimproved forest brush or grassy covered land th...

Page 19: ...the splitting control Splitting wedge NEVER attempt to change the height of the splitting wedge Pressure setting NEVER increase the pressure setting of the pump or control valve Safety equipment cont...

Page 20: ...trength In some cases logs as small as 8 in diameter and 14 in length may be heavier than what some persons should be repeatedly lifting onto the splitter Employers are advised to consider NIOSH lifti...

Page 21: ...while the push plate is moving Straddling reaching across Never straddle reach across or step over the beam while the engine is running and the log splitter is in the horizontal position You could tri...

Page 22: ...t Control Lever Never use any other body part or a rope cable or other remote device to actuate the control Second person Many accidents occur when there is more than one person involved in loading an...

Page 23: ...remove a stuck log by Modifying the splitter Using the hydraulic force of the splitter Adding attachments to the splitter 1 Turn engine OFF 2 Remove stuck log from the wedge manually with a pry bar o...

Page 24: ...fuel valve lever in the OFF position to reduce the possibility of fuel leakage Long Term Storage between infrequent uses and at end of season Drain the fuel tank and carburetor as instructed in the en...

Page 25: ...components of the log splitter NEVER check for leaks with your hand Leaks can be located by holding a piece of cardboard or wood at least two feet long with your hand at one end and passing the other...

Page 26: ...ration 4 Lubricate 1 Lubricate the beam before each use with engine oil Lubricate the top of the beam and under the top edge so the push plate will easily move across the beam 2 If necessary adjust th...

Page 27: ...hands Leaks can be located by holding a piece of cardboard or wood at least 2 feet long with your hand at one end and passing the other end suspected area wear eye protection Look for discoloration o...

Page 28: ...um Log Length 18 5 in Tire Size 10 in Flat Free Gas Engine 208cc Wel Bilt Overall Dimensions 59 L x 29 W x 24 5 H 150x74x62cm Dry Weight 220 lbs The manufacturer reserves the right to make improvement...

Page 29: ...ON Heavy lifting required Some of the components in these assembly instructions are heavy and cannot be lifted by one person safely Please plan on assembling this product when another person can be av...

Page 30: ...1 3 Long Axle Sleeve 1 4 Control Valve Handle 1 5 Cotter Pin 2 6 Flat Washer 2 Parts Found In Your Hardware Box Step 1 Install Wheel Axle 1 Take all parts out of shipping box and hardware box Put a bl...

Page 31: ...rt axle sleeve 17 wheel 18 flat washer 11 and secure with the cotter pin 19 2 On the right side of the axle install parts in the following order long axle sleeve 13 wheel 18 flat washer 11 and secure...

Page 32: ...o the handle base and secure with a 10mm wrench Step 4 Reposition Engine Pump Assembly for Operation 1 Loosen the hex bolt 15 lock nut 14 and lock washer 13 2 Slide the engine pump assembly out away f...

Page 33: ...Parts Breakdown Exploded View 141300 Rev A 33...

Page 34: ...sure Hose Sleeving 1 13 Kit 2 Combination Washer 14 1 14 Kit 2 Inlet Hose High Pressure Hose 1 15 Kit 1 Hex Bolt M10x100 1 16 Kit 1 Flat Washer 10 4 17 Kit 1 Lock Washer 10 4 18 Kit 1 Hex Nut M10 2 19...

Page 35: ...141300 Rev A 35 Item Part Number Description Quantity 1 N A Front Support Leg Weldment 1 2 N A Round Pin 1 3 N A Hook Pin Weldment 1 4 N A Lock Washer 12 1 5 N A Flat Washer 12 1 Assembly available o...

Page 36: ...Weldment 1 2 N A Nylon Plate 2 3 N A Middle Plate Left 1 4 N A Hook Plate Left 1 5 N A Hex Thick Nut M12 4 6 N A Lock Washer 12 4 7 N A Flat Washer 12 4 8 N A Hook Plate Right 1 9 N A Middle Plate Ri...

Page 37: ...d View 141300 Rev A 37 Item Part Number Description Quantity 1 787571 Oil Tank Breather 1 2 787572 Cylinder 1 3 Kit 3 Control Handle 1 4 Kit 2 Kit 4 Inlet Connector 1 5 Kit 2 Kit 4 Oil Filter 1 6 Kit...

Page 38: ...6 Kit 4 Kit 5 Lock Washer 8 10 7 Kit 4 Kit 5 Flat Washer 8 10 8 Kit 4 Hex Bolt M8x25 4 9 Kit 4 Gear Pump 1 10 Kit 4 Kit Suction Hose Connector 1 11 Kit 4 Kit Seal Washer 18 1 12 Kit 4 Inner Hex Bolt...

Page 39: ...Parts Breakdown Exploded View 141300 Rev A 39...

Page 40: ...e 1 9 Hose Clamp 2 11 Nylon Cable 2 12 High Pressure Hose Sleeving 1 13 Combination Washer 14 1 14 Inlet Hose High Pressure Hose 1 3 Hardware Box Kit 3 Cylinder Parts View Control Handle 1 787560 1 19...

Page 41: ...Kit 6 Pump Parts View Lock Washer 8 4 787562 1 7 Pump Parts View Flat Washer 8 4 13 Pump Parts View Lock Washer 10 1 14 Pump Parts View Nut M10 1 15 Pump Parts View Hex Bolt M10x45 1 16 Pump Parts Vie...

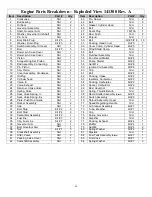
Page 42: ...Engine Parts Breakdown Exploded View 141300 Rev A 42...

Page 43: ...ase N A 1 61 Bolt Kit 6 2 20 Oil Plug N A 1 62 Packing Intake Kit 2 1 21 Cylinder head N A 1 63 Insulator Carburetor Kit 2 1 22 Valve In N A 1 64 Packing Carburetor Kit 2 1 23 Valve Exhaust N A 1 65 S...

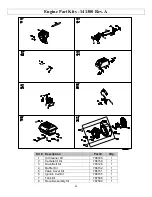
Page 44: ...Kit Description Part Qty 1 Air Cleaner Kit 786729 1 2 Carburetor Kit 786730 1 3 Drain Bolt Kit 783126 1 4 Muffler Kit 786732 1 5 Valve Cover Kit 786731 1 6 Ignition Coil Kit 786735 1 7 Tank Kit 787508...

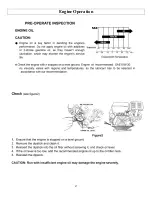
Page 45: ...Engine Operation 45 CAUTION This engine is shipped without oil If you start the engine without oil the engine will be damaged beyond repair and will not be covered under warranty...

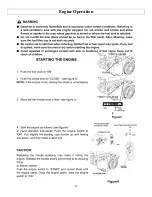
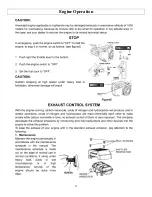
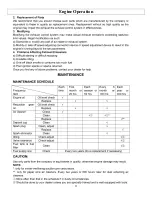
Page 46: ...Engine Operation 46 not included on this engine not included on this engine not included on this engine...

Page 47: ...Engine Operation 47...

Page 48: ...Engine Operation 48...

Page 49: ...Engine Operation 49...

Page 50: ...Engine Operation 50...

Page 51: ...Engine Operation 51...

Page 52: ...Engine Operation 52...

Page 53: ...Engine Operation 53...

Page 54: ...Engine Operation 54...

Page 55: ...Engine Operation 55...

Page 56: ...Engine Operation 56...

Page 57: ...Engine Operation 57...

Page 58: ...Engine Operation 58...

Page 59: ...Engine Operation 59...

Page 60: ...Engine Operation 60...

Page 61: ...Engine Operation 61...

Page 62: ...Engine Operation 62...

Page 63: ...Engine Operation 63...

Page 64: ...can occur Boots Falling logs can crush feet Always wear safety shoes or heavy boots when operating or helping to load logs Loose dangling Loose or dangling apparel can become entangled in moving parts...

Page 65: ...se approved container Never pump fuel directly into engine at gas station Static charge can build and ignite fuel Use an UL approved fuel container to transfer gas to the engine Running hot engine A r...

Page 66: ...ieve system pressure before changing or adjusting hydraulic system components such as hoses tubing fittings or other components Carbon monoxide The running engine gives off carbon monoxide a poisonous...

Page 67: ...s below to manually remove the log IMPORTANT NEVER attempt to remove a stuck log by using the hydraulic force of the splitter or by modifying or adding attachments to splitter Personal injury could re...

Page 68: ...arranty This warranty covers parts only It will not provide for replacement of complete products due to defective parts Components not manufactured by Wel Bilt are guaranteed by their manufacturer and...

Page 69: ...69 This page left intentionally blank...

Page 70: ...70 Distributed by Northern Tool Equipment Co 2800 SouthCross Drive West P O Box 1499 Burnsville MN 55337 0499 Made in China...

Reviews: