Part Number: 9294098 01/18
15
Section 2
Installation
Changing Pan Height
If additional pan temperature cooling ability is desired,
especially in higher ambient temperature conditions and/
or if pan covers are open or off for extended time periods
improved cooling of pans can usually be achieved by utilizing
the lower position of the dual level pan guides.
When utilizing the lower position on a model with drawers,
only 4” deep pans can be used in the top. When utilizing the
lower position on a door model, 4” or 6” deep pans may be
used.
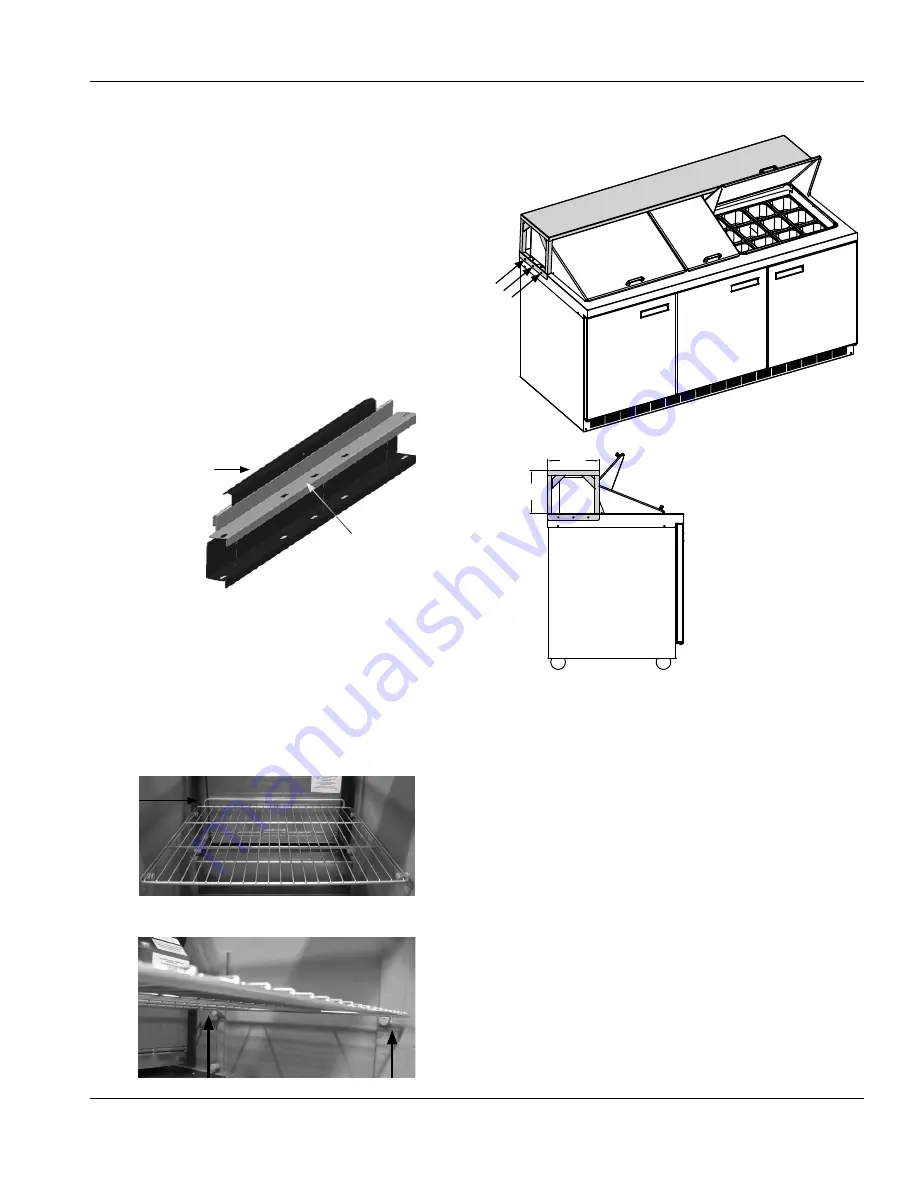
1. Remove all pans, pan dividers, front and rear support bars.
2. Remove the upper side support brackets by pulling them
up and off.
3. Reinstall all components removed in step one.
Use side support alone
to lower pans 1”
Remove upper side
support bracket
If the lower pan position is desired for models 4427N-8 or
4427N-12M, model specific brackets must be ordered. They
will replace all other brackets.
Shelf Installation Instructions
1. Notice the shelves have four alignment pins on the
underside and a backstop on the top back.
2. Insert the shelves into the cabinet.
• The backstop should be at the top back.
• The alignment pins should be in front and back of the
shelf supports.
Optional Overshelf Installation Instructions
12.00”
(30cm)
10.00”
(25cm)
If the unit is ordered to have the overshelf:
1. Remove the three screws from each top side of the
cabinet (total six screws).
2. Set the overshelf in-place on the top of the cabinet.
3. Line up the overshelf holes with the unit holes.
4. Secure with three screws per side of the cabinet (total
six screws).
If the overshelf was not ordered with the unit:
1. Set the overshelf in-place on the top of the cabinet.
2. Secure with three screws per side of the cabinet (total
six screws).


