20
IOM-222
MODEL: ESSENTIALS™ GAS SAMPLER
REV: A
13839 West Bellfort Street, Sugar Land, TX 77498
welker.com
Service Department 281.491.2331
Using Auxiliary Gas
9.
Ensure that a sample cylinder is installed to the Essentials™ Gas Sampler.
10.
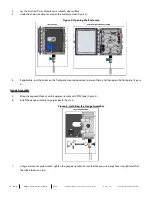
Remove the tubing connection on top of the gauge assembly (
11.
Connect a customer-supplied auxiliary gas supply to the elbow on top of the gauge assembly.
12.
Close product inlet valve A (
).
13.
Disconnect the tubing from the outlet of the MPS-2.
14.
Open purge valve B (
).
15.
Adjust the auxiliary gas supply pressure to the desired inline relief setting, and then open the supply. This will
pressurize the Essentials™ Gas Sampler.
16.
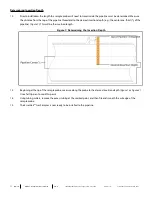
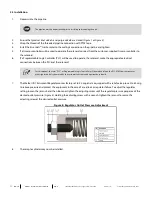
If pressure is leaking past the inline relief, insert an L-shaped hey key through the relief cap, and then turn the spring
adjuster clockwise until no gas bleeds through.
17.
Turn the spring adjuster counterclockwise until some gas bleeds through.
Ensure that at least half a turn remains on the spring adjuster, as too much tension will prevent the spring from contracting and
releasing when the MPS-2 is actuated. To ensure at least half a turn remains on the spring adjuster, Welker recommends turning
the spring adjuster clockwise and counting each turn until the spring adjuster can no longer be turned; the spring adjuster can
then be turned counterclockwise the appropriate number of turns.
18.
Turn the spring adjuster clockwise until no gas bleeds through.
19.
Verify that the outlet pressure gauge reads zero (0) psig. This reading indicates that the inline relief is holding and that
sample cannot flow to the sample cylinder. If the outlet pressure gauge reads partial pressure, the inline relief requires
further adjustment; return to step 16.
20.
Reconnect the tubing to the outlet of the MPS-2.
21.
Disconnect the customer-supplied auxiliary gas supply from the elbow on top of the gauge assembly, and then
reconnect the tubing connection (


