background image


Refer to the Product Safety Guidelines section for additional usage and operating tips

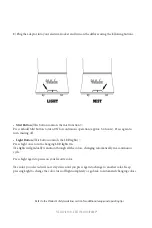
8) Plug the adaptor into your electrical socket and turn on the diffuser using the following buttons.

•  Mist Button (This button controls the mist function) = 

Press & hold Mist button to turn ON for continuous operation (approx 3-4 hours). Press again to 

turn misting off.

•  Light Button (This button controls the LED lights) = 

Press Light once to turn changing LED lights On.

The lights will gradually transition through all the colors, changing automatically in a continuous 

cycle. 

Press Light again to pause on your favorite color.

The color you selected will now stay static until you press again to change to another color. Keep 

pressing Light to change the color, turn off light completely or go back to automated changing colors.

- Welledia.com – a Better atmosphere

tm

 - 

Summary of Contents for Wel-835

Page 1: ...User guide GentlE Aroma Diffuser ultrasonic Wel 835...

Page 2: ...Welledia com A Better AtmosphereTM...

Page 3: ...s modern ultrasonic technology that generates waves at 2 4 million times per second releasing the mixture of essential oils and water into millions of micro particles dispersing them as vapor into the...

Page 4: ...the color of your choice to set the mood for your essential oils adventure I Perfect for use at night time for peaceful sleep lights can be turned off while the diffusion of your chosen essential oil...

Page 5: ...Section 2 Product Overview PARTS LIST Diffuser with Base Tank Cap Tank Cover Measuring Cup Power Adapter Cleaning Brush Essential Oil Glass Dropper User Guide Welledia com A Better AtmosphereTM...

Page 6: ...ty In the event of any abnormal observations such as smoke peculiar smells or noise shut off and unplug the diffuser immediately and discontinue use Do not disassemble or attempt to repair the diffuse...

Page 7: ...penings Do not use any metal or similar tools to clean the ultrasonic plate this may damage the diffuser and will void the warranty Essential Oils Guidelines This diffuser is designed to work only wit...

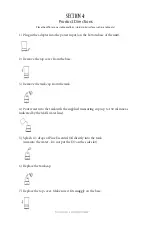
Page 8: ...ase of the unit 2 Remove the top cover from the base 3 Remove the tank cap from the tank 4 Pour water into the tank with the supplied measuring cup up to 150 ml max as indicated by the MAX water line...

Page 9: ...ess again to turn misting off Light Button This button controls the LED lights Press Light once to turn changing LED lights On The lights will gradually transition through all the colors changing auto...

Page 10: ...the Safety Precautions section for additional tips Diffuser Cleaning Methods Cleaning requires wiping down the outer cover tank lid inner vault ceramic disc sides and the back of diffuser Damped Soft...

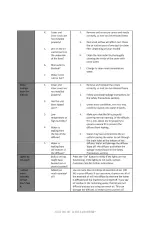
Page 11: ...oduct Troubleshooter Refer to the Safety Precautions section for additional usage and operating tips refer to our website for more help or contact us continued on following page Welledia com A Better...

Page 12: ...Welledia com A Better AtmosphereTM...

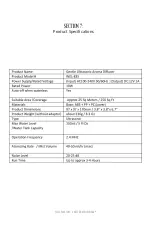
Page 13: ...Section 7 Product Specifications Welledia com A Better AtmosphereTM...

Page 14: ...HAT REPAIR AND UPON AVAILABILITY REPLACEMENT AS APPLICABLE UNDER THE WARRANTY SERVICES DESCRIBED HEREIN IS YOUR SOLE AND EXCLUSIVE REMEDY WITH RESPECT TO ANY BREACH OF THE WELLEDIA INC LIMITED WARRANT...

Page 15: ...Welledia com A Better AtmosphereTM...

Page 16: ...Welledia com A Better AtmosphereTM...

Reviews: