20
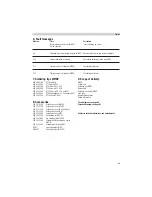
External input device WCB 2 (option)
The following functions are available if an external input
device is used:
Offset:
The actual soldering tip temperature can be changed by
± 40 °C through the input of a temperature offset.
Setback:
Adjustable temperature decrease, as described in Section 3.
The setback times after which a temperature decrease is
effected can be set from 0-99 minutes.
Lock:
Locking of specified temperature. After locking, no more set-
ting changes at the soldering station are possible.
°C/°F:
Switching the temperature display from °C to °F and vice
versa. Pressing the "Down" button when switching on
displays the current temperature version.
Window:
Limitation of the temperature range to max. ± 99 °C, starting
from a temperature locked by the "LOCK" function. The lok-
ked temperature thus represents the middle of the adjusta-
ble temperature range. In the case of units with potential-
free contact (optoelectronic coupler output), the "WINDOW"
function is used to set a temperature window. If the actual
temperature is within the temperature window, the potenti-
al-free contact (optoelectronic coupler output) is connected
through.
Cal: (function cannot be used for WMRS)
Recalibration of the soldering station and factory setting
(FSE). Reset all setting values to 0, temperature
350 °C 660 °F.
PC interface:
RS232
Temperature measuring device:
Integrated temperature measuring device for thermocouple
model K
English
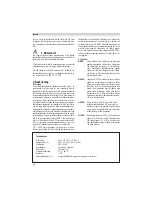
4. Potential balance
Due to the different circuits in the 3.5 mm switch jack
socket (11), 4 variations are possible:
Hard-earthed:
without plug
(delivery status)
Potential balance
(impedance or Ohm):
with plug, balance line at middle
contact
Potential-free:
with plug
Soft-earthed:
with plug and soldered
resistor.
Earthing via selected resistance
value.
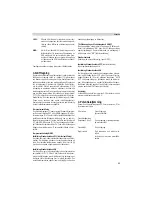
5. Operating guidelines
Soldering tip change
Caution! Risk of injury through burning.
The soldering tip must only be changed when it is cold. Tools
are not required to change the soldering tip. The soldering
tip is inserted in the rear section of the grip and can be
removed by simply pulling the soft grip of the soldering tip
(8).
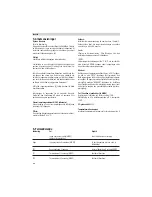
Important:
Always ensure that the soldering tip is properly seated.
When fitting the new soldering tip, ensure that the soldering
tip is inserted completely up to the stop in a single opera-
tion. Operation with a soldering tip that is not completely
inserted can lead to malfunctions.
During the first heating-up period, coat the selected tinnable
soldering tip with solder. This removes oxide layers and con-
tamination on the soldering tip caused by storage. During
soldering pauses and before setting down the soldering iron,
always ensure that the soldering tip is well tinned. Never use
an aggressive flux.
Always keep the cleaning sponge (9) damp. Use only distil-
led water.
The soldering units have been calibrated for a medium sol-
dering tip. Deviations may result through tip changing or the
use of other tip shapes.

