background image

42

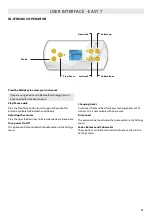
USER INTERFACE - EASY 7

WATER CARE

The Water Care section will help you 
set up your ideal filtration and heating 
settings. Choose from Away, Standard, 
Energy Savings, Super Energy Savings, 
and Weekender, depending on your 
need. Use Light key to choose your 
setting. A checkmark will appear on the 
selected icon to confirm.

In Economy mode, the set point will be 
reduced by 20°F*, which means that 
the heating system will not be engaged 
unless the temperature falls to 20°F below 
the hot tub's set temperature.

* Default pack value

*  Filtration will be reduced when the economy mode is active.

WATER CARE MODES

AWAY:

In this mode the hot 

tub will always be 

in economy; the set 

point will be reduced 

by 20° F*.

STANDARD:

The hot tub will 

never be in economy 

mode and will be 

filtering according to 

the pack's low level 

configuration.

ENERGY SAVINGS

The hot tub will be in 

economy mode during 

the peak hours of 

the day and resume 

normal mode on the 

weekend*.

SUPER ENERGY 

SAVINGS:

The hot tub will always 

be in economy mode 

during peak hours, ev-

ery day of the week*.

WEEKENDER:

The hot tub will be in 
economy mode from 

Monday to Friday, and 

will run normally on 

the weekend*.

MODIFYING SCHEDULES

To see and/or modify a Water Care 
category, use the lit button to the right 
(Key 1) to open the selected Water Care 
menu.
Use the arrow keys to choose a schedule 
to modify (choice of economy and 
filtration schedules). Use the Light key to 
move between parameters. 

You have several possibilities for the 
schedule (Mon-Fri, weekend, every 
day, or single days). The schedules will 
be repeated every week. The time and 
duration are set in 30 minute increments. 
Once you have set the schedule, use Key 1 
to go back. Ensure that you have selected 
the desired Water Care option in the main 
Water Care menu.

The filtration schedule shown on the 
screen will apply to the main filtration 
pump, most likely pump 1. If your hot 
tub uses a circulation pump configured 
to run 24 hours, the screen will show you 
the purge setting instead of filtration. 
The purges are pre-programmed for a 
fixed number of minutes, therefore the 
duration will be set to N/A on the screen, 
and only the start time can be modified.

Summary of Contents for Amazon W-Flow

Page 1: ...USER MANUAL FOR HOT TUB CONTROL SYSTEMS KEYPADS ACCESSORIES ...

Page 2: ...care Exit immediately if uncomfortable dizzy or sleepy Hot tub heat can cause hy perthermia and unconsciousness Hot tub heat in conjuction with alcohol drugs or medication can cause uncons douress WHEN PREGNANT water temperature before entering Soaking in hot water for long periods can harm your fetus Measure Exit immediately if uncomfortable dizzy or sleepy Hot tub heat can cause hy perthermia an...

Page 3: ...ce Easy 4 37 Easy 7 40 Smart Touch 53 4 and 1 single button panel 77 Optional accessories Aquasoul Pro 78 My Music 82 in clear 83 in clear in Smart Touch 91 UV C Ozone 97 in grid 98 in touch 2 101 Sand filter system 124 Water treatment basics 125 Maintenance 126 Wiring diagram W2000 127 W3000 W5000 132 W8000 136 Breaker setting 139 Frequently asked questions 141 3 TABLE OF CONTENTS ...

Page 4: ...drotherapy to create hot tubs providing the perfect massage experience Develop a peaceful space for relaxation with your product in your home and join the group of the few who seek a positive impact on their environment by establishing internal harmony Dive into your hot tub and enjoy the gently flowing water The user manual is available at http www wellis com catalogue INTRODUCTION Aeware Gecko a...

Page 5: ... a hot tub may be installed within 5 feet of metal surfaces if each metal surface is per manently connected by a minimum 8 AWG 8 4 mm2 solid copper conductor to the wire connector on the terminal box that is provided for this purpose 8 DANGER Risk of Electric Shock Do not permit any electric appliance such as a light telephone radio or televi sion within 5 feet 1 5 m of a hot tub 9 WARNING To redu...

Page 6: ...ervicing to a qualified service personnel h This unit should be subjected to periodic routine maintenance for example once every 3 months to make sure that the unit is operating properly FOR YOUR SAFETY PLEASE AL WAYS PERFORM THE FOLLOW ING PRECAUTIONS IF YOU DO NOT FOLLOW THE WARNINGS AND INSTRUCTIONS ITEMS MAY GET DAMAGED YOU MAY GET INJURED OR YOU MAY SUFFER FATAL INJURY IMPROPER IN STALLATION ...

Page 7: ...lectric shock Disconnect the power until the problem has been corrected 2x120 volt permanently connected or converted models A ground terminal is provided on the terminal block TB 1 system ground ter minal located inside the control box To reduce the risk of electric shock connect this terminal to the grounding terminal of your electrical service or supply panel with a continuous green insulated c...

Page 8: ...cal components Do not service this product yourself as opening or removing covers may expose you to dangerous voltage or other risk of injury Refer all servicing to qualified service personnel DO Be sure your hot tub is connected to the power supply correctly use a licensed electrical contractor Disconnect the hot tub from the power supply before draining the hot tub or servicing the electrical co...

Page 9: ... 6 F The symptoms of hyperthermia include an increase in the internal tem perature of the body dizziness lethargy drowsiness and fainting The effects of hyperthermia include failure to perceive heat failure to recognize the need to exit hot tub or hot tub unawareness of impend ing hazard fetal damage in pregnant wom en physical inability to exit the hot tub or hot tub and unconsciousness resulting...

Page 10: ...der the age of 18 under parental supervision Maintenance can only be performed by trained professionals The user should check the electrical wiring every 3 months It is required to perform a check by a professional every 3 years Mains fuses circuit breakers may be acti vated because of power outages Installation and wiring of the hot tub replacement of power cord and any repairs must be performed ...

Page 11: ...water If you feel uncomfortably or sleepy leave the hot tub immediately Never add water to the chemicals Always be cautious when adding chemicals to the hot tub water to avoid inhaling vapors and possible effects of inhaling undiluted chemicals and splatters Only place the hot tub on a surface that can support its weight Inspect the unit before use contact the ser vice provider stated in this manu...

Page 12: ...romine level Always check the expiry date of the test kit because after this date the test results may be inaccurate For proper disinfection hot tubs must periodically be completely drained The advised time period between full drains given in days is calculated by dividing the capacity of the hot tub in litres by the tenfold of the average daily users The in clear unit is applicable for indoor hot...

Page 13: ...B OR HOT TUB MEASURE THE WATER TEMPERATURE WITH AN ACCURATE THERMOMETER AVERTISSEMENT AVANT D UTI LISER UNE CUVE DE RELAXATION MESURER LA TEMPÉRATURE DE L EAU À L AIDE D UN THER MOMÈTRE PRÉCIS WARNING DO NOT USE A HOT TUB OR HOT TUB IMMEDIATELY FOL LOWING STRENUOUS EXERCISE AVERTISSEMENT NE PAS UTI LISER UNE CUVE DE RELAXATION IMMÉDIATEMENT APRÈS UN EXER CICE FATIGANT WARNING PROLONGED IMMER SION ...

Page 14: ...LISER UNE CUVE DE RELAXATION OU PENDANT QU ELLE S Y TROUVE RISQUE L ÉVA NOUISSEMENT ET LA NOYADE WARNING RISK OF ACCIDENTAL DROWNING DUE TO HYPERTHER MIA CONSULT THE INSTRUCTIONS PROVIDED WITH THIS UNIT FOR A DESCRIPTION OF THE CAUSES SYMPTOMS AND EFFECTS OF HY PERTHERMIA AVERTISSEMENT RISQUE DE NOYADE PAR SUITE D HYPERTHER MIE LIRE LA NOTICE QUI ACCOM PAGNE CET APPAREIL ELLE DÉCRIT LES CAUSES LES...

Page 15: ...SIZE TO THE CIRCUIT CONDUCTORS SUPPLY ING THIS EQUIPMENT C AT LEAST TWO LUGS MARKED BONDING LUGS ARE PROVIDED ON THE EXTERNAL SURFACE OR ON THE INSIDE OF THE SUPPLY TERMINAL BOX OR COMPART MENT TO REDUCE THE RISK OF ELECTRIC SHOCK CONNECT THE LOCAL COMMON BONDING GRID IN THE AREA OF THE HOT TUB OR SPA TO THESE TERMI NALS WITH AN INSULATED OR BARE COPPER CONDUCTOR NOT SMALLER THAN NO 6 AWG D ALL FI...

Page 16: ... water reversing will operate In this case the effi ciency of the massage is reduced it splits among the seats ENRICHMENT With the enrichment tool addi tional air is introduced to the jets which strengthens the effect of the massage Open to the right close to the left TAP The tap has an opened and a closed position When it s open it can operate the waterfall nozzle the one hole fountain or the nec...

Page 17: ...damage the hot tub In case of sealed design if the hot tub was placed between glass structures prevent the sun rays from reaching the hot tub directly through the glass as the temperature may get too high 3 IN GROUND SUNKEN HOT TUB In case of sinking the hot tub into the ground you must make sufficient space for walking around the hot tub For completion of maintenance works a minimum of 60cm wide ...

Page 18: ...e cable Copper 90 C 194 F THHN THWN Ampere rating of the supply circuit overcurrent protective device AWG rating of the supply conductor Olympus 50 A 4 Mont Blanc Elbrus 230 50A 6 Monte Rosa Kilimanjaro 50A 6 Monte Bianco Discovery 40A 6 Paris Elbrus 2018 40A 6 London Malaga 2018 40A 6 Milan Palermo 2018 40A 6 Berlin Marbella 2018 35A 6 Rome Manhattan2018 35A 6 Taurus Kilimanjaro 40A 6 Libra 40A 6...

Page 19: ...MAJOR COMPONENTS OF THE PRODUCT 19 OLYMPUS ...

Page 20: ...MAJOR COMPONENTS OF THE PRODUCT 20 MONT BLANC ELBRUS 230 ...

Page 21: ...MAJOR COMPONENTS OF THE PRODUCT 21 MONTE BIANCO DISCOVERY ...

Page 22: ...MAJOR COMPONENTS OF THE PRODUCT 22 MONTE ROSA KILIMANJARO ...

Page 23: ...MAJOR COMPONENTS OF THE PRODUCT 23 PARIS ELBRUS 2018 ...

Page 24: ...MAJOR COMPONENTS OF THE PRODUCT 24 LONDON MALAGA 2018 ...

Page 25: ...MAJOR COMPONENTS OF THE PRODUCT 25 MILAN PALERMO 2018 ...

Page 26: ...MAJOR COMPONENTS OF THE PRODUCT 26 BERLIN MARBELLA 2018 ...

Page 27: ...MAJOR COMPONENTS OF THE PRODUCT 27 TAURUS KILIMANJARO ...

Page 28: ...MAJOR COMPONENTS OF THE PRODUCT 28 LIBRA ELBRUS 230 ...

Page 29: ...MAJOR COMPONENTS OF THE PRODUCT 29 HERCULES ...

Page 30: ...MAJOR COMPONENTS OF THE PRODUCT 30 LEO P P ...

Page 31: ...MAJOR COMPONENTS OF THE PRODUCT 31 LEO SCANDI PACK ...

Page 32: ...MAJOR COMPONENTS OF THE PRODUCT 32 ORION P P ...

Page 33: ...MAJOR COMPONENTS OF THE PRODUCT 33 ORION SCANDI PACK ...

Page 34: ...MAJOR COMPONENTS OF THE PRODUCT 34 RIO GRANDE W FLOW ...

Page 35: ...MAJOR COMPONENTS OF THE PRODUCT 35 AMAZON W FLOW ...

Page 36: ...MAJOR COMPONENTS OF THE PRODUCT 36 DANUBE W FLOW ...

Page 37: ...OFF message theclockand thewatertemperature Thehottublightwillflashfor afewsecondsbeforetheend ofthe30minutestowarnyou thatthesystemisaboutto resumeitsnormaloperation PressPump1orPump2 if available torestartthesystem beforetheexpirationofthe30 minutedelay Whenthesystem resumesitsnormaloperation thedisplayshows On for3 seconds PUMP 2 KEY Notavailableonallmodels PressPump2keytoturnPump 2onatlowspeed...

Page 38: ...menuby holdingdowntheLightkey for5seconds Thedisplaywill showthecurrentclocksetting withthehourflashing Dependingonfactorysettings yoursystemmaybesetto24 hourtimeor12 hourtime Settingthehour UsetheUp orDownkeystoadjustthe hours PresstheLightkeyto jumptothenextparameter theminutes Settingtheminutes Usethe UporDownkeystoadjustthe minutes PresstheLightkeyto jumptothenextparameter thefilterorpurgestar...

Page 39: ...ealer or service supplier if problem persists TROUBLESHOOTING SECTION Should an error occur the display will show one of the following error messages toggled with the clock and the water temperature SMART WINTER MODE OurSmartWinterModepro tectsyoursystemfromthecold byturningpumpsonseveral timesadaytopreventwater fromfreezinginpipes The SWM indicatorlights upwhenfreezingisdetected andflasheswhenthe...

Page 40: ...figuration itsmenuwillnotappear Refertothefollowing sectiontogetdetailsaboutthepossibleaccessoriesandtheirdetailedfunctionalities Thescreenwillrevertbacktothehottubmodeifnokeyispressedfor60seconds Ifyoudon thaveanyaccessoriesonyourhottub theModekeycanbeusedtodirectly changeyourdisplayorientation POWER Pressanybuttontoturnthekeypadon After30minuteswithoutactivityitwill shutoff MAIN SCREEN Themainsc...

Page 41: ...ter 3secondswithoutanychangetothe settemperaturevalue thekeypadwill resumethenormaldisplayofmessages Whenthesetvalueislowerthanthe currenttemperatureCoolingtoxx xwill appear Whenthesetvalueishigherthan thecurrenttemperature Heatingtoxx x willbeindicated Normallythereisashort delaybeforetheheatingstarts during whichHeatingSuspendedisindicated SETTINGS Fromthehomepageyoucanaccessthe Settings whereyo...

Page 42: ...end SUPER ENERGY SAVINGS The hot tub will always be in economy mode during peak hours ev ery day of the week WEEKENDER The hot tub will be in economy mode from Monday to Friday and will run normally on the weekend MODIFYING SCHEDULES Toseeand ormodifyaWaterCare category usethelitbuttontotheright Key1 toopentheselectedWaterCare menu Usethearrowkeystochooseaschedule tomodify choiceofeconomyand filtr...

Page 43: ...edifferencebetweenthe waterandthesetpoint Theheatpumpis notusedtocoolthewaterinthismode ECO AUTO Thismodeborrowsfunctionalityfrom bothEcoHeatandCoolmodesandhas theabilitytoselecttheproperHeator Coolmodeautomaticallyaccordingtothe watertemperature Theheatingelement isneveractivatedinthismode SMART AUTO Thismodeborrowsfunctionalityfrom bothSmartHeatandCoolmodesand hastheabilitytoselecttheproperHeat ...

Page 44: ...y more than 2 a warning message will appear with an option to cancel or confirm the change Thein stream2Settingsmenugivesyou aSourceselector aBluetoothdisconnect option anOn Offswitchandanaudio controlonfader balanceandsubwoofer Formoreinformationonaudiofunctions seethein tune in streamorin stream2 operationsection UsetheUpandDownkeystomakeyour selection thenlightkeytoconfirm UsetheUpandDownkeysto...

Page 45: ...bpagewill returnattheendofmaintenance PresstheKey1toleaveStandbymode andrestartthehottub Note Inversion6 00only Standbymodeis accessibledirectlyfromtheSettingspage KEYPAD SETTINGS Inthissection youcanchangethe temperatureunit language display orientation rimlightcolorandkeypad security Notethehottubpackmustbe configuredaccordinglytobeableto changetherimlightcolor Whenyouchangethedisplayorientation...

Page 46: ...ourin touchmoduletoaWiFi networkortochangeitsnetwork Formoredetailsaboutotherin touch connectionmethodspleaseseethe in touchtechbook Toconnectyourin touchmoduletoa wirelessnetwork usetheUp Downkeys togototheWiFioptionintheSettings menuandLightkeytoselectit Afterafewsecondstheavailable networkswillappearonthescreen as wellastheirsignalstrength UsetheUp Downkeystomovethrough thelist Selectyournetwor...

Page 47: ...sedontheaccessoriesselectedinyourpack slowlevelconfiguration Pleaserefertothe QuickStartCard QSC forspecificationstoidentifythelowlevelconfigurationforyourhottub POSSIBLE KEY MAPPINGS Low level configuration Key 1 Key 2 Light 1 pump Pump 1 Light 2 pumps Pump 1 Pump 2 Light 2 pumps blower Pump 1 Pump 2 Blower Light 4 pumps Pump 1 Pump 2 Pump 3 Pump 4 Light 3 pumps blower Pump 1 Pump 2 Pump 3 Blower...

Page 48: ...onstowork Play Pause audio PressthePlay Pausebuttontostartorpausetheaudio Adjusting the volume PresstheUportheDownkeytoincreaseordecreasethevolume Turn power On Off version 7 00 and higher PressandholdthePlay Pausekeyfor3secondstoturnthe in streamonoroff Changing tracks UsetheLastTrackandNextTrackkeystochangetracks Disconnect or Unpair Bluetooth TheseoptionscanbefoundundertheAudiosectioninthe Sett...

Page 49: ...savailableforBluetoothandUSBonly Adjusting the volume PresstheUportheDownkeytoincreaseordecreasethevolume Turn power On Off ThisoptioncanbefoundundertheAudiosectionintheSettings menu Changing tracks UsetheLastTrackandNextTrackkeystochangetracksorFM stations ThisisnotavailablewithAuxsource Disconnect ThisoptioncanbefoundundertheAudiosectionintheSettings menu Fader Balance and Subwoofer These option...

Page 50: ...Boost Seethein clearusermanualformoredetailsaboutBoostlevels Diagnostic Mode Press on the Diagnostic key to start a BromiCharge con centration level test To exit diagnostic mode press on the Diagnostic key again The system will automatically exit after 15 minutes In diagnostic mode the BromiCharge gauge indicates the ap proximate level of BromiCharge in the hot tub water Do not add BromiCharge if ...

Page 51: ...high FLC Flow switch closed SP in Input voltage issue RH NC Comm error in xm2 in therm RH ID in xm2 in therm incompatible SC ER Learning mode error F1 in xm2 Fuse 1 is blown F2 in xm2 Fuse 2 is blown F3 in xm2 Fuse 3 is blown Hr Danger Thermal fuse error UPL The hot tub pack does not have valid software Please insert valid in stick to reprogram hot tub pack CFLO No Flow condition in clear HIBr Add...

Page 52: ...mperature unit 3 00 Language English 3 00 Français 3 00 Español 6 00 Polski 6 00 Nederlands 6 00 Deutsch 6 00 Norsk 6 00 Svenska 6 00 Magyar 10 00 Italiano 10 00 Português 10 00 Česky 14 00 Display 7 00 Color 12 00 Security 15 00 Wi Fi 7 00 Electrical configuration 3 00 Factory reset Audio config 3 00 in tune functions 3 00 in stream functions 3 00 in stream 2 functions 11 00 in clear functions 13...

Page 53: ... your hot tub from its Smart Touch main hot tub keypad ALL ON ALL OFF TARGET KEY Smart Touch features an all on or all off one touch activation key of last used settings that when pressed stops or starts all working components and accessories at once From the home page you can access the following modes sanitization with in clear connected audio with Aquasoul Pro connected color with in mix instal...

Page 54: ...cons on the screen will reflect the speed or state of the devices running on your hot tub When an accessory has more than two speeds press the button until it reaches the desired speed DISPLAY CONTRAST To modify the display contrast settings slide the right wheel until the display contrast icon is highlighted in the middle Simply touch the line of the contrast you want to select WATER TEMPERATURE ...

Page 55: ... main settings menu The second one is Cooldown There you can adjust the duration and intensity of your training cooldown by touching the up and down arrows Adjust the training drill Step Time duration by touching the up and down arrows Preparation Time gives you some time to get into swimming position after touching the start button and before the pumps actually start You can set the duration of y...

Page 56: ...ssion from water splashing on the keypad display You can touch Pause or Stop whenever you need During the workout session you can follow your progression with the swim mer icon moving toward right over the training duration bar You can touch Pause or Stop whenever you need Touch Pause to suspend your swim session You will be able to change the intensity level of your drill or go in other menus to ...

Page 57: ... whenever you need During the workout session you can follow your progression with the swim mer icon moving toward right over the training duration bar Your in mix controlled lights will change colors before each interval to inform you of the change of intensity requires an installed in mix You can touch Pause or Stop whenever you need Touch Pause to suspend your swim session You will be able to c...

Page 58: ...p whenever you need During the workout session you can follow your progression with the swim mer icon moving toward right over the training duration bar Your in mix controlled lights will change colors before each interval to inform you of the change of intensity requires an installed in mix You can touch Pause or Stop whenever you need Touch Pause to suspend your swim session You will be able to ...

Page 59: ...se or Stop whenever you need During the workout session you can follow your progression with the swim mer icon moving toward right over the training duration bar Your in mix controlled lights will change colors before each interval to inform you of the change of intensity requires an installed in mix You can touch Pause or Stop whenever you need Touch Pause to suspend your swim session You will be...

Page 60: ...our swim session from water splashing on the keypad display You can touch Pause or Stop whenever you need During the workout session you can follow your progression with the swim mer icon moving toward right over the training duration bar Your in mix controlled lights will change colors before each interval to inform you of the change of intensity requires an installed in mix You can touch Pause o...

Page 61: ... ized workout If you cancel the modifi cations will not be saved The preparation countdown is dis played allowing you to get in position before your swimming session starts Your in mix controlled lights will blink during the countdown requires an installed in mix The keypad can be put in sleep mode by touching the sleep icon located at the top right of the screen It will prevent interruptions of y...

Page 62: ...bar Your in mix controlled lights will change colors before each interval to inform you of the change of intensity requires an installed in mix You can touch Pause or Stop whenever you need If you touch Stop to interrupt your swim session you will be able to change the duration and or the intensity of your session select another training drill or modify any other parameters Touch Start to start yo...

Page 63: ...eel up or down until the settings icon menu is highlighted in the middle In the Settings page you can access the following water care electrical configuration maintenance wifi date time about keypad To select an item slide the right wheel until the desired icon is highlighted in the middle or press on the menu name WATER CARE The Water care page will help you set up your ideal filtration and heati...

Page 64: ...several possibilities for the schedule Mon Fri weekend every day or single days The schedules will be repeated every week The time and du ration are set in 30 minute increments Once you have set the purge use the calendar icon to go back In Economy mode the set point will be reduced by 20 F which means that the heating system will not be engaged unless the temperature falls to 20 F below the hot t...

Page 65: ...can access the following Error log Reminders Simply touch the line of the item you want to change ERROR LOG Errors are archived by the system Drag the list Up and Down to move through the list Errors are archived chronologi cally from the most recent at the top to the oldest at the bottom The Error log page shows the error code the date of the error and the time Touching the garbage can icon will ...

Page 66: ... page to set or change the nor mal or inverted display orientation KEYPAD LOCK UNLOCK OPTIONAL When this option is enabled the user can partially or completely lock the key pad When the user wants to lock the keypad he is asked to select a 4 digit code The same code will be needed to unlock the keypad Next time he wants to lock the keypad he will be prompted again to select a 4 digit code same fun...

Page 67: ...a green check mark Swipe Up or Down the list to select your network WIFI NETWORK PASSWORD If the wifi network is password protect ed enter it when keyboard prompts Use Enter key to validate the password If no password is required the in touch will connect automatically USER INTERFACE SMART TOUCH KEYPAD COLOR OPTIONAL If this option is available depending on the hot tub configuration the keypad rim...

Page 68: ...ack filtration over tem perature feature When Warm weather is Off the filtration over temperature is disabled This feature allows the hot tub to continue filtering even though the water temperature is high INFO MESSAGES When pumps are running they pro duce heat that may increase your water temperature Warm Weather option gives you the option to bypass the pack filtration over temperature feature W...

Page 69: ...ke changes in this section unless you are a qualified electrician A password will be required Please contact a representative in order to obtain that password To change the low level configuration the number of phases and the input current of your hot tub system slide the right wheel until the electrical configuration icon is highlighted in the middle USER INTERFACE SMART TOUCH 69 ...

Page 70: ...e middle AUDIO MODE only available if the system detects a connected Aquasoul Pro audio station TURN AQUASOUL PRO ON Slide the right wheel until the power on off icon is highlighted in the middle Press on the audio icon at the center of the screen to turn Aquasoul Pro on MAIN DISPLAY Press Play Pause to start or pause playback of audio files Drag the volume slider to adjust the volume or tap the m...

Page 71: ...ation icon is highlighted in the middle You can calibrate balance fade subwoofer Use the sliders to calibrate the speakers at the desired level The fade and subwoofer sliders will only appear on the screen if the cor responding speakers are installed on Aquasoul Pro TO SELECT AN AUDIO SOURCE Slide the right wheel until the source icon is highlighted in the middle In the menu list the following sou...

Page 72: ...ost levle maintenance statuts and messages mode selection wheel in clear icon SANITIZATION MODE only available if the system detects a connected in clear water sanitization system To select the sanitization mode slide the left wheel up or down until the in clear icon menu is highlighted in the middle In the sanitization page you can access the following in clear on off boost level bromicharge main...

Page 73: ...dd227g 5lb of BromiCharge atatimeandalwaysallow 5minutesforthegaugetoreactbefore addingmoresodiumbromide The green zone in the center area of the gauge should be targeted for optimal performance BROMICHARGE LEVEL To modify the boost level slide the right wheel until the boost icon is high lighted in the middle and use the up or down arrow keys to adjust the level Clickonthethelevelicontoconfirmyou...

Page 74: ...evel is 12 Use the up or down arrow keys to adjust the level Note that the level can be adjusted by increment of 2 using the up and down arrow keys If you do retest the bromine level the day after If the bromine is not in the 3 5 range and is higher than 5 ppm decrease the maintenance level If the bromine is lower than 3 ppm increase it Repeat until the test reads a bromine level in the 3 5 range ...

Page 75: ...ighted in the middle This selection allows you to modify its color CHANGING COLORS Once a zone has been selected use the color wheel to choose the desired color or the rainbow icon to get changing colors The rainbow icon alternates between slow transitions fast transitions and normal color selection IN MIX FUNCTIONS ON OFF There are two ways to turn the in mix on or off The first one is by using t...

Page 76: ...s water Error messages on the screen list and definitions http geckokeypads com k1000errormessages INSTALLATION ERROR MESSAGES Upon connecting Smart Touch to your hot tub system you may see one of two error messages Please follow the instructions in the message or contact your dealer for more information USER INTERFACE SMART TOUCH 76 ...

Page 77: ...on in different locations around your hot tub ONE SINGLE BUTTON PANEL AUXILIARY KEYPAD FOR YOUR HOT TUB This one single button panel is also an auxiliary keypad designed to be installed as a second keypad on your hot tub It allows you to activate the hot tub pump associated to its respective section The panel surface allows for an easy installation in any location around your hot tub USER INTERFAC...

Page 78: ...l power supply Aquasoul Pro can be used in any place in the world All the electronics circuits are contained in a innovatively designed and splashproof plastic enclosure Aquasoul Pro is equipped with state of the art class D audio amplifiers This type of amplifier is very power efficient and dissipates much less heat than any comparable audio system for use in hot tub Depending on the selected con...

Page 79: ...h a compatible keypad you will have full control over the Aquasoul Pro features from inside of your hot tub USB AUX input in p4 Bluetooth Subwoofer Left Front Right Rear Left Right AC input Communication link Remove the cover screws from the front of the apparatuswith a Phillips screw driver Remove cover and put aside the foam gaskets located in the wire channel TO PREVENT ELECTRIC SHOCK HAZARD DO...

Page 80: ...er 10 Subwoofer To connect your own speaker cable or to connect the option al adaptor insert the 10 pin connector into the appropriate connector Route the wires through the molded strain relief channel as illustrated Class 2 Wiring 1 3 8 5 10 2 7 4 9 6 CONNECTIONS CONNECTING THE SPEAKERS AND SUBWOOFER CAUTION AQUASOUL PRO DOES NOT COME WITH SPEAKERS AND ASSOCI ATED WIRING THE INTERCONNECTION BETWE...

Page 81: ...airing is done select in stream 2 When con nected is displayed Aquasoul Pro will be ready to start playing the selected audio Note If the device moves out of range and loses connection it should reconnect automatically as soon as it is close enough This should happen without having to go through the menu again Aquasoul Pro will keep up to 8 devices in its memory If one of the last three connected ...

Page 82: ...tening to music via Bluetooth device 1 The Bluetooth mode is activated as soon as it is paired with a Bluetooth device 2 Play music on the device and the Bluetooth Media Player will provide the sounds 3 Press the PLAY PAUSE buttons to play or pause the music 4 Press the FAST REWIND FORWARD buttons to play the previous next track 5 The songs tracks and volume can be set directly on your Bluetooth d...

Page 83: ...Your goal is a residual bromine bank of 3 5 ppm If the bromine content of your water is less than 3 ppm press and hold the Maintenance key for 2 seconds and in crease the Maintenance setting by 1 or 2 increments with the up arrow Repeat daily until your bromine level stabilizes at 3 5 ppm IMPORTANT FOR THE STAND ALONE VERSION Make sure your hot tub is filtering the water at least 8 hours per day T...

Page 84: ...ked version which communicates with the hot tub pack for more control and precision EFFECTS OF BROMINE Bromine destroys waterborne bacteria Bromine destroys algae in water e g Black Green Mus tard Bromine swiftly eliminates the presence of organic matter left behind by hot tub users e g oil sweat dead skin cells Because bromine doesn t contain calcium it can be used to sanitize hard water without ...

Page 85: ...joyment of the hot tub and prolong the life of the in clear system For best results adjust to the following water chemistry parameters Check these parameters periodically Calcium hardness TH between 150 and 200 PPM Total Alkalinity between 100 and 120 PPM pH between 7 2 and 7 8 Water chemistry should be balanced before adding sodium bromide into the water It s essential that the water chemistry pa...

Page 86: ...ortant to note that the in clear system can ONLY generate bromine when the water is circulating If you are having problems maintaining a stable level of bromine or de termining the proper maintenance level for your hot tub you may have to increase the daily filtering time Longer filtration produces a more steady level of bromine BOOST MODE The Boost Mode should be activated every time you use your...

Page 87: ...evelorto checksodiumbromidekeypad warningsanderrors TheBromiChargeGaugewill indicatethelevelofsodium bromideinthehottubwater Asyouaddsodiumbromideto thehottubananimationwill indicaterisinglevels Ifthe levelsgodown whenadding freshwater forexample theanimationwillindicate diminishinglevels PresstheProgkeytoexit diagnosticmodeorthesystem willautomaticallyexitafter15 minutes Inolderversionsanumber wi...

Page 88: ...ers using the hot tub For example activate the boost level to 2 if two bathers are entering the hot tub 1 With the system in maintenance mode press the Boost key to activate the Boost mode 2 The keypad display will show a numeric value that corresponds to the selected level There are 8 possible levels available with the boost mode Set the boost level by using the up and down arrow to select the nu...

Page 89: ...hein clearunitor insufficientflow internalpressure switchproblem BLINKING AC Ablinking AC messagedis playedonthekeypadindicates thatthereisaproblemwiththe powerinput Themostcommon reasonisthatthein clearunit issuppliedwith120Vinstead of240V Pleasemakesurepowercord isconnectedproperlytoa240 Vsource STANDALONE VERSION ONLY BROMINE GENER ATION INDICATOR BLINKING AblinkingBromineGeneration LEDmeanstha...

Page 90: ...ate the bromine bank properly increase the daily filtration time If bromine production is still inadequate after following all of the instructions above biofilm deposits could be causing the lack of bromine generation Flushing products such as Sea Klear Hot tub System Flush Swirl Away or National Chemistry Hot tub Purge have shown to be effective for biofilm removal FLO ERROR OUT OF DIAGNOSTIC MOD...

Page 91: ...e see Set Maintenance Mode It is important to note that the in clear system can ONLY generate bromine when the water is circulating If you are having problems maintaining a stable level of bromine or de termining the proper maintenance level for your hot tub you may have to increase the daily filtering time Longer filtration produces a more steady level of bromine BOOST MODE The Boost Mode should ...

Page 92: ... example activate the boost level to 2 if two bathers are entering the hot tub 1 With the system in maintenance mode press the Boost key to activate the Boost mode 2 The keypad display will show a numeric value that corresponds to the selected level There are 8 possible levels available with the boost mode Set the boost level by using the up and down arrow to select the number of bathers that use ...

Page 93: ...ication of the electrolytic plates airlocks trapped in the in clear unit or insufficient flow internal pressure switch prob lem INPUT AC A input AC message displayed on the keypad indicates that there is a prob lem with the power input The most common reason is that the in clear unit is supplied with 120 V instead of 240 V Please make sure power cord is con nected properly to a 240 V source IN CLE...

Page 94: ...alanced Refer to the section Adjust Water Chemistry in the Hot tub for more details Test your hot tub water for phosphate to make sure there is no contamination Phosphates should never exceed 100 PPB Phosphates can be introduced to your hot tub water by household cleaners soaps and lotions Change your filter or clean it with a filter cleaner and rinse thouroughly with cold water Make sure the in c...

Page 95: ... tubuserssuchasoil sweatand deadskincellsthatserveas food forbacteria CALCIUM HARD NESS CH CalciumHardnessdescribes theconcentrationofcalciumin yourhottubwater TOTAL HARDNESS TH TotalHardnessdescribesthe concentrationofcalciumand magnesiuminyourhottub water BATHER LOAD Thistermisusedtodescribethe numberofbathersusingahot tub combinedwiththelength andfrequencyofitsusage Thehigherthebathusage the gr...

Page 96: ...on does not begin the cell does not need to be cleaned Rinse and reinstall the cell Allow the electrodes to remain in the solution until the foaming has stopped However DO NOT leave in acid for more than fifteen minutes Excessive acid cleaning will damage the electrolytic cell Pour the acid solution back into the bucket and rinse the cell thoroughly with clean tap water If deposits are still vis i...

Page 97: ...istant lid 1 to the nut 2 h Open the tap and check if the device is leaking Repair as necessary I Plug the device into the electric supply Use a socket equipped with a fault circuit interrupter GFCI CHANGING THE LAMP AND SERVICING THE UV SYSTEM Important Do not touch the quartz sleeve or the sides of the lamp only hold it by the ends 1 Unplug the power plug 2 Shut down and drain the water from the...

Page 98: ... system With in grid you can choose one of its four modes of opera tion that suits you the best depending on your external heating system and your climate Smart modes help you tak ing more advantage of your external heat source to optimize your savings INSTALLATION The in grid provides a connection to a normally open dry contact relay on a spring loaded female connector The connector accepts bare ...

Page 99: ...oltage must be below 24 V If the in grid controls are used with a gas heater the remote temperature control input is usually called fire man s switch Please make sure your heat exchange does not have a flow restriction The heater in your Y series hot tub control system needs a minimum of 20 GPM all the time Make sure to always connect your heat exchange unit in the same water pipe filter of your Y...

Page 100: ... in grid Freeze Protection Freeze protection has been added because EXT EXTERNAL mode does not allow the activation of the internal heater In cold weather if it becomes impossible to keep the water over freezing point the help of the internal heater will then be needed This is the only time the freeze protection will come in At any time if the water temperature drops to 40 F 4 5 C the resistive he...

Page 101: ...ns for a successful installation If possible install device on the first floor of your house If installing in a basement place at highest level pos sible and closest to a window Try to install as far as possible from materials that may interfer with signal ie metal structures thick cement walls Install as far as possible from router as the signal emitted by the antenna may interfere with RF signal...

Page 102: ...onds the pairing operation should complete and the Home Transmitter status LED will no longer be YELLOW Note in touch 2 modules can be paired as often as necessary but can only be paired with a single counterpart mod ule at a time Once paired the modules store this information permanently until the next pairing operation Pairing information is stored in non volatile memory so pairing is not requir...

Page 103: ...ng Router not detected Red Router detected Green in touch 2 server detected Module is fully functional Blue Hot tub Transmitter Pairing mode Yellow Blinking Hot tub controller not detected Red in touch 2 server detected Module is fully functional Blue When the LED status is blinking blue green or red this indicates that the communication between the EN module and the CO module it not established s...

Page 104: ...re in the world In order for them to communicate both the in touch 2 module and your device must be connected to a network that allows access to the Internet Once your Home Transmitter is connected to the Internet the LED status is blue you can use your in touch 2 app any time your device is also connected to the Internet wireless or cellular network even if you are away from home To have access t...

Page 105: ...ur application go to the Wi Fi section of your device s settings Make sure you are connected to your home network This needs to be the same Wi Fi provided by the router to which you connected your Home Transmitter OPTIONAL ACCESSORIES IN TOUCH 2 105 ...

Page 106: ...you choose Don t Allow the application will not send you notifications If you change your mind later concerning notifications you may add or remove notifications for the in touch 2 application On iOS go in your settings menu and choose in touch 2 Select the notifica tions menu you can turn notifications on or off from this page On Android go to your settings menu and then into the notifications me...

Page 107: ... Your account will give you the opportunity to have access to your hot tub from any in touch 2 application When you choose to create a new account you agree at the same time our Terms of Service and our Privacy Policy You can read them at any time through this link https geckointouch com legal OPTIONAL ACCESSORIES IN TOUCH 2 107 ...

Page 108: ...trated on the Select a spa page There are 5 possibile states Signal superior to 80 Signal between 80 and 51 Signal between 50 and 31 Signal below 30 The Hot tub Transmitter is not available HOME PAGE The main screen gives you access to your accessories water temperature water care and settings Hot tub name Accessories control line Water Care menu Reminders menu Indicates current hot tub water temp...

Page 109: ...Indicates that your hot tub is now in a filtering cycle Indicates that your hot tub is now in economy mode Indicates that your hot tub is running normally there is no user de mand heating no filtration or economy active The widget on the home page displays a single color at a time The color dis played is decided by priority of state The established priority is as listed above CHANGE TEMPERATURE To...

Page 110: ...n the accessory is on Simply press on the icon to start or stop the accessory If your accessory has more than one speed press the button until the desired speed is reached The icon designs are customized according to your hot tub pack configuration Pump Waterfall Blower To control your hot tub lights simply press the button to turn it on or off Accessories Light OPTIONAL ACCESSORIES IN TOUCH 2 110...

Page 111: ...ht bulb icons allow you to turn on and off your in mix 300 To select a zone click on the wanted one in the zone selection stripe To change the color use the color wheel to choose the one you want On the left side the intensity slider allows you to modify the brightness of your lights Use the rainbow icon to get color gradation The synchronization desynchroniza tion icon gives you the possibility t...

Page 112: ...ater Care to open its menu Below you have a short description of each Water Care at default state Away From Home In this mode the hot tub will always be in economy the set point will be reduced by 20 F Beginner Standard The hot tub will never be in economy mode and will be filtering according to the pack s low level configura tion Energy Savings The hot tub will be in economy mode during the peak ...

Page 113: ...he in touch 2 will remember you to perform required maintenance tasks on your hot tub such as rinse filter or clean filter Each task has its own reminder duration based on normal use The owner can reset his reminders after the hot tub maintenance OPTIONAL ACCESSORIES IN TOUCH 2 113 ...

Page 114: ...e schedules will be repeated weekly The time and duration are set in 30 minute increments Once you have set the schedule use the arrow at the top of the page to go back Ensure that you have selected the desired Water Care mode in the main Water Care menu When an economy schedule is active the set point will be reduced by 20 F which means that the heating system will not be engaged unless the tempe...

Page 115: ...ll open the selected menu IN TOUCH NETWORK The in touch network menu allows you to have access to information concerning the RF connection param eters between the Home Transmitter and the Hot tub Transmitter This menu gives you acces to Channel Signal strength Reset channel resets channel to default To change channels press on the Channel line OPTIONAL ACCESSORIES IN TOUCH 2 115 ...

Page 116: ...ignal You can have access to this page by touching the fol lowing tabs Spa settings at the bottom right in touch network channel TEMPERATURE UNITS This menu lets you change the units used to display temperature You can have access to this page by touching the following tabs Spa settings at the bottom right temperature units OPTIONAL ACCESSORIES IN TOUCH 2 116 ...

Page 117: ...s Spa settings at the bottom right Change hot tub name This section shows information about the in touch 2 soft ware number and the revision numbers of the different components of your system You can have access to this page by touching the follow ing tabs Spa settings at the bottom right Technical info OPTIONAL ACCESSORIES IN TOUCH 2 117 ...

Page 118: ...ub you need to connect your mobile device to the same network to which you connected your Home Transmitter Once you have done a connection with the hot tub its name will be saved on this page to allow you to connect to this hot tub from anywhere You can have access to this page by touching the following tabs Settings up right corner Add a spa The RF signal strength communication between the two in...

Page 119: ...s to your account information You can have access to this page by touching the following tabs Settings up right corner account This section gives you a quick over view of your in touch 2 application s functions OPTIONAL ACCESSORIES IN TOUCH 2 119 ...

Page 120: ...ight corner AUTHORIZING AN INVITATION All the invitations you may receive are under the dealers tab in the settings menu To choose an invitation simply click on it You will then see a window authorization to confirm with the dealer s information You can also decline the invitation at any time if you want to OPTIONAL ACCESSORIES IN TOUCH 2 120 ...

Page 121: ...m of the page Both in touch 2 modules have a status LED to help diagnose problems if any occur TROUBLESHOOTING There are 2 different modules in the in touch 2 kit The Home Transmitter EN Module and the Hot tub Transmitter CO Module They communicate together via an RF link The Home Transmitter is responsible for the Ethernet communi cations and the Hot tub Transmitter is responsible for the hot tub...

Page 122: ...necting with another cable If a computer or other device works fine on the LAN port and the cable is fine then the Home transmitter is likely defective GREEN color Reason The Home Transmitter is connected to a router an IP address was assigned but the in touch 2 server is not reachable What to do This is very likely a router configuration issue so refer to your router s User Manual It may be due t...

Page 123: ...e tests in the order given below Unpaired As the modules are shipped paired from the factory this is not a likely cause but it is the easiest test to perform in the field Simply attempt to pair them again Please refer to the Pairing section for instructions on pairing Modules out of range If the pairing test above does not resolve the problem then the modules may be too far from each other for an ...

Page 124: ...ng the sand filtration tank with sand wash the sand as follows 1 Set the valve to RINSE 2 Open the lockings so that the water flow will not be obstructed and switch on the pump for 3 minutes 3 Switch the pump off and set the valve to FILTRATION After you finish these steps the sand filtration system is ready to filter the hot tub water Attention operate the valve only when the pump is switched off...

Page 125: ...ody lotions etc that soak out of the human skin and the chemicals It endangers conservation of the aesthetic appearance and cleanliness of the water 6 Water analysers There are several types of water analysers which are mostly used to measure chemical and disinfectant effect Chemical pH Disinfectant Br O3 Tester types Box containing tablets and graduated measuring glass Litmus paper indicators in ...

Page 126: ...t winterized properly the system can retain water that can easily freeze during the winter months This can cause heavy irreparable damage to the pipes and the engine This will void the warranty Maintenance of the out of service hot tub When you are not using the hot tub use the thermo cover and fasten it with the buckles Do not forget If the hot tub is filled with water and you are not using it li...

Page 127: ...ers Main keypad connector Main power entry connection Bonding lugs heat wav power con nection Probe connectors heat wav s low voltage cable or regulation probe and overheat captor model re Watertight strain relief system Pump 1 and accessory fuse OVERVIEW W2000 WIRING DIAGRAM W2000 ...

Page 128: ...d to the bonding lug connector located on the side of the hot tub pack DIRECT OUTPUT Voltage 120 V 240 V Green ground P27 P27 Black line P25 P25 White common P18 P14 LIGHT 12 V DC 1A Switc h P33 HEAT WAV YJ Green ground P5 Black line P3 White common P4 RGB LEDS IN LU ME 1A Switch P38 DIRECT OUTPUT Voltage 120 V 240 V Green ground P28 P28 Black low speed K6 P K6 P Red high speed K7 P K7 P White com...

Page 129: ...tings Make sure all accessories are linked to the bonding lug connector located on the side of the hot tub pack DIRECT OUTPUT Voltage 120 V Green ground P27 Black line P25 White common P18 RGB LEDS IN LU ME 1A Switch P38 DIRECT OUTPUT Voltage 120 V Green ground P28 Black low speed K6 P Red high speed K4 P White common P19 OZONATEUR Voltage 120 V Green ground P30 Black line P23 White common P35 Lig...

Page 130: ...NG DIAGRAM W2000 COMPLETING THE INSTALLATION CONNECTIONS Strain relief bracket For 14 3 18 3 cable size For 12 3 14 4 14 3 cable size Foam gasket Molded strain relief channels Output cable opening size 130 ...

Page 131: ...sconnect power before starting electrical work Wiring must be completed by a qualified electrician and must be done in accordance with the local electrical code Do not use a wire gauge bigger than 8 AWG WARNING For units for use in other than single family dwellings a clearly labeled emergency switch shall be provided as part of the installation The switch shall be readily acces sible to the occup...

Page 132: ...erminal After making sure wires are securley connected push them back into the box and replace the cover Do not over tighten cover screws torque to 8 in lb max 0 9 N m Connect the bonding conductor to the bonding lug on the side of the hot tub pack a grounded electrode conductor should be used to connect the equipment grounding conductors 240 V 4 WIRES Remove the brown wire and insert each wire in...

Page 133: ...W3000 W5000 WIRING DIAGRAM W3000 W5000 133 ...

Page 134: ... 2 A2 in ye 3 only Voltage 120 V 240 V Green ground P50 P50 Black low speed K2 P K2 P White common P59 P70 LIGHT 12 V AC 1A MAX Always on P34 Relay P35 CONNECTING HIGH VOLTAGE ACCESSORIES ALL MODELS Two options are available with Y Series hot tub packs for connecting high voltage accessories 0 250 quick connect terminals or AMP connectors conform to industry standards CONNECTING HIGH VOLTAGE ACCES...

Page 135: ... protected Part numbers 9917 101959 cable for conversion 9920 101449 5 5 kW heat wav heater Connections for 120 V heaters 1 kW BROWN wire must be cor rectly connected between P12 and P10 For early North American ver sion installations the YELLOW wire must be between P25 and P20 The ORANGE wire must be between P24 and P16 Connections for 240 V heaters North American installations only BROWN wire mu...

Page 136: ...WIRING DIAGRAM W8000 136 ...

Page 137: ... BLOWER B4 IN YT 12 ONLY Voltage 120 V 240 V Green ground P114 P114 Black line K25 P K25 P White common P120 P126 CIRCULATION PUMP C2 IN YT 7 Voltage 120 V 240 V Green ground P93 P93 Black line K22 P K22 P White common P87 P81 CIRCULATION PUMP C2 IN YT 12 Voltage 120 V 240 V Green ground P93 P93 Black line K23 P K23 P White common P87 P81 OZONATOR A1 Voltage 120 V 240 V Green ground P51 P51 Black ...

Page 138: ... heat wav heater is also offered in 240 V 5 5 kW or 240 V 2 kW versions heat wav specification summary Supports 120 V or 240 V Incoloy heater element Protected by external breaker not fused Note European models are 230 240 V only and are fuse protected Part numbers 9917 101959 cable for conversion 9920 101449 5 5 kW heat wav heater Connections for 240 V heaters North American installations only BR...

Page 139: ...and efficient current management and reduce nuissance GFCI RCD trip pings Press and hold the Prog button until you access the breaker setting menu the programming menu will appear first If your control system is equipped with the phase configuration menu it will appear before the breaker setting menu Note if the keypad does not have the Prog Key use the Light key For color display keypad go in set...

Page 140: ...in the hot tub plumbing and that the water flow is sufficient between the main pump and the water heater Turn on the breaker IN FLO DRY FIRE PROTECTION At start up the in flo s detector verifies the water flow accord ing to the following sequence The Pump 1 or the circulation pump runs for a period of 2 to 5 minutes The display will show during the flow verification After this time the system conf...

Page 141: ...an appropriate cable length electric supply a 30mA protective relay and with certain products a floor drain Is a floor drain necessary for an indoor hot tub Building a floor drain is mandatory TECHNICAL DATE OF THE PRODUCT USAGE What type of water circulation engine is used for mas sage hot tubs Our massage hot tubs are equipped with Laing low power 110W energy saving silent circulating motor pump...

Page 142: ...tub equipped with the in clear au tomatic water management system a daily 8 hour circulation period is recommended to produce necessary amounts of bromine The 8 hour 2x4 hour setting is ideal Can the operating device for our hot tub be placed in an external location where only the staff can access it The operating device can only be placed 5 meters cable length away from the hot tub What is the se...

Page 143: ......

Page 144: ...y not always match the specifications of the advertised product Manufacturer reserves the right to modify the products including the product range without prior notice since they are valid at the time they are delivered to the printing press We may not be made responsible for printing errors ...

Reviews: