DIP Switches and Jumpers Definitions
DIP Switches and Jumpers Definitions
Jumper Key
J43
When jumper is placed on 2 pins during power-up, system will reset persistent memory.
Leave on 1 pin only to enable persistent memory feature.
WARNING:
•
Setting DIP switches incorrectly may cause abnormal system behavior and/or damage to system components.
•
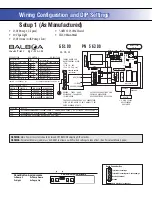
Refer to Switchbank illustration on Wiring Configuration page for correct settings for this system.
•
Contact Balboa if you require additional configuration pages added to this tech sheet.
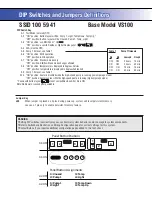
SSID 100 59 41
Base Model VS100
A3: OFF
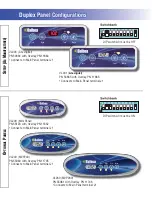
Panel Button Positions
Panel Button Assignments
A3:ON
A2: OFF
A2:ON
1
1
2
3
4
2
3
4
1
4
2
3
1=Unused
2=Pump 1
3=Temp
4=Light
1=Pump 1
2=Light
3=Temp Down
4=Temp Up
DIP Switch Key
A1 Test Mode (normally OFF)
A2 “ON” position: Button layout will be: Pump 1, Light, Temp Down, Temp Up *
“OFF” position: Button layout will be: Unused, Pump 1, Temp, Light
A3 “ON” position: use Mini Panel *
“OFF” position: use Lite Duplex or Digital Duplex panel
A4 N/A (must be OFF)
A5 Pump 1 timeout, see Table 1
A6 “ON” position: 50Hz operation
“OFF” position: 60Hz operation
A7 “ON” position: Standard mode only
“OFF” position: Std/Ecn/Sleep mode changes allowed
A8 “ON” position: temperature is displayed in degrees Celsius
“OFF” position: temperature is displayed in degrees Fahrenheit
A9 Pump 1 timeout, see Table 1
A10 “ON” position: heater is disabled while the high-speed pump is running (low amperage mode)
“OFF” position: heater can run while the high-speed pump is running (high amperage mode)
* Panels with button layout
are not compatible when A2 or A3 is ON.
Note: No blower or second pump available.
Table 1
Pump 1 Timeouts
A5
A9
Low-spd
Hi-spd
OFF
OFF
2 hours
15 min
ON
OFF
2 hours
30 min
OFF
ON
15 min
15 min
ON
ON
30 min
30 min

