background image

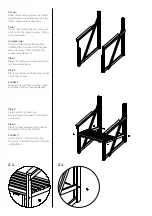
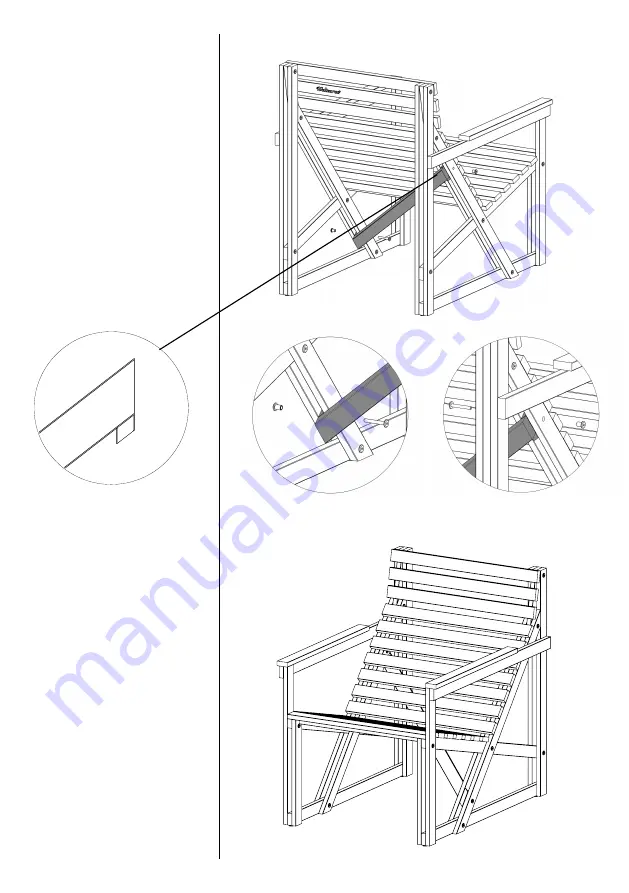
Stap 5

Bevestig de constructielat diagonaal 
aan de achterzijde van de stoel tegen de 
diagonale latten van de armleuningen - 
de linkerkant beneden en de rechterkant 
boven.

Step 5

Attach the construction slat diagonally 
to the rear of the seat against the 
diagonal slats of the armrests - the left 
side below and the right above.

Schritt 5

Bringen Sie die Konstruktion Latte 
diagonal zur Rückseite des Stuhls gegen 
den diagonalen Latten der Armlehnen - 
der linken Seite nach unten und rechts 
oben.

Let op:

Draai nu alle bouten en moeren goed 
aan.

Note:

Now tighten all nuts and bolts securely.

Anmerkung:

Ziehen Sie alle Schrauben und 

Muttern fest.

Stap 6

De Patio Easy chair is klaar voor gebruik. 
Zoek een mooi plekje, leun achterover 
en geniet!

Step 6

The Patio Easy chair is ready for use. 
Find a nice spot, sit back and enjoy!

Schritt 6

Patio Easy chair ist für den Einsatz 
bereit. Finden Sie einen schönen Platz, 
lehnen Sie sich zurück und genießen 
Sie!

Summary of Contents for PATIO EASY CHAIR

Page 1: ...PRODUCT MANUAL PATIO EASY CHAIR...

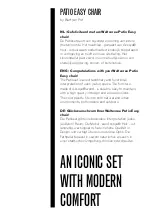
Page 2: ...ee Patio Easy chair The Patioset is an extraordinary and functional interpretation of each outer space The furniture made of Accoya wood is durable easy to maintain with a high quality in design and a...

Page 3: ...oor het schoonmaken van uw Patioset Spray the Patioset twice a year with cleaning vinegar and let it stand for three days after this you can clean the Patioset with a brush and water Do not use a pres...

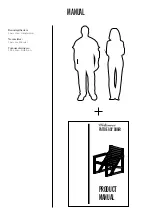
Page 4: ...Benodigdheden 2 personen Handleiding Necessities 2 persons Manual Voraussetzungen 2 Personen Anleitung PRODUCT MANUAL PATIO EASY CHAIR MANUAL...

Page 5: ...with 4 mm hex bit 4 mm Inbus Schl s sel oder Akku Bohrschrauber mit 4 mm Inbus Schraube Onderdelen kleine doos Parts in small box Teile in kleine Box 5 mm Inbussleutel of accu boormachine met 5 mm in...

Page 6: ...Onderdelen grote doos Parts in big box Teile in gro en Box 1x Linker armleuning Left armrest Linker Armlehne 1x Rechter armleuning Right armrest Rechter Armlehne...

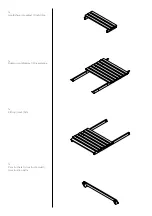
Page 7: ...1x Hoofdsteun Headrest Kopfst tze 1x Rugleuning Backrest R ckenlehne 1x Zitting Seat Sitz 1x Constructielat Construction slat Konstruktion Latte...

Page 8: ...Doe dit wanneer de Easy Chair volledig geassembleerd is Note Do not fully tighten the bolts and nuts directly Do this when the Easy Chair is fully assembled Anmerkung Nicht vollst ndig die Schrauben u...

Page 9: ...die R ckenlehne ruhig zwischen den Armlehnen nach unten Befestigen mit Schrauben und Muttern Stap 4 Schuif de hoofdsteun vanaf de bovenzijde van de stoel voorzichtig tussen de leuningen naar beneden B...

Page 10: ...diagonal zur R ckseite des Stuhls gegen den diagonalen Latten der Armlehnen der linken Seite nach unten und rechts oben Let op Draai nu alle bouten en moeren goed aan Note Now tighten all nuts and bol...

Page 11: ...de schade is veroorzaakt door brand bliksem overstromingen natuurrampen en ontploffingen g de schade het gevolg is van enig overheidsvoorschrift inzake de aard of de kwaliteit van de toegepaste mater...

Page 12: ......

Reviews: