
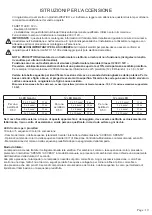

NOTE : If the SPOTLIGHT bulb’s power is supplied by an electronic transformer there is a risk it may not work (contact
your retailer for details).
Works only with a safety transformer (toroidal transformer) Class II 230V / 12V ~.
Provide a power supply 10% higher than the power absorbed by the spotlight.
For example: A power supply of 300 watts provides power for 5 spotlights (12 LED white) : 4 x 36 = 144W..
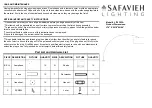
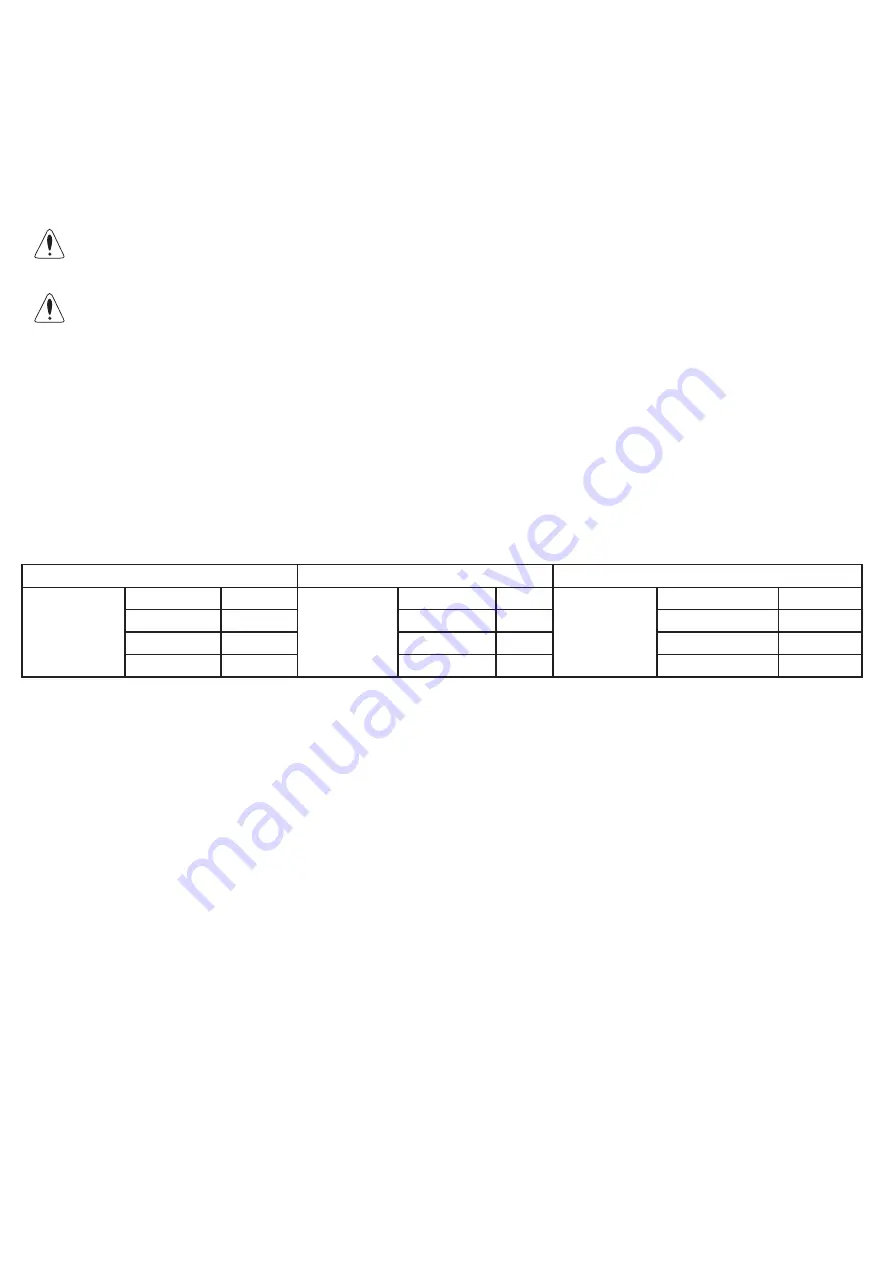
See the table below to identify the section of cable depending on the length and power. For low currents and short son,
please be very superfluous. Remember that falls can be very high on bad connections, lugs and son Loose oxidized.
Measure the voltage at the end of the cable without the projector (minimum required voltage: 10.5 V / maximum voltage
supported:
13.5 V
).
6 white LED
12 white LED
12 LED colors
For a loss of
0.5 V
2 x 2,5 mm²
13 m
For a loss of
0.5 V
2 x 2,5 mm²
8 m
For a loss of
0.5 V
2 x 2,5 mm²
11 m
2 x 4 mm²
21 m
2 x 4 mm²
12 m
2 x 4 mm²
18 m
2 x 6 mm²
31 m
2 x 6 mm²
19 m
2 x 6 mm²
27 m
2 x 10 mm²
52 m
2 x 10 mm²
32 m
2 x 10 mm²
45 m
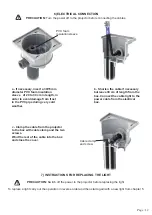
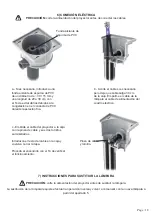
If the external flexible cable or cord of this luminaire is damaged, it must only be replaced by the manufacturer, its service agent
or similarly qualified person, in order to avoid all risks.
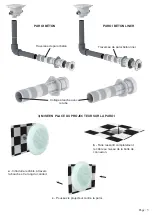
COLOR LEDS FOR HEADLAMPS
10 colours/5 continual colour sequences.
- Change colours or sequences (standard) by turning off the power button “ON/OFF».
- Optional: colour or sequence changes using the Monitor-Modulator Receptor KIT with
wireless remote control.
- Remember the bulb colour or pre-defined sequence after switching off the power.
Instructions:
When turned on, the bulb lights up. To change the colour or sequence, proceed by turning off the power button ON/
OFF in manual mode. The procedure requires a power cut of
1 second.
On the first power cut, the bulbs will set to the first fixed colour. At each subsequent cut, the
10 fixed colours will light up, followed by 5 continual sequences until it comes back to the first fixed colour.
A power cut longer than 10 seconds memorises the current sequence or colour, enabling the predefined colour or sequence of
lights
to be restored.
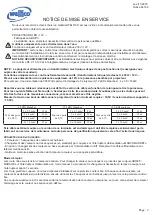
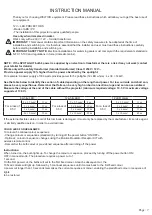
INSTRUCTION MANUAL
Thank you for choosing WELTICO equipment. Please read these instructions which will allow you to get the best use of
our equipment.
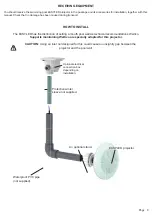
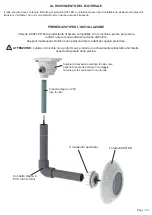
12V ~ LED PROJECTORS
- Made of ABS / PC
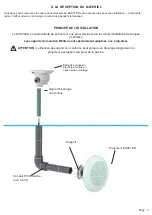
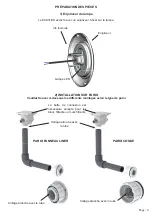
- The installation of this projector requires qualified people.
Use only when immersed in water.
Works only with a 230V / 12V ~ toroidal transformer.
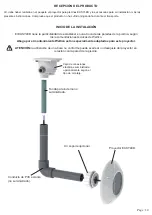
IMPORTANT:
This manual contains important information on the safety measures to be adopted at the time of
installation and switching on. It is therefore essential that the installer and user must read these instructions carefully
before starting installation and switching on.
IMPORTANT SAFETY NOTE:
Electrical installations for swimming pools must comply with the requirements standards
NF C 15-100 and regulations in force (domestic mains).
Page : 7