12
BENCHTOP INSTALLATION
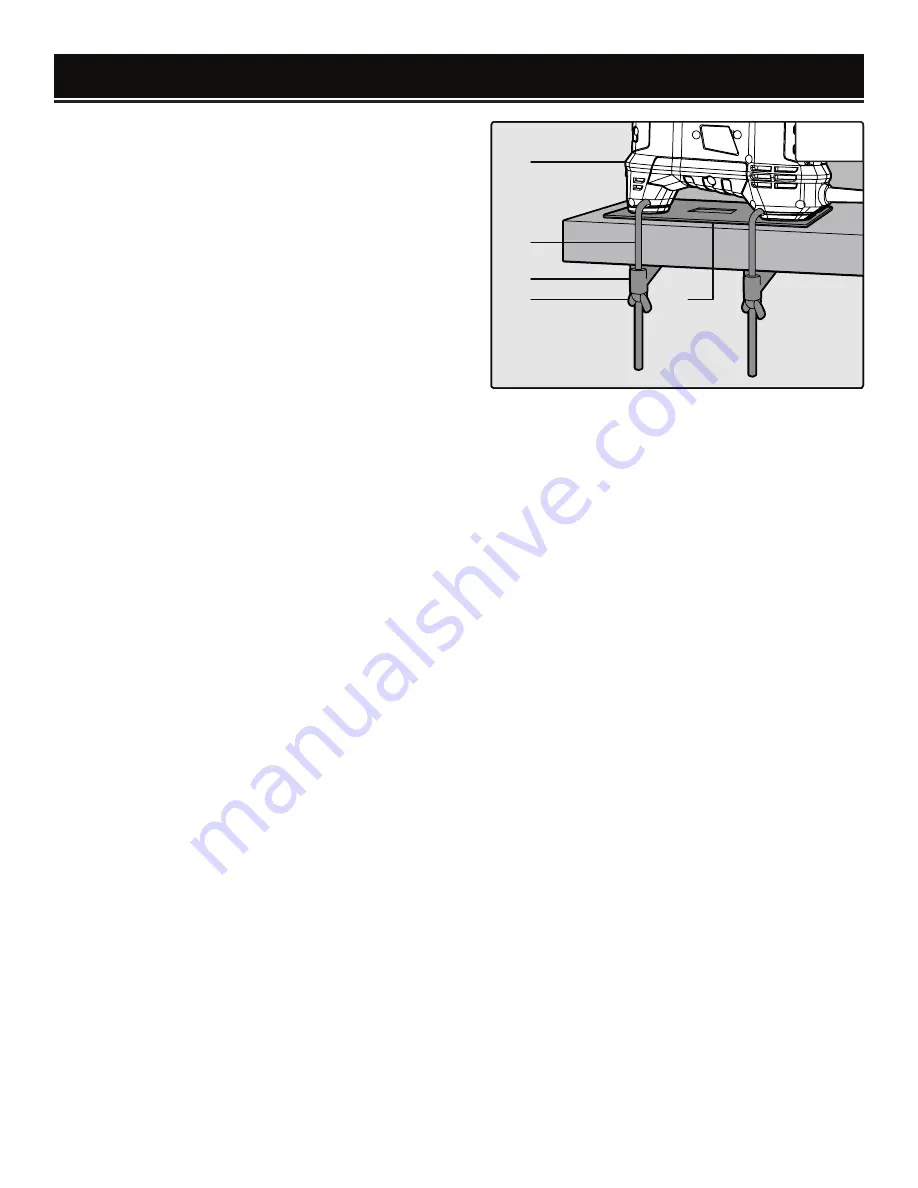
1. Place the mounting pad (Fig. 4 - 1) along the edge of a flat
benchtop so that the sander notches face up.
2. Place the sander (Fig. 4 - 2) upside-down on top of the
mounting pad and fit it into the designated notches.
3. Insert two (2) anchor bolts (Fig. 4 - 3) completely into
the mounting holes on either side of the sander body.
4. Fasten two (2) clips (Fig. 4 - 4) and two (2) wing nuts
(Fig. 4 - 5) to the anchor bolts on either side of the sander
and tighten until the sander is secured to the benchtop.
5. To remove the anchor bolts, loosen the wing nuts and flip
the clips out from under the table. Wiggle the sander until
the anchor bolts are loose enough to remove.
ASSEMBLY & ADJUSTMENTS
Fig. 4
1
2
3
4
5
Summary of Contents for HA5932
Page 19: ...19 NOTES ...
Page 20: ...THANKS FOR REMEMBERING ...


