Attaching the hardware to racks
StockSAVER manual - Software version 2.1
37
5.8.5
Configuring racks
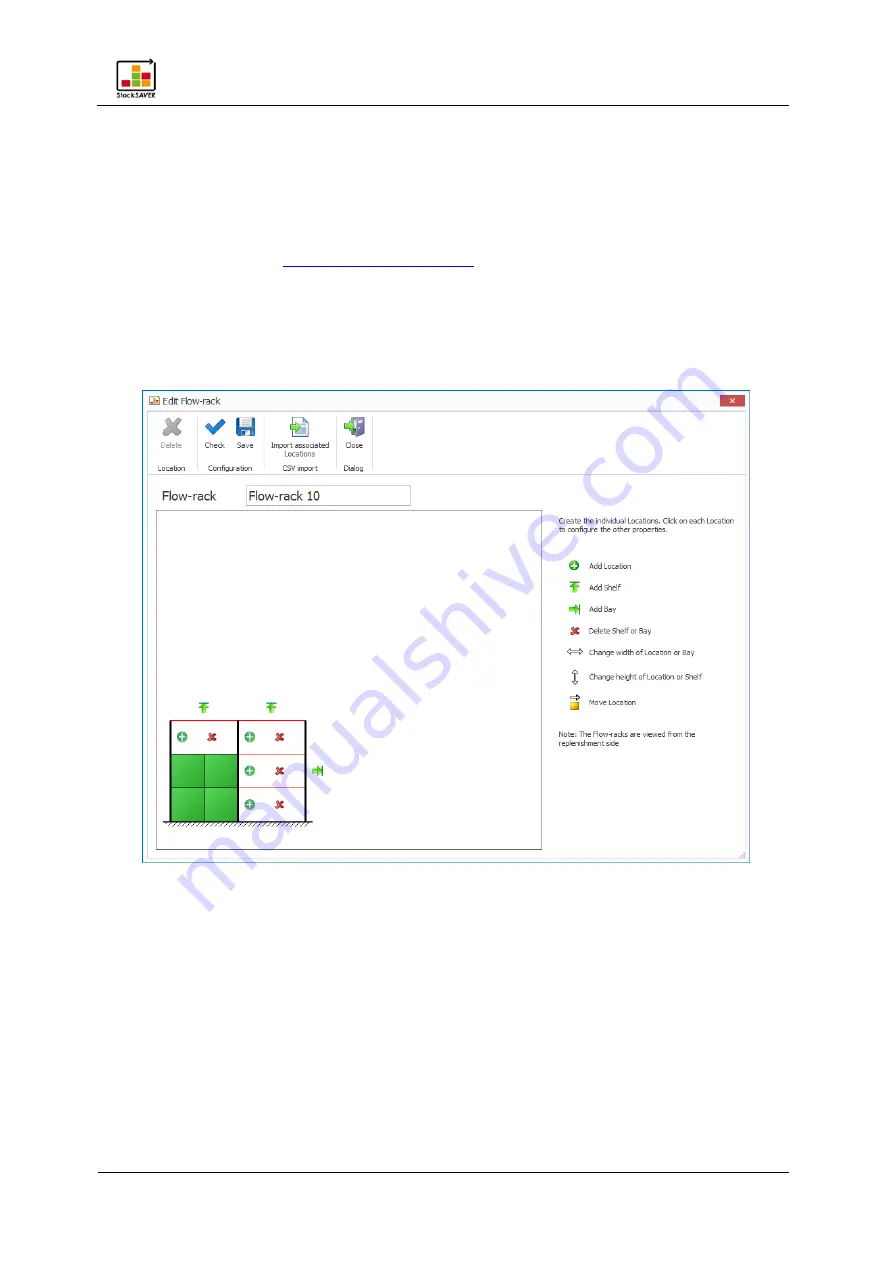
Map the racks in line with their current status in the software. Locations are represented by
green fields.
Note
−
A Part Number can be saved for every Location. To do so, the Material Master data must
first be created. See
−
Alternatively, Part Numbers can be assigned at a later date so you can continue with the
configuration. In this case, only the sensor statuses will be displayed in the Control Station.
−
Location transaction data is only continuously recorded once material has been assigned
to the Location.
1.
In the Edit Flow-rack dialog, click Add.
2.
Enter the rack name.
3.
Map the rack in line with its physical configuration using the configuration icons. Note that
the image view is from the Replenishment side.
4.
Click the green Location icon to enter a Location name, Part Number and stock limits for
every Location.
−
Location names must be unique. It is recommended to begin the Location name with
general information and become progressively more specific. Example of Location
name structure: Plant-Department-Aisle-Bay-Shelf-Location
−
An automatically assigned Location name is generated as default: Consecutive rack
number-Bay (alphabetical)-Shelf-Location.


