System operation
StockSAVER manual - Software version 2.1
49
6.5
Configuring racks
1.
Click in the main menu to configure racks.
2.
Click Add in the Edit racks dialog.
3.
Enter the rack name.
4.
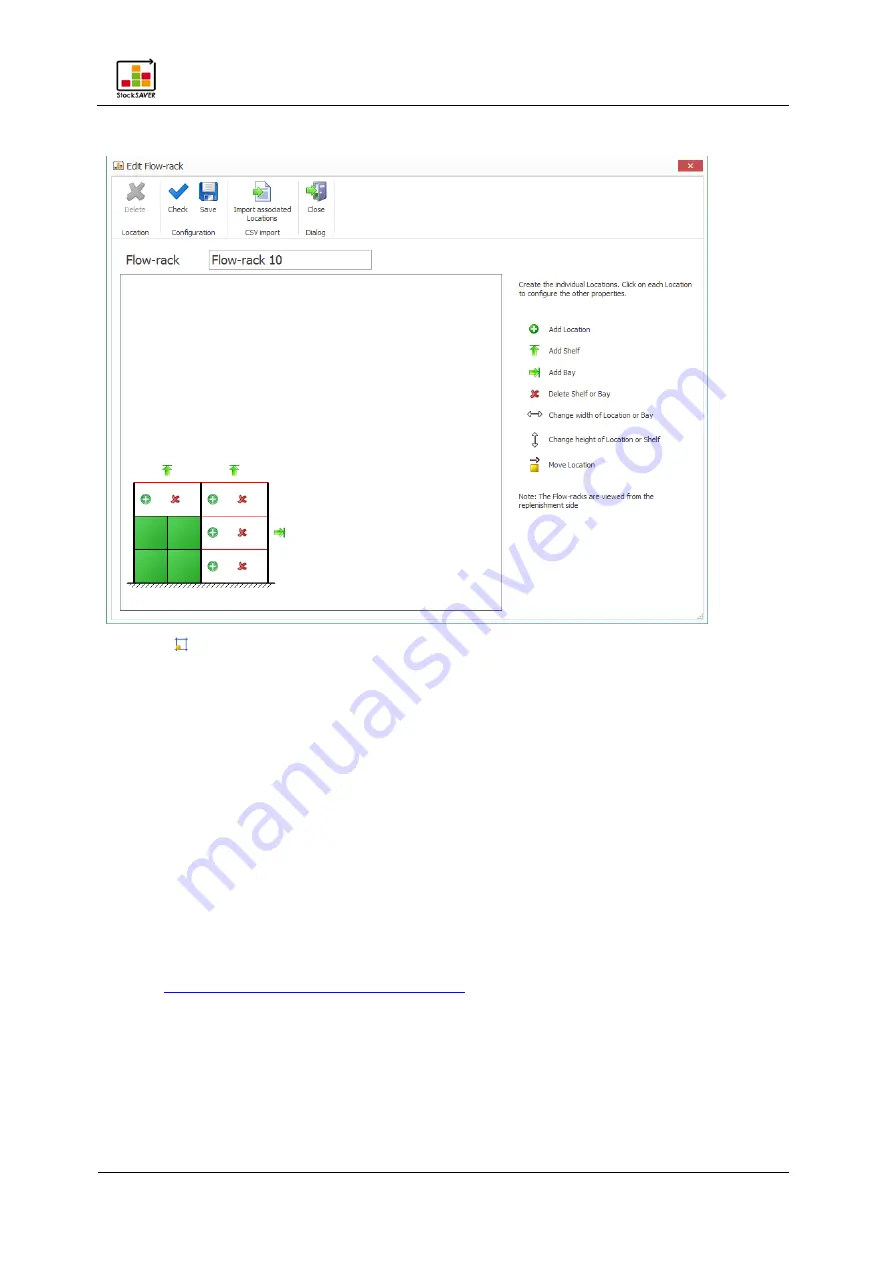
Map the rack in line with its physical configuration using the configuration icons. Note that
the image view is from the Replenishment side.
5.
Click the green Location icon to enter a Location name, Part Number and stock limits for
every Location.
−
Location names must be unique. It is recommended to begin the Location name with
general information and become progressively more specific. Example of Location
name structure: Plant-Department-Aisle-Bay-Shelf-Location
−
An automatically assigned Location name is generated as default: Consecutive rack
number-Bay (alphabetical)-Shelf-Location.
6.
As an alternative to manual input, rack Location assignments can be imported via CSV.
See
Importing Location assignments from CSV
7.
Click Check to check the configuration for errors.
8.
Save the rack configuration, click OK and close the dialog.


