7
A
230V AC
24V AC
24V DC
+
_
I
3
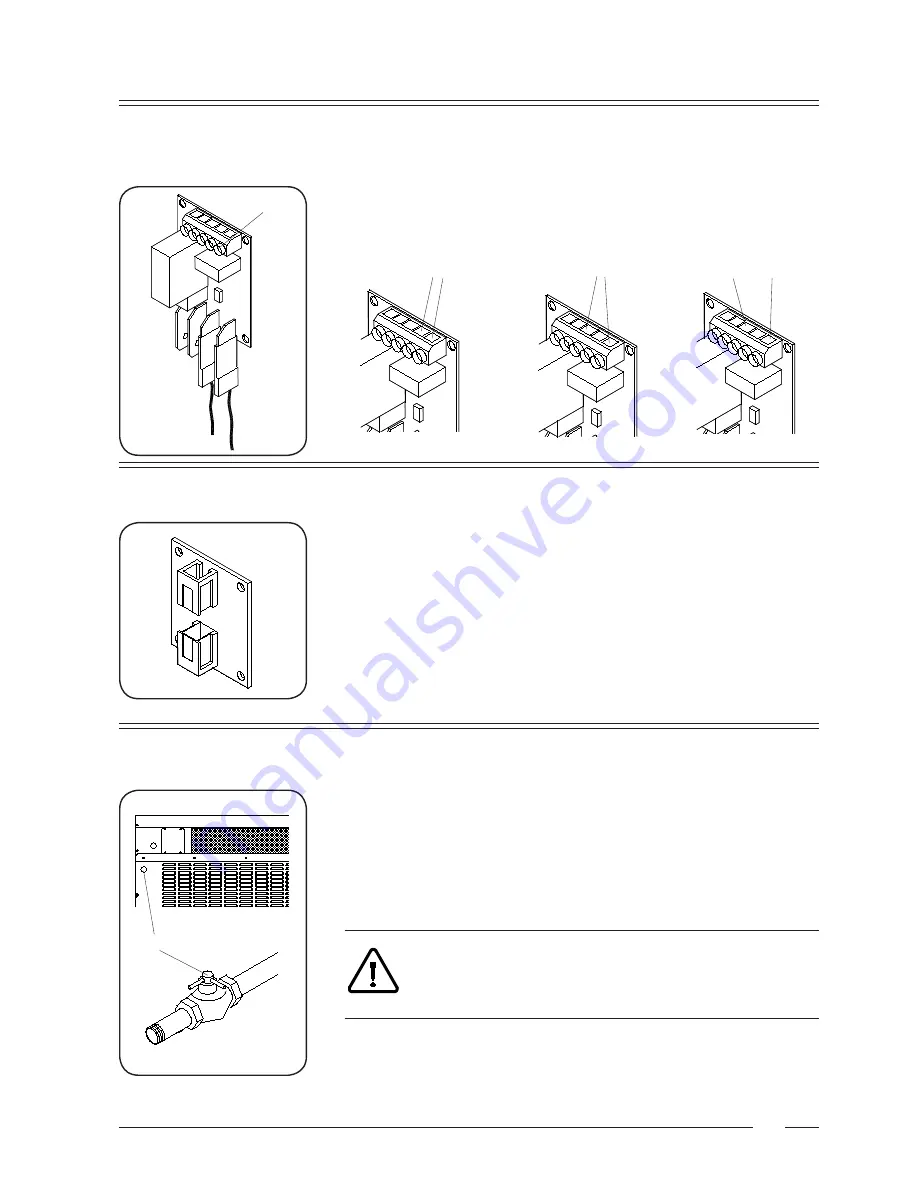
Connection of the central operating panel
for coin operated dryers (option)
At right in the wiring box, you find a plate (209/00438/00) with the clamps (A),
to where the central operating panel has to be connected. There are three possible
versions as the departure voltage of the operating panel.
Gas connection
The gas supply pipe shall be connected
to a gas tap (I) HTR-approved or according
to the standards in force in the country where the machine is used.
The connections shall be made by a competent and recognized skilled worker to be
sure that the installation meets the standards and guidelines in force in the country
where the drier is installed.
The drier shall be connected to the
type of gas and the gas pressure indicated on the
machine identification plate.
The use of too small gas lines can lead to insufficient gas supply, resulting in a bad
heating up and bad drying results.
Test all couplings and connections for leakages (according to the instal-
lation standards in force in the country where the machine is installed)
and
never use a flame.
It is important to always work with the correct gas pressure (see: Technical Informa-
tion) to obtain a good ignition, heating-up and consequently a good functioning in
general.
After having connected the gas supply, the gas supply tap (I) in the drier shall be
opened (by turning it clockwise).
If the dryer is connected to a payment system with serial communication, this con-
nection should be fixed on this printboard (209/00540/00) by means of an RJ11.
Connect the cable to the free connector on the printboard.
Connection of the serial communication (option)
Summary of Contents for DTI10
Page 2: ......
Page 3: ......
Page 4: ......
Page 12: ...9 4 ...
Page 14: ...11 4 ...
Page 16: ...13 4 ...
Page 18: ...15 ...
Page 20: ...17 ...
Page 22: ...19 4 ...
Page 24: ...21 4 ...
Page 26: ...23 4 ...
Page 28: ...25 ...
Page 30: ...27 ...
Page 34: ...31 ...
Page 45: ...1 DTI10 DTI14 CD220 350 ...
Page 47: ...1 DTI10 DTI14 CD 220 350 ...
Page 49: ...2 DTI10 DTI14 CD 220 350 ...
Page 51: ...3 DTI10 DTI14 CD 220 350 ...
Page 53: ...4 DTI10 DTI14 CD 220 350 ...
Page 55: ...5 DTI10 DTI14 CD 220 350 ...
Page 57: ...6 DTI10 DTI14 CD 220 350 ...
Page 59: ...7 DTI10 DTI14 CD 220 350 ...
Page 61: ...8 DTI10 DTI14 CD 220 350 ...
Page 63: ...9 DTI10 DTI14 CD 220 350 ...
Page 65: ...10 DTI10 DTI14 CD 220 350 ...
Page 67: ...11 DTI10 DTI14 CD 220 350 ...
Page 69: ...12 DTI10 DTI14 CD 220 350 ...
Page 71: ...13 DTI10 DTI14 CD 220 350 ...
Page 73: ...14 DTI10 DTI14 CD 220 350 ...
Page 75: ...15 DTI10 DTI14 CD 220 350 ...
Page 77: ...15 DTI10 DTI14 CD 220 350 ...
Page 79: ...16 DTI10 DTI14 CD 220 350 ...
Page 81: ...17 DTI10 DTI14 CD 220 350 ...
Page 83: ......
Page 84: ......
Page 85: ......
Page 86: ......


