4
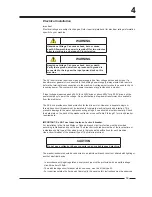
Label 4
)'
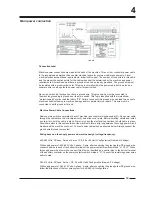
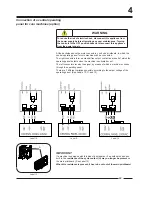
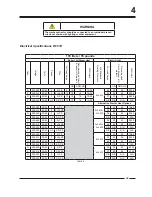
Main power connection
Connection label:
Machine power connections are made at the back of the machine. Three or four conductor power cable
is the recommended method (See chapter electrical specs for minimum cable requirements, if local
electrical codes exceed these requirements, follow local codes). The number of conductors in this cable
and the proper connection points for the cable wires shall be determined by the machine and power
requirements. All machines must have a ground wire and be properly grounded. The ground wire must
be insulated with a green/yellow color. This wire is normally within the power cable but can also be a
separate wire run along side the power cable if properly sized.
Never run a machine that does not have a ground wire. This ground wire must be connected to
the machine grounding lug found near the main switch. This lug is identified with the international
“protective earth” symbol and the letters “PE”. Failure to connect this ground wire can lead to an unsafe
machine condition leading to machine damage and/or operator injury or death. This wire must be
connected to earth ground at far end.
Machine Power Cable Connections:
Remove main switch cover plate at back of machine (see chapter dimensions part (F)). Run power cable
through the cabinet knock-out located directly below the cover plate. Before installing, obtain and install
a cord-grip to hold the cable in place. Never rely upon the electrical connections to hold cable in place.
Allow some slack in this cable outside of the machine to form a drip-loop between the supply power circuit
breaker and the machine knock-out. Connect power cable wires as directed below. Always connect the
ground wire first and remove last.
Wiring based on the supply power and machine design (voltage/frequency):
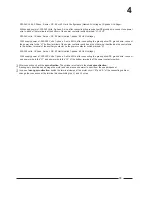
440-480 Volts, 3-Phase, 3-wire or 4-wire + PE, 50 or 60 Hertz Configuration (Named: N-Voltage):
With supply power of: 440-480 Volts, 3-phase, 3-wire, after connecting the green/yellow PE ground wire,
connect one wire to each of the bottom terminals of the power contactor switch marked: “L1,L2,L3”. When
this supply power has four wires, connect this 4th wire, identified as a neutral wire, to the bottom terminal
of the auxiliary contactor on the power contactor switch marked: “N”. Connect the remaining power wires
as first noted.
380-415 Volts, 3-Phase, 4-wire + PE, 50 or 60 Hertz Configuration (Named: P-Voltage):
With supply power of: 380-415 Volts, 3-phase, 4-wire, after connecting the green/yellow PE ground wire,
follow the directions of the four wire system for 440-480 Volt configuration.
Summary of Contents for W121E
Page 2: ......
Page 3: ......
Page 4: ......
Page 5: ......
Page 6: ......
Page 35: ...electronic timer micro 20 Manual Operating instructions...
Page 43: ...1 10...
Page 44: ...11...
Page 70: ...8 E E E 2U ZDLWLQJ IRU VHFRQGV 2U ZDLWLQJ IRU VHFRQGV 2U ZDLWLQJ IRU VHFRQGV...
Page 83: ...1 W121E W151E...
Page 85: ...2 W121E W151E...
Page 87: ...3 W121E W151E...
Page 89: ...4 W121E W151E...
Page 91: ...5 W121E W151E...
Page 93: ...6 W121E W151E...
Page 95: ...7 W121E optie option...
Page 97: ...8 W151E optie option...
Page 99: ...8 W151E optie option...
Page 101: ...9 W121E W151E...
Page 103: ...9 W121E W151E...
Page 105: ...10 W121E W151E...
Page 107: ...11 W121E W151E...
Page 109: ...12 W121E W151E...
Page 111: ...12 W121E W151E...
Page 113: ...13 W121E W151E...
Page 115: ...14 W121E W151E...
Page 117: ...15 W121E W151E...
Page 119: ...16 W121E W151E...
Page 121: ...17 W121E W151E...
Page 123: ...18 W121E W151E...
Page 125: ...19 W121E W151E...
Page 127: ...20 W121E W151E...
Page 129: ...21 W121E W151E...
Page 131: ...22 W121E W151E...
Page 133: ...23 W121E W151E...
Page 135: ...24 W121E W151E...
Page 137: ...25 W121E W151E...
Page 139: ...26 W121E W151E...
Page 141: ...27 W121E W151E...
Page 143: ...28 W121E W151E...
Page 145: ...29 W121E W151E...
Page 147: ...30 W121E W151E...
Page 149: ...31 W121E W151E...
Page 151: ...32 W121E W151E...
Page 153: ...33 W121E W151E...
Page 155: ...34 W121E W151E...
Page 157: ...35 W121E W151E...
Page 159: ...36 W121E W151E...
Page 161: ...36 W121E W151E...
Page 163: ...37 W121E W151E...
Page 165: ...38 W121E W151E...
Page 167: ...38 W121E W151E...
Page 169: ...39 W121E W151E...
Page 171: ...40 W121E W151E...
Page 173: ...41 W121E W151E...
Page 175: ......
Page 176: ......
Page 177: ......
Page 178: ......
Page 179: ......


