7
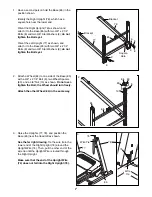
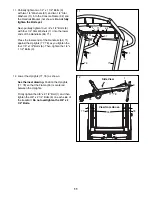
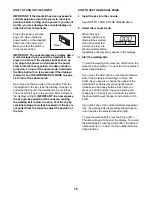
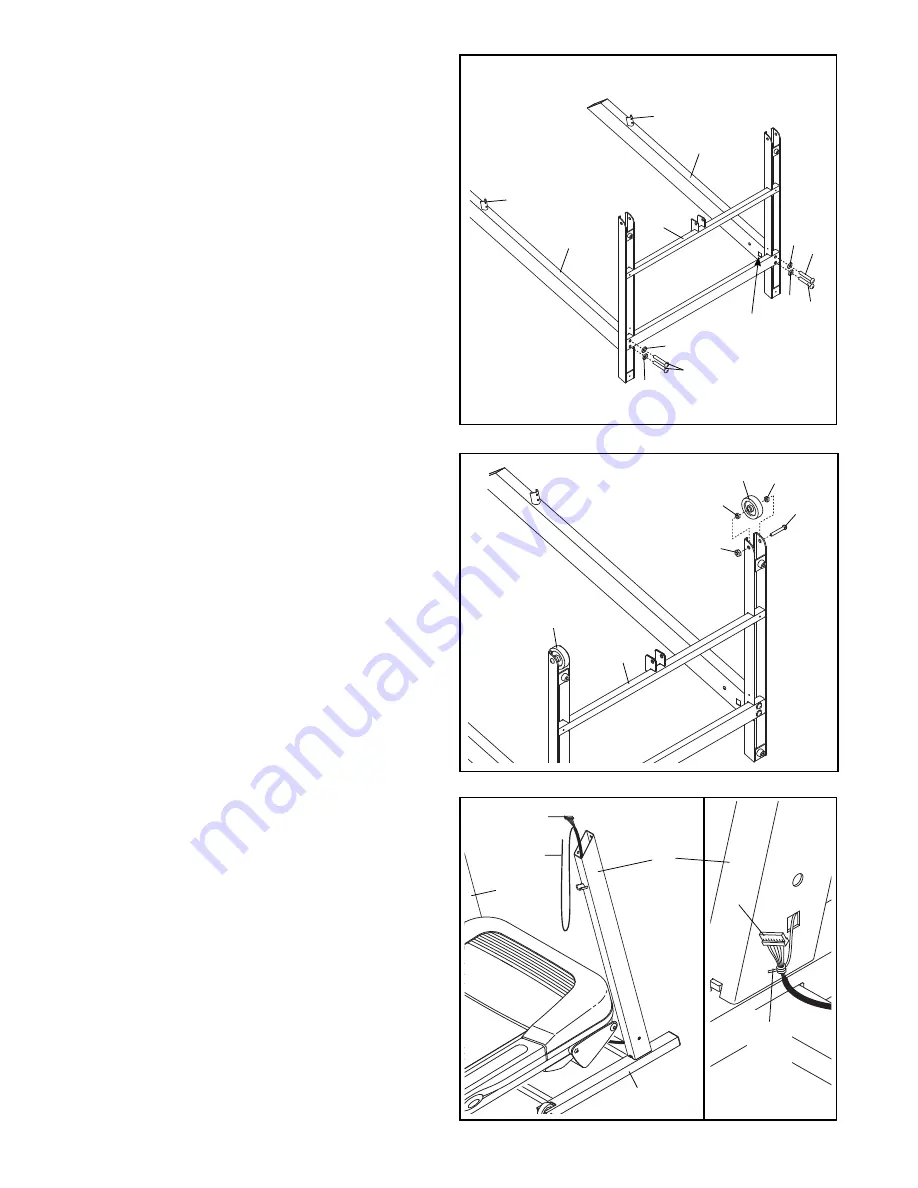
2. Attach a Wheel (84) to one side of the Base (85)
with a 3/8” x 2 1/4” Bolt (8), two Wheel Spacers
(83), and a 3/8” Nut (13) as shown. Do not over-
tighten the Bolt; the Wheel should turn freely.
Attach the other Wheel (84) in the same way.
85
84
13
83
83
8
84
2
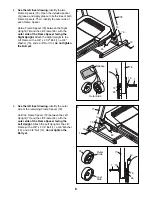
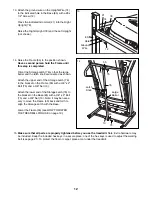
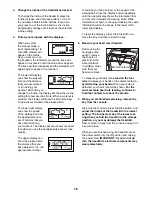
1. Have a second person hold the Base (85) in the
position shown.
Identify the Right Upright (78), which has a
square hole near the lower end.
Orient the Right Upright (78) as shown, and
attach it to the Base (85) with two 3/8” x 2 1/4”
Bolts (8) and two 3/8” Star Washers (9); do not
tighten the Bolts yet.
Orient the Left Upright (77) as shown, and
attach it to the Base (85) with two 3/8” x 2 1/4”
Bolts (8) and two 3/8” Star Washers (9); do not
tighten the Bolts yet.
85
Square
Hole
8
8
9
9
78
77
Bracket
Bracket
8
9
9
1
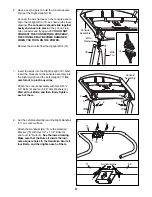
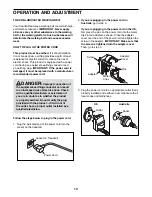
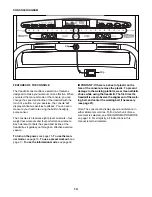
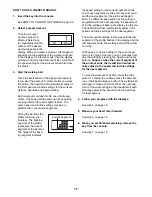
3. Raise the Uprights (77, 78), and position the
Base (85) near the treadmill as shown.
See the far right drawing. Tie the wire tie in the
lower end of the Right Upright (78) around the
Upright Wire (74). Then, pull the other end of the
wire tie until the Upright Wire is routed through
the Right Upright.
Make sure that the end of the Upright Wire
(74) does not fall into the Right Upright (78).
3
74
Wire Tie
85
74
78
77
Wire
Tie


