background image

ASSEMBLY

Assembly requires two persons. Set the treadmill in a cleared area and remove all packing materials. Do not
dispose of the packing materials until assembly is completed. Assembly requires the included allen wrench
and your own phillips screwdriver                          and two adjustable spanners                       .

Note: The underside of the treadmill walking belt is coated with high-performance lubricant. During shipping, a
small amount of lubricant may be transferred to the top of the walking belt or the shipping carton. This is a nor-
mal condition and does not affect treadmill performance. If there is lubricant on top of the walking belt, simply
wipe off the lubricant with a soft cloth and a mild, non-abrasive cleaner.

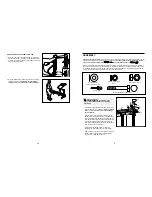
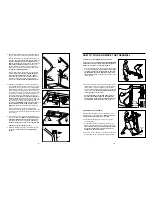
1. Note that the right handrail (not shown) is connected

to the treadmill by a wire harness. During assembly
steps 1 to 3, be careful not to pull on or damage
the wire harness.

With the help of a second person, carefully lay the
treadmill onto its side. Position one of the Base Legs
(62) on the base of the Upright (46) as shown. Make
sure that the Base Leg Pads (63) and the Wheel (68)
are in the indicated positions. Attach the Base Leg
with two Base Leg Bolts (42), two Base Leg Washers
(43), and two Base Leg Nuts (61).

Carefully turn the treadmill onto its other side.
Assemble the other Base Leg (62) as described. 

With the help of a second person, carefully raise the
treadmill to the upright position so that both Base
Legs (62) are resting flat on the floor.

5

12

42

43

63

62

68

46

61

Screw (2)–6

Handrail Washer/

Base Leg Washer (43)–8

Handrail Bolt/Base Leg Bolt (42)–8

Base Leg Nut (61)–4

Handrail Star Washer

(44)–4

1

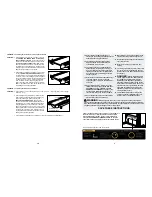
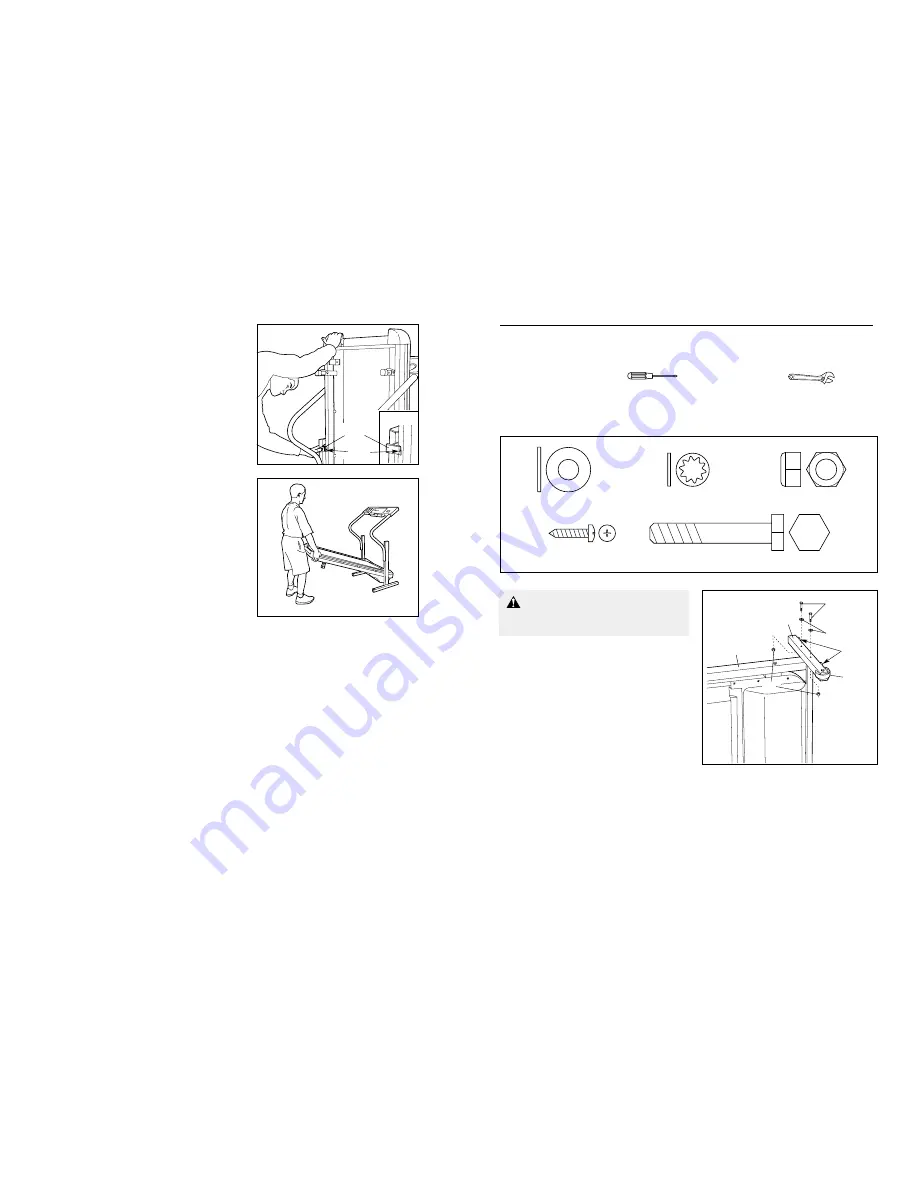
HOW TO LOWER THE TREADMILL FOR USE

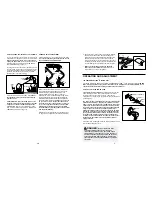
1. Hold the upper end of the treadmill with your right hand

as shown. Using your left thumb, press the storage latch
and hold it. Pivot the treadmill until the frame and foot rail
are past the storage latch.

2. Hold the treadmill firmly with both hands, and lower the

treadmill to the floor. To decrease the possibility of
injury, bend your legs and keep your back straight.

Closed

Storage 

Latch

Catch

WARNING: 

Do not plug in the

power cord until the treadmill is completely
assembled.

Summary of Contents for Cadence 830

Page 1: ...t cover of this manual the KEY NUMBER and DESCRIPTION of the desired part s see the PART LIST and the EXPLODED DRAWING in the centre of this manual www iconeurope com Visit our website at 08457 089 00...

Page 2: ...d by using your heart rate as a guide The chart below shows recom mended heart rates for fat burning and aerobic exercise To find the proper heart rate for you first find your age near the bottom of t...

Page 3: ...sustained by or through the use of this product SAVE THESE INSTRUCTIONS 14 The decal shown below has been placed on your treadmill If the decal is missing or illegible please call our Customer Service...

Page 4: ...n cord is needed use only a 3 conductor 1 mm2 14 gauge cord that is no longer than 1 5 m 5 ft b After the power cord has been plugged in make sure that the key is fully inserted into the console c Che...

Page 5: ...n one of the Base Legs 62 on the base of the Upright 46 as shown Make sure that the Base Leg Pads 63 and the Wheel 68 are in the indicated positions Attach the Base Leg with two Base Leg Bolts 42 two...

Page 6: ...wo holes in the Handrail with the holes in the Upright if you are 173 cm 5 ft 8 in or taller align the lower two holes Attach the Left Handrail with two Handrail Bolts 42 two Handrail Washers 43 and t...

Page 7: ...he treadmill Batteries 54 57 Tab 6 The Console 57 requires two 1 5 V batteries Alkaline batteries are recommended Open the Battery Cover 54 as shown Press two batteries into the battery com partment w...

Page 8: ...This mode shows the total distance you have walked or run Fat Calories This mode shows the approximate number of fat calories you have burned See FAT BURNING on page 15 Calories This mode shows the a...

Page 9: ...cap 38 5 Roller Adjustment Washer 39 1 Front Roller Adjustment Bolt 40 2 Plastic Fastener 41 1 Motor Belt 42 8 Handrail Bolt Base Leg Bolt 43 8 Handrail Washer Base Leg Washer 44 4 Handrail Star Washe...

Page 10: ...54 2 2 2 2 57 69 56 55 2 48 46 58 43 42 44 61 61 60 66 61 61 68 67 63 3 63 43 3 42 62 63 62 3 43 42 3 63 67 68 61 79 14 73 3 77 74 72 10 10 53 78 15 2 80 82 81 84 3 9 9 9 38 83 86 82 81 85 49 38 86 87...

Reviews: