8
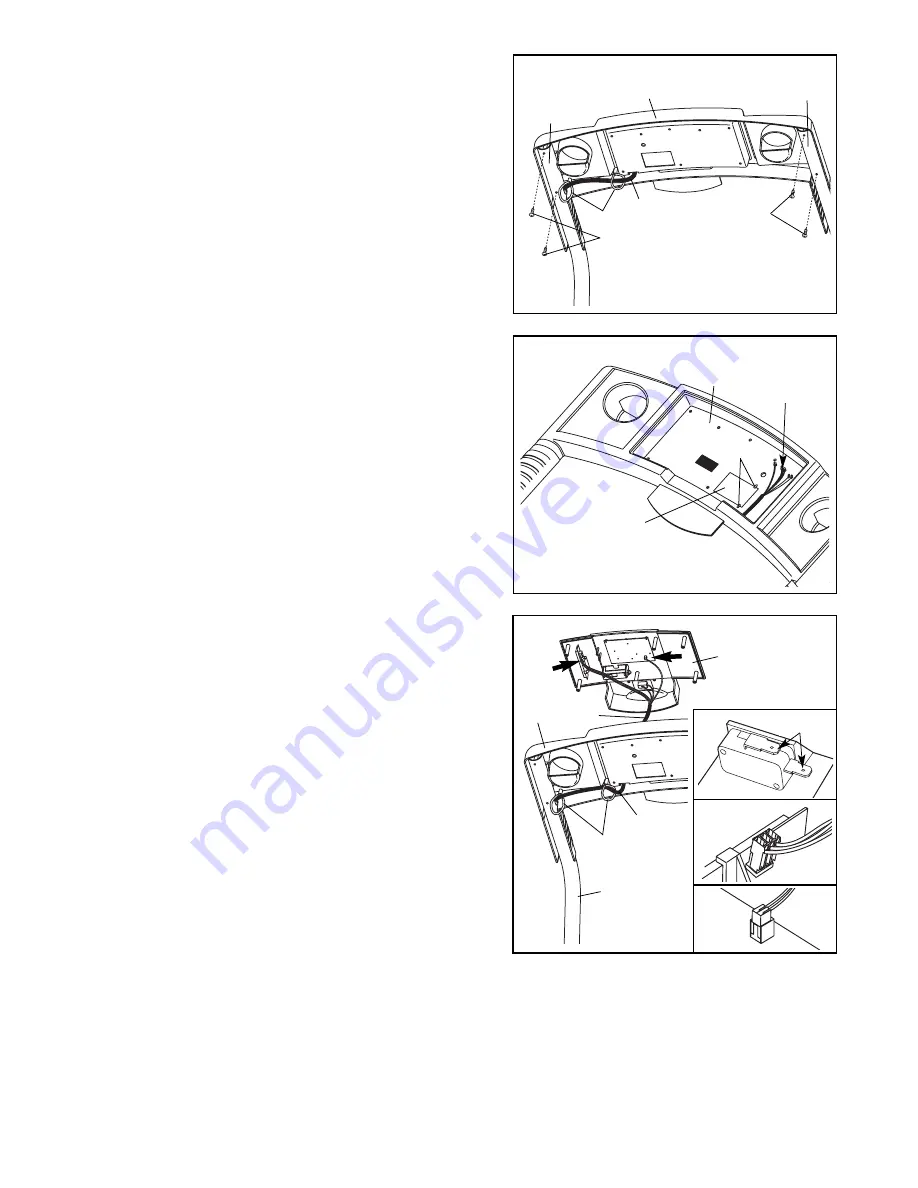
6. Hold the Console (11) near the Console Base (87).
Touch the right Handrail (4) to discharge any static.
Locate the two wires in the Wire Harness (53) that have
L-shaped connectors on the ends. Press the connectors
onto the two tabs on the switch shown in inset drawing 6a.
Connect the other two wires in the Wire Harness (53) to
the back of the Console (87) in the locations shown by
the arrows in drawing 6. The connectors should slide
easily into the sockets and snap into place (see
drawings 6b and 6c). If the connectors do not slide easi-
ly and snap into place, turn the connectors and then
insert them. IF THE CONNECTORS ARE NOT INSERT-
ED PROPERLY, THE CONSOLE MAY BE DAMAGED
WHEN THE POWER IS TURNED ON.
11
53
53
6
87
Ties
4
6a
Tabs
6c
6b
12
Connectors
Hinges
87
5
5. Insert the Battery Cover (12) up through the bottom of
the Console Base (87), with the hinges in the position
shown. The Battery Cover should pivot down, away from
the Console Base.
Remove the tape from the connectors.
5
53
Ties
5
4
4
87
4
4. Open part bag C. Set the Console Base (87) on the
Handrails (4). Thread four 3/4” Screws (5) into the
Handrails and the Console Base. After you have started
all four Screws, tighten the Screws until they are
snug; do not overtighten the Screws.
Insert the Wire Harness (53) through the two indicated
plastic ties on the Console Base (87) and then through
the hole in the bottom of the Console Base.
Summary of Contents for Cadence Cr12 Treadmill
Page 19: ...19 NOTES ...


