background image

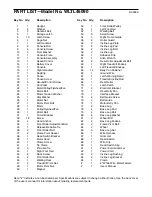
PART LISTÑModel No. WLTL46090

R0299A

Note: Ò#Ó indicates a non-illustrated part. Specifications are subject to change without notice. See the back cover
of the userÕs manual for information about ordering replacement parts.

Key No.

Qty.

Description

1

1

Upright

2

4

Washer

3

4

Handrail Bolt 

4

1

Storage Latch

5

10

Latch Screw

6

4

Cage Nut

7

1

Left Handrail

8

2

Console Bolt

9

4

Console Screw

10

2

Pivot Washer

11

1

Console Plate 

12

1

Console Assembly

13

1

Speed Control

14

1

Battery Cover

15

1

Console

16

1

Right Handrail

17

1

Key/Clip

18

1

Choke

19

7

Choke Screw

20

5

Ground/Control Screw

21

1

Controller

22

1

Motor/Pulley/Flywheel/Fan

23

1

Motor Bolt

24

1

Motor Tension Washer

25

1

Star Washer

26

1

Motor Nut

27

1

Motor Pivot Bolt

28

1

Motor

29

1

Pulley/Flywheel/Fan

30

1

Motor Belt

31

1

Circuit Breaker

32

16

Screw

33

4

Hood Anchor

34

1

Front Roller Adjustment Bolt

35

1

Releasable Cable Tie

36

2

Front Roller Bolt

37

2

Frame Pivot Spacer

38

1

Reed Switch Bracket

39

1

Motor Hood

40

1

Clamp Screw

41

1

Tie Clamp

42

3

8Ó Cable Tie

43

1

Right Foot Rail

44

8

Deck Screw

45

2

Front Roller Nut

46

1

Walking Deck

47

2

Treadmill Pivot Nut

48

1

Motor Pivot Nut

49

1

Magnet

Key No.

Qty.

Description

50

1

Front Roller/Pulley

51

1

Left Foot Rail

52

1

Walking Belt

53

6

Small Screw

54

1

Right Frame Guide

55

2

Roller Guard

56

2

Incline Leg Plate

57

6

Incline Leg Pad

58

2

Incline Leg Bolt

59

2

Incline Leg

60

1

Adhesive Clip

61

1

Allen Wrench

62

2

Rear Roller Adjustment Bolt

63

1

Right Treadmill Endcap

64

1

Left Treadmill Endcap

65

14

Belly Pan Fastener

66

1

Ground Wire

67

1

Latch Warning Decal

68

1

Treadmill Incline Rod

69

1

Rear Roller

70

1

Latch Catch

71

2

Electronic Bracket

72

1

Rear Belly Pan

73

1

Interface Bracket

74

4

Belt Guide Screw

75

2

Belt Guide

76

1

Motor Belly Pan

77

2

Base Leg

78

4

Base Leg Pad

79

4

Base Leg Bolt

80

8

Base Leg Washer

81

2

Wheel Bolt

82

2

Base Leg Endcap

83

2

Frame Pivot Bolt

84

2

Wheel

85

6

Base Leg Nut

86

1

Wire Harness

87

1

Grommet

88

1

Reed Switch

89

1

Wire Clip

90

1

Reed Switch Clip

91

1

Power Cord Grommet

92

1

Power Cord

93

2

Incline Leg Bushing

94

2

Incline Leg Bracket

95

1

Frame

#

1

8Ó White Wire, Male/Female

#

1

UserÕs Manual

Summary of Contents for Cadence Dx8

Page 1: ...RY DELAYS PLEASE CALL DIRECT TO OUR TOLL FREE CUSTOMER HOT LINE The trained techni cians on our customer hot line will provide immediate assis tance free of charge to you CUSTOMER HOT LINE 1 800 999 3...

Page 2: ...ds 8 Never allow more than one person on the treadmill at a time 9 Wear appropriate exercise clothing when using the treadmill Do not wear loose clothing that could become caught in the treadmill Athl...

Page 3: ...into any open ing 23 DANGER Always unplug the power cord immediately after use before cleaning the treadmill and before performing the maintenance and adjustment procedures described in this manual N...

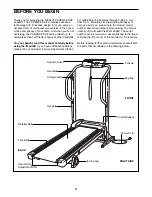
Page 4: ...ase call our Customer Service Department toll free at 1 800 999 3756 Monday through Friday 6 a m until 6 p m Mountain Time excluding holidays To help us assist you please note the product model number...

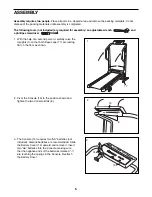
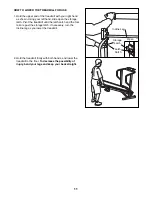
Page 5: ...erson carefully raise the Uprights 1 so that both Base Legs 77 are resting flat on the floor as shown 1 77 1 2 2 Pivot the Console 15 to the position shown and tighten the two Console Bolts 8 15 8 3 T...

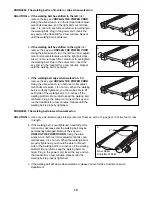
Page 6: ...hat all parts are tightened before you use the treadmill To protect the floor or carpet place a mat under the treadmill 4 Attach the the Latch Catch 70 to the left side of the Frame 95 with four Screw...

Page 7: ...ly installed and grounded in accordance with all local codes and ordinances This product is for use on a nominal 120 volt circuit and has a grounding plug that looks like the plug illus trated in draw...

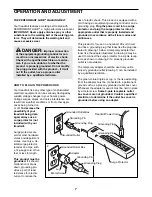
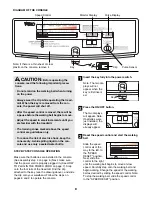
Page 8: ...ns to move at slow speed Carefully step onto the walking belt and begin walking Change the speed of the walking belt as desired by sliding the speed control Note To stop the walking belt slide the spe...

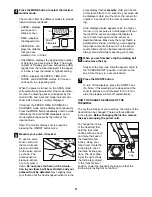
Page 9: ...e pulse display flashes steadily Hold your thumb at this level After 5 to 10 seconds your pulse will be displayed Hold your thumb on the sensor for another 15 seconds for the most accurate read ing If...

Page 10: ...torage latch closes fully over the latch catch To protect the floor or carpet from damage place a mat under the treadmill Keep the treadmill out of direct sunlight Do not leave the treadmill in the st...

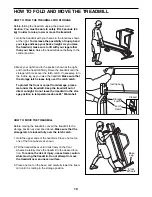
Page 11: ...h Pivot the treadmill until the latch catch and the foot rail are past the storage latch If necessary turn the Incline leg as you lower the treadmill 2 Hold the treadmill firmly with both hands and lo...

Page 12: ...k the circuit breaker located on the treadmill frame near the power cord see the drawing above If the circuit breaker has tripped wait for five minutes and then press the switch back in b Make sure th...

Page 13: ...kwise 1 4 of a turn When the walking belt is correctly tightened you should be able to lift each side of the walking belt 2 to 3 inches off the walking platform Be careful to keep the walking belt cen...

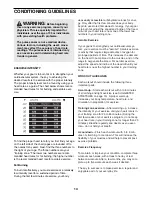
Page 14: ...the blood For aerobic exercise adjust the speed and incline of the treadmill until your heart rate is near the highest number in your training zone WORKOUT GUIDELINES Each workout should include the...

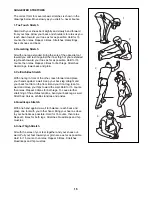
Page 15: ...lles Stretch With one leg in front of the other reach forward and place your hands against a wall Keep your back leg straight and your back foot flat on the floor Bend your front leg lean for ward and...

Page 16: ...Clamp Screw 41 1 Tie Clamp 42 3 8 Cable Tie 43 1 Right Foot Rail 44 8 Deck Screw 45 2 Front Roller Nut 46 1 Walking Deck 47 2 Treadmill Pivot Nut 48 1 Motor Pivot Nut 49 1 Magnet Key No Qty Descripti...

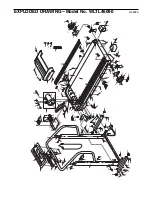
Page 17: ...5 69 93 56 57 58 57 57 59 94 60 61 53 62 2 63 65 64 2 62 66 20 65 67 93 94 53 57 59 57 57 58 56 68 95 65 65 70 32 72 65 73 65 74 75 76 49 37 65 47 88 32 19 21 71 20 18 8 80 80 2 2 36 45 36 45 9 9 4 2...

Page 18: ...ON This warranty does not extend to any product or damage to a product caused by or attributable to freight damage abuse misuse improper or abnormal usage or repairs not provided by an ICON authorized...

Reviews: