background image

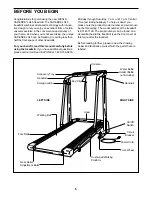
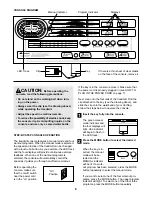
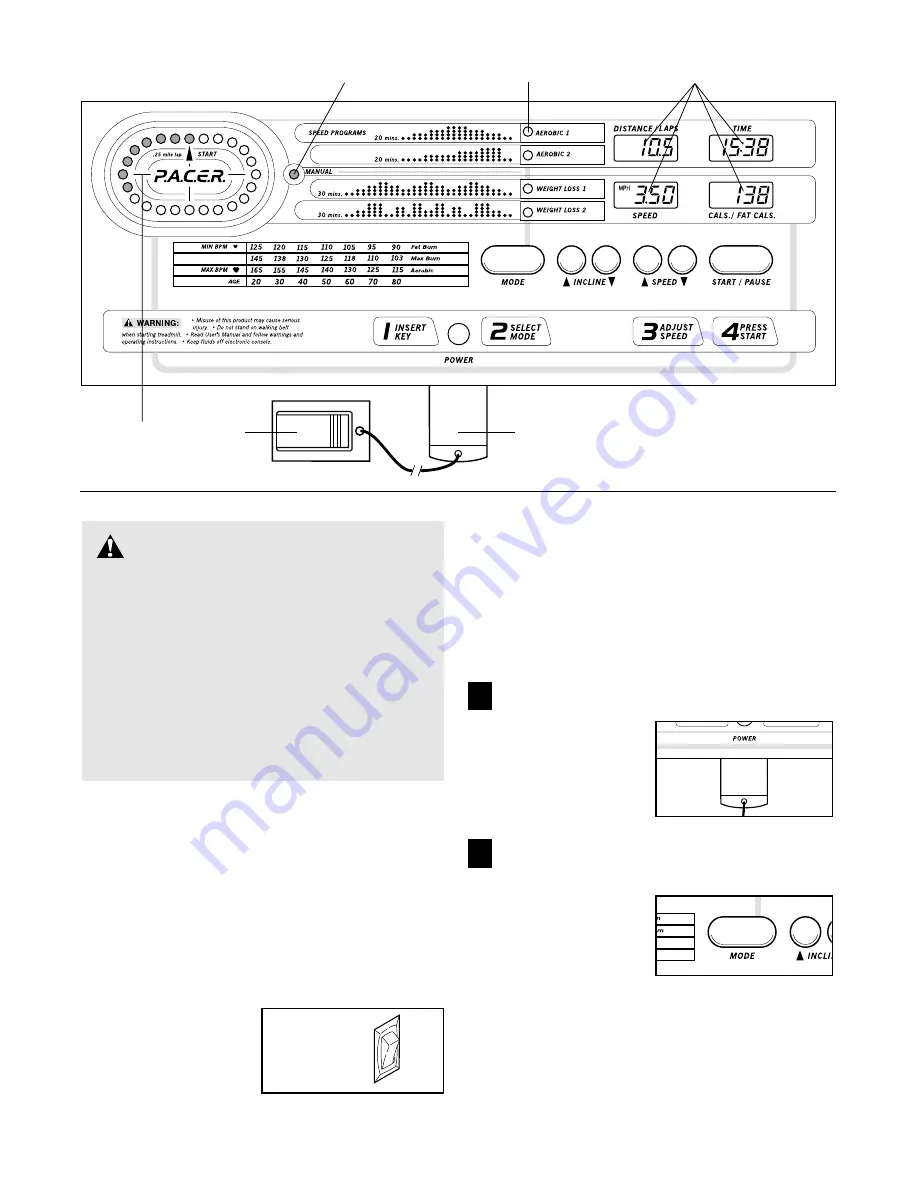
CONSOLE DIAGRAM

Clip

Key

Displays

LED Track

Program Indicator

Manual Indicator

If there is a thin sheet of clear plastic 

on the face of the console, remove it.

STEP-BY-STEP CONSOLE OPERATION 

The treadmill console features a manual mode and four
workout programs. When the manual mode is selected,
the speed and incline of the treadmill can be changed
with a touch of a button. As you exercise, the LED track
and the four displays will provide continuous exercise
feedback. When one of the workout programs is 
selected, the console will automatically control the
speed as it guides you through an effective workout. 

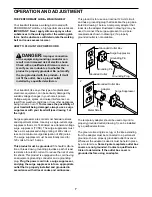
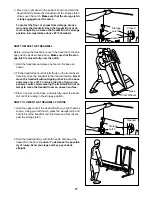
Before operating the
console, make sure
that the on/off switch
near the power cord
is in the “on” position. 

If the key is in the console, remove it. Make sure that
the power cord is properly plugged in (see HOW TO
PLUG IN THE POWER CORD on page 7).

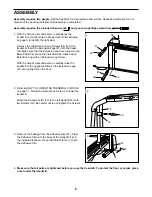
Next, step onto the foot rails of the treadmill. Find the
clip attached to the key (see the drawing above), and
slide the clip onto the waistband of your clothing. 
Follow the steps below to operate the console.

Insert the key fully into the console.

The green manual
mode indicator and
the four displays will
light. One indicator
will begin to flash in
the LED track.

Press the MODE button to select the desired
mode.

When the key is in-
serted, the manual
mode will be se-
lected and the
MANUAL indicator
will be lit. If a work-
out program has been selected, press the MODE
button repeatedly to select the manual mode.

If you want to select one of the four workout pro-
grams, press the MODE button. The upper program
indicator will light. To select one of the other three 
programs, press the MODE button repeatedly.

CAUTION:

Before operating the

console, read the following precautions.

• Do not stand on the walking belt when turn-

ing on the power. 

• Always wear the clip (see the drawing above)

while operating the treadmill.

• Adjust the speed in small increments.

• To reduce the possibility of electric shock, keep

the console dry. Avoid spilling liquids on the
console, and use only a sealed water bottle.

1

2

OFF

ON

“On”
Position

8

Summary of Contents for Cadence Lx45

Page 1: ...l Number Decal Model No 831 297100 Serial No CAUTION Read all precautions and instruc tions in this manual before using this equipment Save this manual for future reference SEARS ROEBUCK AND CO HOFFMA...

Page 2: ...ENT 7 HOW TO FOLD AND MOVE THE TREADMILL 10 MAINTENANCE AND TROUBLE SHOOTING 12 CONDITIONING GUIDELINES 14 ORDERING REPLACEMENT PARTS Back Cover FULL 90 DAY WARRANTY Back Cover Note An EXPLODED DRAWIN...

Page 3: ...voltage surge suppressor TVSS The surge suppres sor must have a UL suppressed voltage rating of 400 volts or less and a minimum surge dis sipation of 450 joules The surge suppressor must be electrica...

Page 4: ...n any com mercial rental or institutional setting WARNING Before beginning this or any exercise program consult your physician This is especially important for persons over the age of 35 or persons wi...

Page 5: ...736 6879 Monday through Saturday 7 a m until 7 p m Central Time excluding holidays To help us assist you please note the product model number and serial num ber before calling The model number of the...

Page 6: ...on page 11 Follow the instructions in step 2 to lower the treadmill Attach the Storage Latch 12 to the left Upright 14 with two Screws 30 Be careful not to overtighten the Screws 3 Remove the backing...

Page 7: ...uctor and a grounding plug Plug the power cord into a surge suppressor and plug the surge suppressor into an appropriate outlet that is properly installed and grounded in accordance with all local cod...

Page 8: ...e key see the drawing above and slide the clip onto the waistband of your clothing Follow the steps below to operate the console Insert the key fully into the console The green manual mode indicator a...

Page 9: ...mode As you exercise change the speed of the walking belt as desired by pressing the SPEED buttons To stop the walking belt momentarily press the START PAUSE button once The SPEED display will begin...

Page 10: ...the time remaining in the program will be displayed SPEED display This display shows the speed of the walking belt in miles per hour or kilometers per hour An MPH or a KPH will appear in the display...

Page 11: ...l it rolls freely on the front wheels Carefully move the treadmill to the desired location Never move the treadmill without tipping it back or the base pads may come off To reduce the risk of injury u...

Page 12: ...then press the switch back in d Check the on off switch located at the front of the treadmill near the power cord The switch must be in the on position PROBLEM The power turns off during use SOLUTION...

Page 13: ...king belt has shifted to the left first remove the key and UNPLUG THE POWER CORD Using the allen wrench turn the left rear roller adjustment bolt clockwise and the right bolt counterclockwise 1 4 of a...

Page 14: ...p blood to the muscles and on the lungs to oxygenate the blood For aerobic exercise adjust the speed and incline of the treadmill until your heart rate is near the higher number in your training zone...

Page 15: ...lles Stretch With one leg in front of the other reach forward and place your hands against a wall Keep your back leg straight and your back foot flat on the floor Bend your front leg lean forward and...

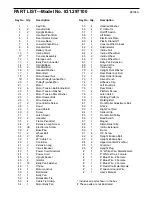
Page 16: ...50 2 Belt Guide 51 1 Belly Pan 52 4 Releasable Tie 53 4 Cable Tie Clamp 54 1 Motor Belly Pan Key No Qty Description 55 4 Handrail Washer 56 4 8 Cable Tie 57 1 On Off Switch 58 1 Lift Board 59 1 Electr...

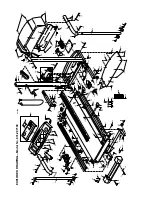
Page 17: ...16 81 14 28 35 35 35 29 34 36 30 38 63 36 30 30 30 54 30 30 30 56 35 53 52 46 35 50 48 35 47 46 45 34 41 42 43 44 47 51 47 79 80 47 77 83 46 77 46 5 74 75 73 31 62 47 47 76 62 78 30 36 49 5 63 63 16 9...

Page 18: ...his manual Model No 831 297100 QUESTIONS If you find that you need help assembling or operating the WESLO CADENCE LX45 TREADMILL a part is missing you need to schedule repair service call our toll fre...

Reviews: