background image

9

4.

Before you fill the DAYBREAK 300, be sure that it
is in the position you want, and that it can be easily
serviced, if needed. Once the DAYBREAK 300 is
filled with water, it will need to be drained to be
moved.

Using a garden hose or other clean water source,
begin filling the DAYBREAK 300, until the jet and fil-
ter openings on the Spa Jet Unit (13) are covered
with water. 

Do not fill the DAYBREAK 300 more

than 20Ó deep with water.

After the DAYBREAK 300 is full, you must prime
the Spa Jet Unit (13) before using the DAY-
BREAK 300 (see PRIMING THE SPA JET UNIT
on page 10).

5.

Insert the Support Ball (4) into the mesh pocket on
the underside of the Spa Cover (11).

See inset drawing A. Insert the inflation tube into
the hole in the Support Ball (4). Inflate the Support
Ball. 

See inset drawing B. When the Support Ball (4) is
inflated, remove the inflation tube from the Support
Ball and insert the ball plug through the mesh into
the Support Ball. 

The head of the ball plug will

hold the Support Ball in place.

Note: The Support Ball (4) is not a toy.

6.

Place the Spa Cover (11) over the Fabric Spa
Surround (8), the Inflatable Spa Liner (9), and the
Spa Jet Unit (13). 

Be sure that the Spa Cover is

properly centered and that the straps on the
Spa Cover line up with the straps on the Fabric
Spa Surround.

Snap each of the six latches on the Spa Cover (11)
into the buckles on the straps on the Fabric Spa
Surround (8).

6

4

9

13

8

11

13

Latches and Buckles

B

A

11

Mesh Pocket

4

4

Inflation

Tube

Ball

Plug

4

5

Summary of Contents for Daybreak 300

Page 1: ...NECESSARY DELAYS PLEASE CALL DIRECT TO OUR TOLL FREE CUSTOMER HOT LINE The trained techni cians on our customer hot line will provide immediate assis tance free of charge to you CUSTOMER HOT LINE 1 80...

Page 2: ...extend to any product or damage to a product caused by or attributable to freight damage abuse misuse improper or abnormal usage or repairs not provided by an ICON authorized service center products...

Page 3: ...water which may collect on the spa cover 12 Keep children and pets away from the DAY BREAK 300 when it is not in use 13 Keep all chemicals away from children and pets 14 The pH and chemical balance o...

Page 4: ...th their physician before using the DAYBREAK 300 Pregnant women should not use the spa if the water temperature is above 100 F 38 C the unborn child could be seriously harmed 28 DANGER To reduce the r...

Page 5: ...e DAYBREAK 300 Locate the labels and familiarize yourself with this information The label on the side of the spa jet unit is an adhesive decal If this decal is missing or if it is not legible please c...

Page 6: ...WESLO If you have additional questions please call our Customer Service Department toll free at 1 800 999 3756 Monday through Friday 6 a m until 6 p m Mountain Time excluding holidays To help us assis...

Page 7: ...e is room around the DAYBREAK 300 to permit servicing of the unit The diameter of the tub is 69 You should allow for this size plus the size of the spa jet unit when choosing the location 8 Be sure to...

Page 8: ...th the hole in the Fabric Spa Surround Flip the flap on the Fabric Spa Surround 8 over the low section of the Inflatable Spa Liner 9 Be sure that all six cover buckles are fully inserted through the l...

Page 9: ...the Spa Cover 11 See inset drawing A Insert the inflation tube into the hole in the Support Ball 4 Inflate the Support Ball See inset drawing B When the Support Ball 4 is inflated remove the inflation...

Page 10: ...efore using the DAYBREAK 300 First turn on the DAYBREAK 300 by pressing the power button on the console Once the unit is run ning press the GFCI test button The DAYBREAK 300 should shut off Wait at le...

Page 11: ...of children USING THE CONSOLE Refer to the console diagram above The function of each console control is explained below Primer This opening allows you to prime the spa jet unit before operation see...

Page 12: ...s the pump will begin circulat ing the water for twenty minutes to filter any impuri ties Also if the water temperature falls below 40 F the pump will begin circulating and heating the water to preven...

Page 13: ...unts follow the directions on the label closely 5 Keep all containers closed tightly when not in use 6 Never add water to the chemicals always add the chemicals to the water as directed 7 Always store...

Page 14: ...doors and the room temperature is main tained at 70 F it will take approximately 20 to 28 hours for the water to reach the set temper ature b If you are using the DAYBREAK 300 outdoors it may take lon...

Page 15: ...t outdoors in cold weather you must allow the spa to maintain a safe temperature by running in automatic mode Allowing the spa jet unit to freeze will damage the unit If you do not want to use the spa...

Page 16: ...y 6 a m until 6 p m Mountain Time excluding holidays To help us assist you please be pre pared to give the following information when calling 1 The MODEL NUMBER of the product WLHS26080 2 The NAME of...

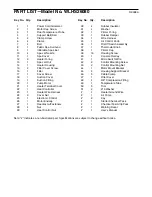
Page 17: ...eat Controller 23 1 Heater Wire Harness 24 2 Cover Nut 25 1 Electronic Control 26 1 Motor Endcap 27 1 Headrest w Fasteners 28 4 Nut 29 1 Heat Control Nut Key No Qty Description 30 4 Rubber Insulator 3...

Reviews: