10
8.
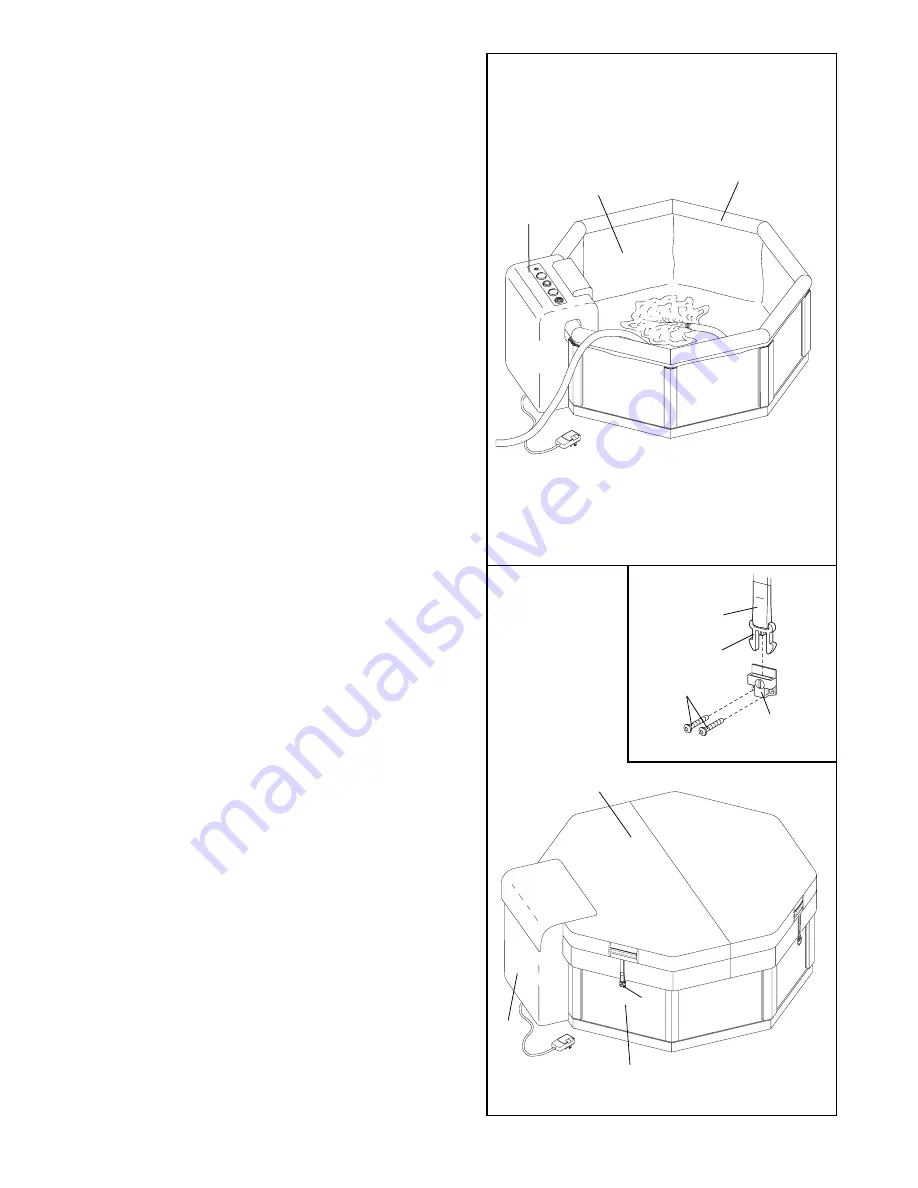
Before you fill the DAYBREAK, be sure that it is in
the position you want, and that it can be easily ser-
viced, if needed. Once the DAYBREAK is filled with
water, it will need to be drained to be moved.
Using a garden hose or other clean water source,
begin filling the DAYBREAK. Be sure to check for
wrinkles, which may form in the Spa Liner (9) as
the water begins to cover the bottom. It is very
important that you remove as many wrinkles from
the floor and sides of the DAYBREAK as possible.
To do this, you should smooth any wrinkles out
toward the sides, and then smooth the wrinkles to
the top. It is normal to have some wrinkles around
the Spa Jet Unit (13).
Continue to fill the DAYBREAK, until the jet and fil-
ter openings on the Spa Jet Unit (13) are covered
with water.
Do not fill the DAYBREAK above the
bottoms of the Edge Protectors (12).
After the DAYBREAK is full, you must prime the
Spa Jet Unit (13) before using the DAYBREAK
(see PRIMING THE SPA JET UNIT on page 12).
9.
Place the Spa Cover (11) over the Side Panels (1)
and the Spa Jet Unit (13).
Be sure that the Spa
Cover is properly centered and that the corners
of the Spa Cover line up with the corners of the
Side Panels (1).
Snap a Buckle (21) onto each of the four latches on
the Spa Cover (11).
See the inset drawing. Position one of the Buckles
(21) on the Side Panel (1) and hold the Buckle in
place, so the strap on the Spa Cover (11) is tight.
(Note: It may be easier to position the Buckles if a
second person holds the strap on the opposite side
of the Spa Cover tight.)
Do not place the Buckle
over one of the grooves in the Side Panel.
Remove the latch. Attach the Buckle to the Side
Panel with two Buckle Screws (23).
Note: It may
be helpful to use a hammer and a nail to tap
starter holes in the Side Panels. You may also
want to apply a little soap or wax to the screw
threads.
Attach the other three Buckles (21) to the Side
Panels (1) in the same manner.
8
9
13
12
9
1
13
11
21
23
Latch
Strap
21


