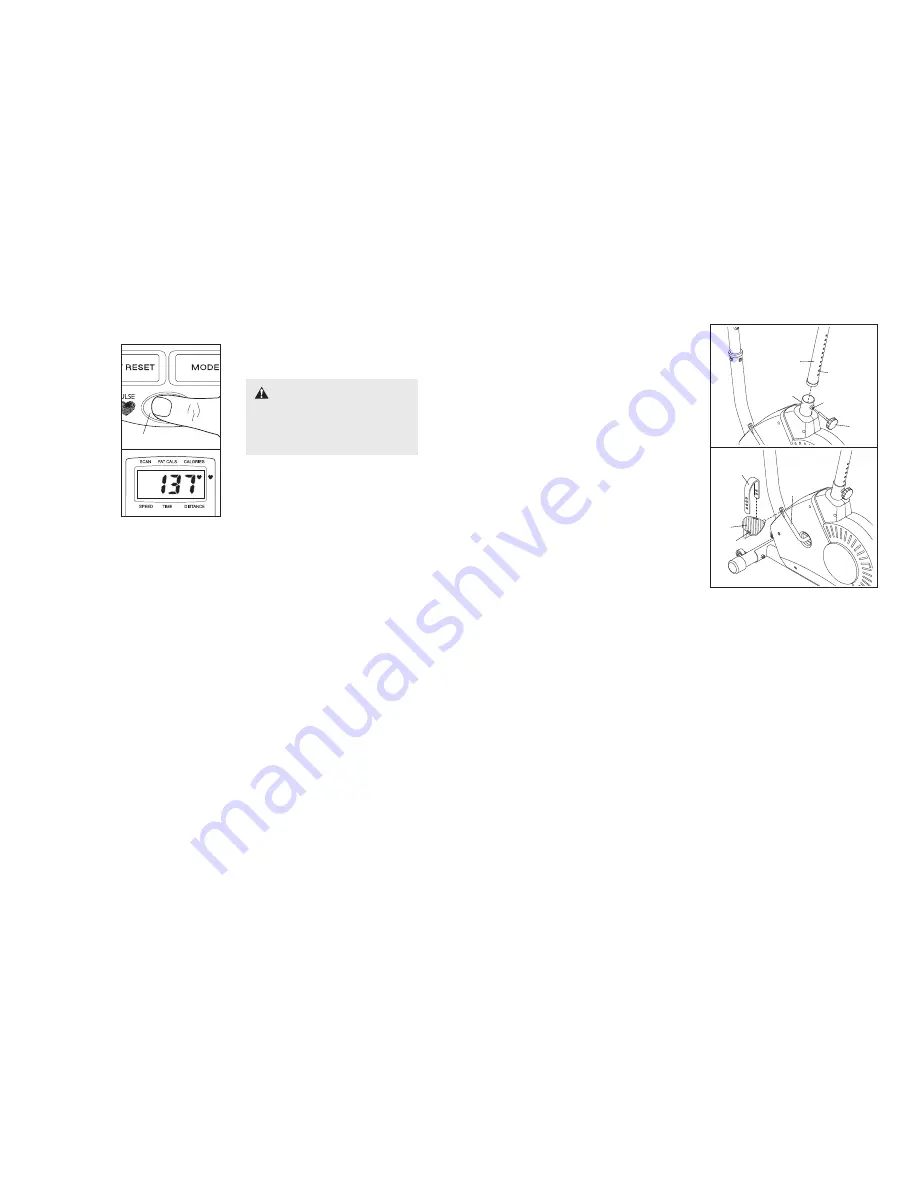
3. Measure your heart rate, if desired.
To measure your
heart rate,
stop
pedaling and
place your thumb
on the pulse sen-
sor as shown.
Do
not press too
hard, or the cir-
culation in your
thumb will be
restricted and
your pulse will
not be detected.
After a few sec-
onds, the heart-
shaped indicator
in the display will
flash
steadily,
two dashes will
appear, and then
your heart rate
will be shown. Hold your thumb on the pulse sensor
for about 15 seconds for the most accurate reading.
If the displayed heart rate appears to be too high or
too low, or if your heart rate is not displayed, lift
your thumb off the pulse sensor for a few seconds.
Then, place your thumb on the pulse sensor as
described above.
Make sure you are applying the proper amount of
pressure to the pulse sensor. Try the pulse sensor
several times until you become familiar with it.
Remember to sit still whilst measuring your heart
rate.
4. To turn off the console, simply wait for a few min-
utes.
The console has an “auto-off” feature. If
the pedals are not moved and the console but-
tons are not pressed for a few minutes, the
power will turn off automatically to save the
batteries.
7
10
10.
Make sure that all parts are properly tightened before you use the exercise cycle. Note: After assembly is
completed, some extra parts may be left over. Place a mat beneath the exercise cycle to protect the floor.
9. Identify the Left Pedal (24), which is marked with an
“L.” Using an adjustable spanner,
firmly tighten the
Left Pedal counterclockwise into the left arm of the
Crank (21). Tighten the Right Pedal (not shown) clock-
wise into the right arm of the Crank.
Important:
Tighten both Pedals as firmly as possible. After
using the exercise cycle for one week, retighten
the Pedals. For best performance, the Pedals must
be kept tightened.
Adjust the left Pedal Strap (25) to the desired position,
and press the end of the Pedal Strap onto the tab on
the Left Pedal (24). Adjust the right Pedal Strap (not
shown) in the same way.
9
8. Turn the indicated Adjustment Knob (9) counterclock-
wise and remove it. Insert the Seat Post (5) into the
Frame (1). Align one of the adjustment holes in the
Seat Post with the indicated hole in the Frame. Insert
the Adjustment Knob into the Frame and the Seat
Post, and turn the Knob clockwise until it is tight.
Make
sure that the Knob is inserted through one of the
adjustment holes in the Seat Post.
1
5
Hole
Adjustment
Holes
9
8
24
21
25
Tab
WARNING:
The pulse sensor
is not a medical device. Various factors
may affect the accuracy of heart rate read-
ings. The pulse sensor is intended only as
an exercise aid in determining heart rate
trends in general.
Pulse Sensor


