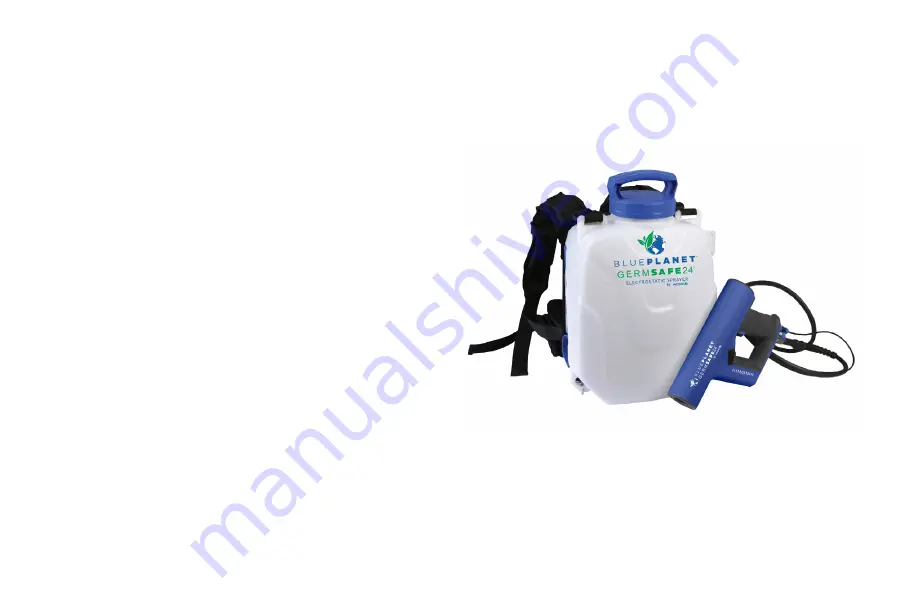
background image

17.

Copyright ©WESSOL, LLC

Copyright ©WESSOL, LLC

Proper sprayer maintenance is crucial to ensure the extended life and performance of your sprayer. Many spray materials can harden if left 

in the sprayer, causing clogs in the nozzle or hose. Gasoline should never be used to clean out your sprayer.

STEP 3.

AFTER YOU FINISH SPRAYING

D).

Store the sprayer in a clean, dry, and shaded location to protect it from extreme heat or 

frost.

*

For long-term storage, regular charging of the battery is required to maximize battery life. 

Check the battery level using the indicator lights every 4 weeks. Recharge the battery if it 

falls below 3 bars. Do not allow the battery to fully discharge.

Summary of Contents for BLUEPLANET GERMSAFE24

Page 1: ... By OPERATION GUIDE 2 5 Gallon Battery Powered Electrostatic Backpack Sprayer ...

Page 2: ...2 Copyright WESSOL LLC TABL OF CONTENT 4 WARNINGS 5 SAFETY 8 REGISTER YOUR SPRAYER 10 WHAT S IN THE BOX 9 SPRAYER CAPABILITIES ...

Page 3: ...3 Copyright WESSOL LLC 12 ASSEMBLY SPRAYING 18 BATTERY CHARGING 24 WARRANTY POLICY 20 PARTS ACCESSORIES 22 TROUBLESHOOTING CLEAN WITH CONFIDENCE ...

Page 4: ...ly carry by the ComfortStraps handle Only spray outdoors when the air is calm no wind or air movement to prevent chemical spray from drifting into unintended areas Keep sprayer and all chemicals out of the reach of children Remove chemicals and thoroughly clean the sprayer after each use Failure to clean the sprayer may cause contamination of subsequent applications will cause premature spray wear...

Page 5: ...y instructions and proper use practices Avoid spraying on windy days Spraying in windy conditions could cause chemicals to be blown onto persons plants or objects that are not intended to be sprayed Do not store chemicals in the tank Chemicals can degrade seals and hoses Drain and clean sprayer after each use Failure to do so may void the sprayer warranty Remove gloves before handling the battery ...

Page 6: ...he correct power setting for your application Using the correct PSI and flow rate will result in a safer and more thorough treatment For calibration resources please contact technical support Note Always refer to local state and federal laws and regulations regarding your application Do not use the sprayer if the power switch is not functioning correctly Any power tool that cannot be controlled wi...

Page 7: ...eye protection Protective equipment such as a respiratory mask non skid safety shoes hard hat or hearing protection used for appropriate conditions will reduce the chance of personal injuries Prevent unintentional starting Ensure the switch is in the off position before connecting the power source battery pack picking up or carrying the sprayer Do not overreach Keep proper footing and balance at a...

Page 8: ... the website below https germsafe24 com pages register Please read and follow this manual carefully to ensure that you get the most out of your new sprayer If you need assistance with the assembly or operation of your sprayer please don t hesitate to contact us via the support methods below germsafe24 com info GermSafe24 com 800 581 5088 ...

Page 9: ... a lightweight spray gun Simply fill up your sanitizing solution in the backpack and strap on the ComfortStraps to start spraying 2 5 GALLON ELECTROSTATIC SPECIFICATIONS Model Number XCEAHX Polarity Positive Ions Gun 12V Grounded Electrostatic Pump Type Diaphragm Battery 18V 5 2Ah Lithium Ion Pressure 85 psi with included nozzles Battery Charger 21V 2 5A Spray Distance Up to 8 feet Coverage per Ta...

Page 10: ...Copyright WESSOL LLC 10 1 2 3 4 5 6 7 8 9 10 11 12 13 WHAT S IN THE BOX ...

Page 11: ... NOZZLE WRENCH PART NUMBER XCAAJG ELECTROSTATIC SPRAY GUN PART NUMBER XCAAHT 18V 5 2AH LITHIUM ION BATTERY PART NUMBER FZAAEM 21V 2 5A BATTERY CHARGER PART NUMBER FZAAEL 40 MICRON STAINLESS STEEL MISTING NOZZLE PART NUMBER XCAAKF 80 MICRON STAINLESS STEEL MISTING NOZZLE PART NUMBER XCAAKG 120 MICRON STAINLESS STEEL MISTING NOZZLE PART NUMBER XCAAKH GUN HOLSTER KIT PART NUMBER XCRALP 1 7 2 8 3 9 4 ...

Page 12: ...zle is pre installed in the gun C Next slide the adjustable strap through the top tank loop Continue by sliding the strap over and under the buckle fitting Lightly tug at the strap to make sure it s secure Repeat on other side B Bring the ComfortStraps 5 to the bottom of the tank 3 Secure lower strap clips to the tank loops near the bottom of the tank Repeat on other side STEP 1 ASSEMBLING YOUR SP...

Page 13: ...tatic hose to gun F Place the gun holster 13 on the molded holster bracket on the tank While holding the holster place nut on one side of the hexagonal slots and screw the bolt through the other side until it fastens into the nut E Take the electrostatic gun 1 and attach it to the threaded fitting on the end of the hose 6 Tighten the fitting to ensure the gasket properly seals the connection STEP ...

Page 14: ...the tank and carefully pour the solution through the tank strainer Securely tighten the tank lid B Determine the nozzle you want to use see below To remove the current nozzle use the nozzle wrench 9 by fitting the 12mm hex socket over the nozzle and rotate until removed 11 40 Micron nozzle 4min Dwell Time 12 80 Micron nozzle 5min Dwell Time 13 120 Micron nozzle 8min Dwell Time C Place any unused n...

Page 15: ...n Once illuminated red light indicates the electrostatic feature is on To toggle on off press once To turn on Turbo Boost Fan flip the switch on the side of the gun Wait until you hear fan There are 3 spray distance capabilities Begin spraying by squeezing the black spray trigger on the handle of the spray gun STEP 2 PREPARING TO SPRAY O Close Spray Turbo Boost Mode Off Medium Spray Low Turbo Boos...

Page 16: ...n the spray tank with warm soapy water Then spray fresh water through the sprayer for 3 to 5 minutes to completely clear the tank pump gun wand and any used nozzles of chemicals C Dry the sprayer tank and clear the nozzle of any buildup B Disconnect the hose from the spray gun and let the hose hang down towards the ground in order to drain the hose of any liquid ...

Page 17: ... should never be used to clean out your sprayer STEP 3 AFTER YOU FINISH SPRAYING D Store the sprayer in a clean dry and shaded location to protect it from extreme heat or frost For long term storage regular charging of the battery is required to maximize battery life Check the battery level using the indicator lights every 4 weeks Recharge the battery if it falls below 3 bars Do not allow the batt...

Page 18: ...seek medical help Liquid ejected from the battery may cause irritation or burns Do not use a battery pack or sprayer that is damaged or modified Damaged or modified batteries may exhibit unpredictable behavior resulting in fire explosion or risk of injury Do not expose a battery pack or sprayer to fire or excessive temperature Exposure to fire or temperature above 265ºF 130ºC may cause explosion F...

Page 19: ...ing of the battery is required It is not necessary to drain the battery pack completely before recharging BATTERY PACK PROTECTION FEATURES Lithium ion battery packs are designed with features that protect the lithium ion cells and maximize battery life If the sprayer stops during use release the trigger to reset and resume operation If the sprayer still doesn t work the battery needs to be recharg...

Page 20: ...ACEMENT PARTS XCRAJL 2 5 Gallon 10 Liter FZAAEM 18V 5 2Ah Battery XCAAHT Electrostatic Spray Gun FZAAEL 21V 2 5Ah Battery Charger FZRABW Tank Strainer XCAAKK 2 5G ComfortStraps XCRAGV Tank Lid FZRAGL Pump Inlet Filter XCRALP Gun Holster Kit ...

Page 21: ...RY REPLACEMENT PARTS XCRAJH Electrostatic Charge Line XCAAJG Nozzle Wrench XCRAJF Pump XCAAKF 40 Micron Stainless Steel XCRAJK DC to DC XCAAKJ ESD Grounded Foot Strap XCAAKG 80 Micron Stainless Steel XCAAKH 120 Micron Stainless Steel ...

Page 22: ...nections on power switch Remove back cover plate Using pliers move all three wires on the power switch over to the neighboring side to the extra set of wire contacts Defective micro switch Purchase replacement part or contact Support for help Defective circuit board Purchase replacement part or contact Support for help Leaks from gun nozzle area Loose connection Ensure spray gun is fully tightened...

Page 23: ...harger using a multimeter Replace if necessary Damaged lithium cells If the battery receives no reading from a multimeter a replacement battery is needed Pump makes a sound when sprayer is on and output is limited Clog in filter or nozzle Check filter or nozzles for clog Using warm water throughly clean the components Clog in pump Open the pump and clean Contact Support for assistance Leak from sp...

Page 24: ...d product registration to file a claim under this warranty If the product fails to function as intended DO NOT RETURN IT TO THE STORE call our customer support hotline at 800 581 5088 email info GermSafe24 com or submit a contact form at germsafe24 com warranty PRODUCT REGISTRATION All sprayers purchased from GermSafe24 or an authorized distributor must be registered online to validate the warrant...

Page 25: ...le for any incidental special consequential or punitive damages or for any costs attorney fees expenses losses or delays alleged to be as a consequence of any damage to failure of or defect in any product including but not limited to any claims for loss of profits Some states do not allow limitations on how long an implied warranty lasts or the exclusion or limitation of incidental or consequentia...

Page 26: ... germsafe24 com 800 581 5088 info GermSafe24 com WESSOL LLC ...

Reviews: