


1
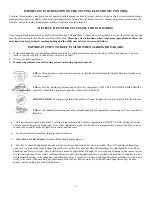
IMPORTANT INFORMATION ON PROTECTING ELECTRONIC CONTROL
To protect bread maker’s electronic control against possible damage caused by surges in electrical power line, we recommend using a
surge protector device, available in the electronic department of most discount/hardware stores. Simply plug surge protector into the
electrical outlet, then plug bread maker cord into receptacle of surge protector.
HELPFUL HINTS FOR SUCCESSFUL BREAD BAKING
To ensure great baking results in your West Bend Bread and Dough Maker, please take a few minutes to review the following tips and
read the basic instructions in the front section of this book.
Please pay close attention on how to measure ingredients, as this is the
most important step in bread machine baking and the difference between success and failure.
IMPORTANT TIPS TO KEEP IN MIND WHEN MAKING BREAD ARE:
•
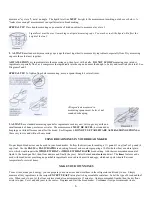
Make sure knead bar is in pan before adding ingredients. Simply match hole in bar with shape of shaft and slide on. You may
need to twist bar slightly to slide all the way down on shaft.
•
Always use fresh ingredients.
•
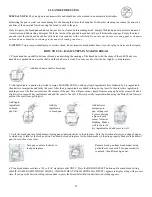
Measure ingredients accurately using correct measuring cups and spoons:
USE
see-through glass or plastic measuring cups with graduated markings for liquids. Measure liquids at eye
level for accuracy.
USE
set of solid, nesting type measuring cups for dry ingredients. ALWAYS SPOON DRY INGREDIENTS,
especially bread flour, into measuring cups, then level with a knife.
DO NOT SCOOP
measuring cups into flour as this will cause dough to be too dry and result in short loaves.
USE
set of graduated measuring spoons for smaller quantities of ingredients, measuring level, not rounded or
heaping.
•
Add ingredients to pan in this order: 1) all liquid ingredients first, 2) all dry ingredients, EXCEPT YEAST, putting salt in one
corner of pan to keep away from yeast. 3) level dry ingredients in pan, divide butter or margarine into 4 pieces and place a piece
in each corner, and 4) make a slight well in center and add yeast.
•
Lock pan securely in machine, turning counterclockwise.
•
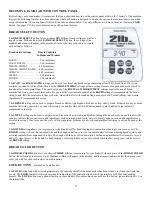
Make
bread
and
bread color
selections
first
, then turn machine on.
•
Feel free to check dough during knead cycle for any minor adjustment that may be needed. After 8-10 minutes of kneading,
open cover to look at and touch dough. (Opening cover at this time does not affect performance). Dough should be in a ball on
knead bar and feel a bit sticky. This is perfect and needs no adjustment. If dough is very sticky and clinging in one corner or pan,
it is too wet and needs flour. Add 1 tablespoon flour at a time until dough forms into a soft ball on knead bar. If dough is too dry
and the machine seems to be struggling, add lukewarm water, 1 teaspoon at a time, until dough becomes soft and elastic and a bit
sticky to the touch. When making any adjustment, always allow flour or water to be blended into dough thoroughly, about 1
minute, before making any further adjustment.
Summary of Contents for L4972T
Page 9: ...8...