background image

3

Notes:

• Choose the mounting location where 

the unit will not interfere with the 
normal driving function of the driver.

• Before finally installing the unit, 

connect the wiring temporarily and 
make sure it is all connected up 
properly and the unit and the system 
work properly.

• Use only the parts included with the 

unit to ensure proper installation.
The use of  unauthorized parts can 
cause malfunctions.

• Consult with your nearest dealer if 

installation requires the drilling of holes
or other modifications of the vehicle.

• Install the unit where it does not get in

the driver’s way and cannot injure the
passenger if there is a sudden stop, 
like an emergency stop.

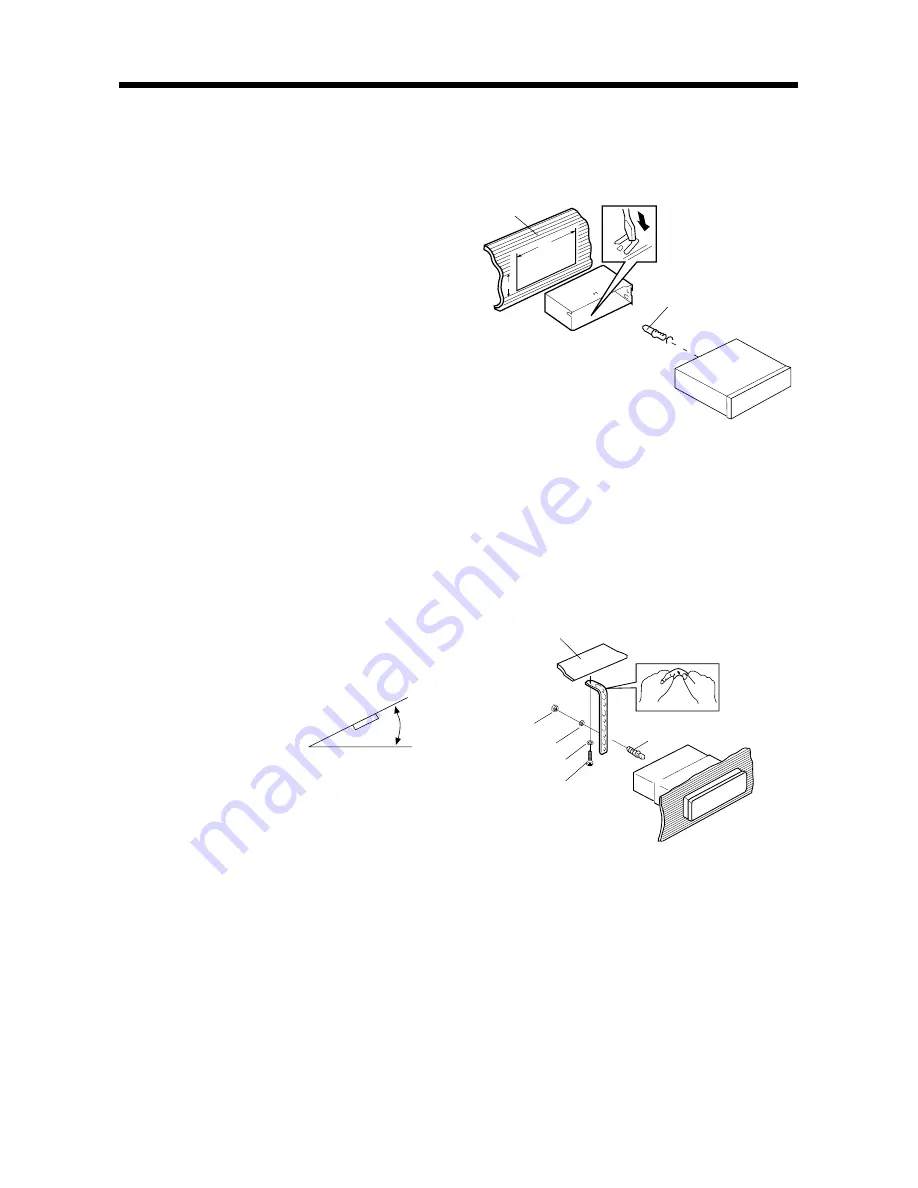
• If installation angle exceeds 30˚ from 

horizontal, the unit might not give its 
optimum performance.

• Avoid installing the unit where it would

be subject to high temperature, such 
as from direct sunlight, or from hot air,
from the heater, or where it would be 
subject to dust, dirt or excessive 
vibration.

DIN FRONT/REAR-MOUNT

This unit can be properly installed either
from “Front” (conventional DIN Front-
mount) or “Rear” (DIN Rear-mount
installation, utilizing threaded screw holes
at the sides of the unit chassis).
For details, refer to the following
illustrated installation methods.

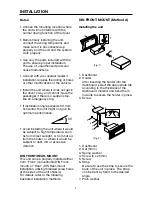
DIN FRONT-MOUNT (Method A)

Installing the unit

1. Dashboard
2. Holder

After inserting the holder into the 
dashboard, select the appropriate tab
according to the thickness of the 
dashboard material and bend them 
inwards to secure the holder in place.

3. Screw

1. Dashboard
2. Nut (5mm)
3. Spring washer
4. Screw (5 x 25mm)
5. Screw
6. Strap

Be sure to use the strap to secure the
back of the unit in place.  The strap 
can be bent by hand to the desired 
angle.

7. Plain washer

30˚

(Fig. 1)

1

3

2

182

53

(Fig. 2)

1

2

6

5

4

3

7

INSTALLATION

Summary of Contents for 2641223

Page 1: ...ine Audio System PLL Synthesizer Stereo Radio Digital Compact Disc Player Automatically Memory Storing Fold Down Full Detachable Panel Auxiliary Input Function Preset Equalization Remote Control OPTIO...

Page 2: ...A 3 Installing the unit 3 Removing the unit 4 DIN Rear Mount Method B 4 Using the Detachable Front Panel 5 Wiring Connection 6 Operation 7 General Operation 7 Radio Operation 8 CD Operation 9 Specifi...

Page 3: ...ing the unit where it would be subject to high temperature such as from direct sunlight or from hot air from the heater or where it would be subject to dust dirt or excessive vibration DIN FRONT REAR...

Page 4: ...IN REAR MOUNT Method B Installation using the screw holes on the sides of the unit Fastening the unit to the factory radio mounting bracket 1 Select a position where the screw holes of the bracket and...

Page 5: ...roperly press control button may not function and display may be missing some segments Pressing the OPEN button and then reinstall the front panel again Precautions when Handling 1 Do not drop the fro...

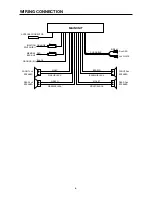
Page 6: ...WN BROWN BLACK VIOLET VIOLET BLACK MAIN UNIT GREY GREY BLACK FRONT Lch SPEAKER REAR Lch SPEAKER FRONT Rch SPEAKER REAR Rch SPEAKER Rch RED Lch WHITE GREY RCA CABLE ANTENNA CONNECTOR ORANGE RED BLACK G...

Page 7: ...urn off the unit FACEPLATE RELEASE Press OPEN button 7 to detach the removable faceplate SOUND ADJUSTMENT Press SEL button 10 shortly to select the desired adjustment mode The adjustment mode will cha...

Page 8: ...shing RESET Reset button 24 is placed on the front panel and must be activated with either a ball point pen or thin metal object The reset button is to be activated for the following reasons Initial i...

Page 9: ...ove to the previous track or the following track Track number shows on display During CD operation hold SKIP MANU button 17 or SKIP MANU button 16 to fast reverse or fast forward CD play starts from w...

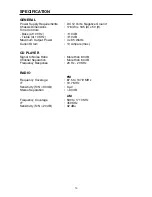
Page 10: ...Output Power 4 x 35 Watts Current Drain 10 Ampere max CD PLAYER Signal to Noise Ratio More than 60 dB Channel Separation More than 60 dB Frequency Response 20 Hz 20 KHz RADIO FM Frequency Coverage 87...

Page 11: ...defective disc new one Temperature inside the car Cool off or until the ambient is too high temperature return to normal Condensation Leave the player off for an hour or so then try again No sound Vo...

Reviews: