Page 14
Appendix A – Quick Start Help
This section is provided to enable installers with a check list of things to do when installing the system.
1)
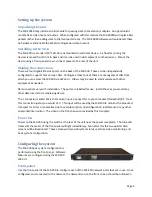
Mount the device and make all the required connections. Power the system on. For more
information follow the instruction above in the section: Setting up the system.
2)
Use the front panel to configure the network interfaces. See Configuring the system for more
information on this topic
3)
Configure the datacasting output, a heartbeat should not be detectable in the transport stream.
Bench test if required. Once bench test is complete, repeat steps 1 – 3 using station transport.
4)
Connect the RF and check the monitor page in the Web UI to see that the heartbeat was
detected. It should discover the channel and show an analysis of the transport stream. Check
the front panel to verify that the station video is present.
5)
Allocate space (NUL packets) in the transport stream for datacasting providers. Verify NUL
packet bandwidth using the monitor page of the WebUI.
6)
Enable the datacasting provider(s).
7)
Contact the datacasting provider to initiate content delivery testing. Verify the content
insertion using the monitor page of the WebUI.
8)
Enable any required TS captures.


