Mounting
Attaching to a Camera or the Cold Shoe Stand
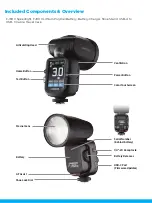
1. Ensure the FJ80 II is
OFF
and rotate the dial all the way to the right.
2. Slide the FJ80 II Speedlight base into the camera’s hot shoe or cold shoe stand with the
touchscreen facing the same direction as the rear of the camera or channel opening on the back
of the shoe stand. (Note: Using the FJ80 II M on Sony cameras REQUIRES the #4711 FJ Adapter for
Sony Cameras.)
3. Rotate the
Shoe Lock
dial left until it’s securely mounted to the camera. Do not overtighten.
Detaching from a Camera or the Cold Shoe Stand
1. Ensure the FJ80 II is
OFF
.
2. Rotate the
Shoe Lock
dial left to right. (Note: Ensure that the dial has been completely moved
to the right. Otherwise, the locking pin may be permanently damaged upon removal of the
speedlight.)
3. Securely grasp the sides of the FJ80 II Speedlight, gently slide the speedlight towards the rear
of the camera or cold shoe stand, and completely remove it from the camera’s hot shoe or cold
shoe stand.
Note: Never force or remove the FJ80 II into or away from the camera’s hot shoe.
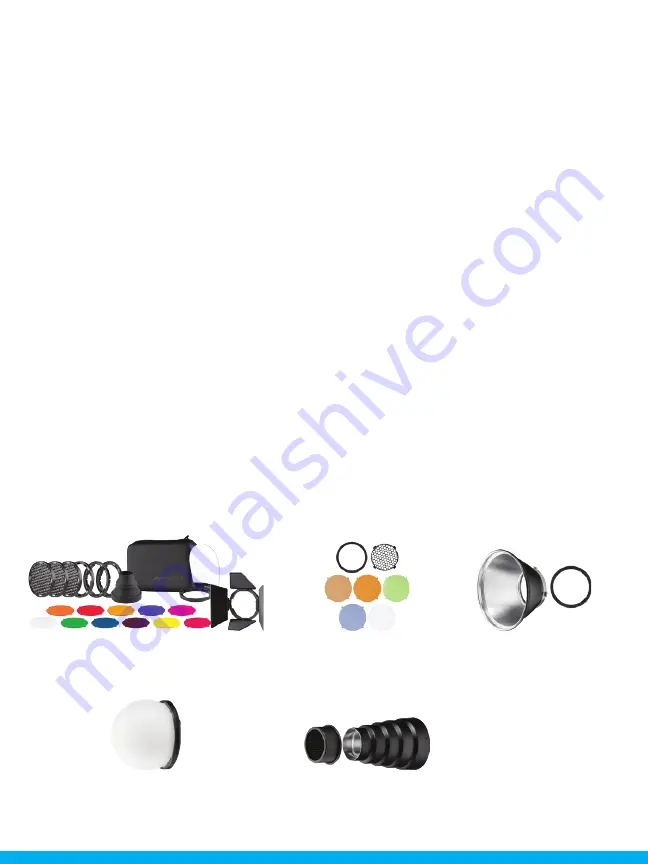
Attaching & Removing Modifiers
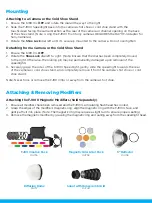
Attaching the FJ80 II Magnetic Modifiers (Sold Separately)
1. Ensure all modifiers have been removed and the FJ80 II’s articulating flash head has cooled.
2. Grasp the edges of the modifier’s magnetic ring, align the magnetic ring with the FJ80 II’s face, and
gently affix it into place. (Note: The magnetic ring may require a slight turn to ensure proper seating.)
3. Remove the magnetic modifier by grasping the magnetic ring and pulling away from the speedlight head.
FJ80 Creative Pack
#4755
Diffusion Dome
#4757
5" Reflector
#4748
Snoot with Honeycomb Grid
#4746
Magnetic Grid & Gel Pack
#4758

