Section BXB-19D-20A
030-100689 Rev. A
R
6
1009IARA
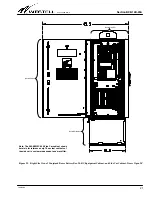
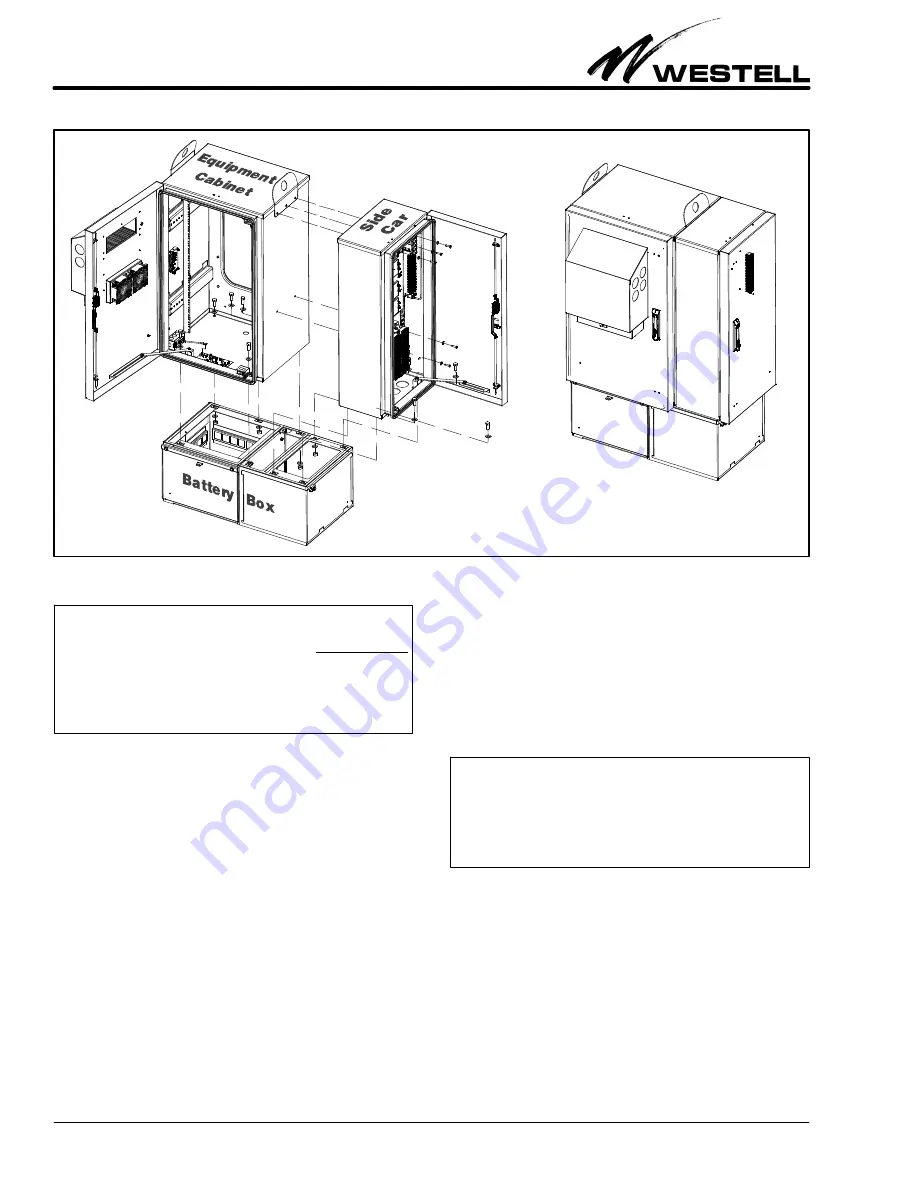
Figure 8.
Mounting the Equipment Cabinet and Side Car Cabinet on the Battery Box
Line up the mounting holes
and install hardware
Conjoined System
- KNOCK-OUT REMOVAL NOTE -
Always remove knock-outs (in the Boxer cabinet mounted
above the battery box) where holes are desired before mounting
the battery box or cabinet, regardless of the type of knock-out and
regardless of the order of the mounting steps. All knock-outs
should be knocked out from the inside of the cabinet, except for
the small 0.575" knock-outs (which should be knocked out from
the outside of the cabinet) or the concentric knock-outs.
3.5.2
Joining the Boxer Cabinets and the Battery Box
Regardless of the mounting type, attach the two Boxer cabinets
to the battery box prior to mounting or installing the conjoined
units. To join the units, follow the steps below:
1.
Open and prepare all Boxer units.
Open the door of both
Boxer cabinets and remove both access panels of the bat-
tery box, for easier handling and mounting hole access.
2.
Locate and open parts/hardware kit.
Find the bag of hard-
ware and parts located inside the battery box. Open the
bag and spread out the parts for easy access.
3.
Remove knock-outs in the both Boxer cabinets.
If not al-
ready done, remove any required knock-outs in the
equipment cabinet and the side car cabinet (see Paragraph
3.5.1 and the
KNOCK-OUT NOTE
at this time). Also, re-
move the small knock-outs in the right side wall of the
equipment cabinet (where the side car cabinet will attach
to it).
4.
Set equipment cabinet on battery box.
Lift the Boxer
equipment cabinet and place it on top of the battery box.
Slide the cabinet to align the five holes in the top surface
of the battery box with the matching holes in the bottom
of the equipment cabinet.
5.
Attach equipment cabinet to battery box.
After aligning all
holes, secure the units together using the included hard-
ware (insert, thread and tighten a bolt (plus a washer)
through each set of aligned holes. Secure bolts with nuts.
- LIFT-EAR NOTE -
The lift-ear on the right side of the 20-RU Boxer equipment
cabinet should be removed prior to mounting the side car
cabinet. Use the same lift-ear mounting hardware to fasten the
side car cabinet to the equiment cabinet, and re-install the
lift-ear between the cabinets prior to threading and tightening the
hardware.
6.
Set side car cabinet on battery box.
Lift the Boxer side car
cabinet and place it on top of the battery box. Slide the cab-
inet to align the four holes in the top surface of the battery
box with the matching holes in the bottom of the equip-
ment cabinet. Also align the holes in the back wall of the
side car with the holes in the right wall of the equipment
cabinet.
7.
Simultaneously attach side car cabinet to equipment cabi-
net and battery box.
After aligning all holes, secure the
units together using the included hardware (insert, thread
and tighten a bolt (plus a washer) through each set of
aligned holes. Alternate the bolt installation between the
bottom bolts and rear-wall bolts (so that the first bolt to be


