11
Westendorf Manufacturing Co., Inc.
WESTENDORFMFG RR315270
MAX Loaders
SECTION 3: MOUNTING / DISMOUNTING
A
Mounting
Bracket
WARNING!: Escaping
fluid under pressure can
penetrate skin causing serious injury. Avoid hazard by
relieving pressure before connecting or disconnecting
pressure lines. Protect hands& body from high pressure
fluids. If injured seek immediate medical attention.
Revolutionary Freedom Mount System
• Stand-free, tool-free mounting system
• Smart-Lock self-locking, self-standing,
and self-tightening system
• Simple concept that is easy to use
Patented Freedom-Mount™ Smart-Lock
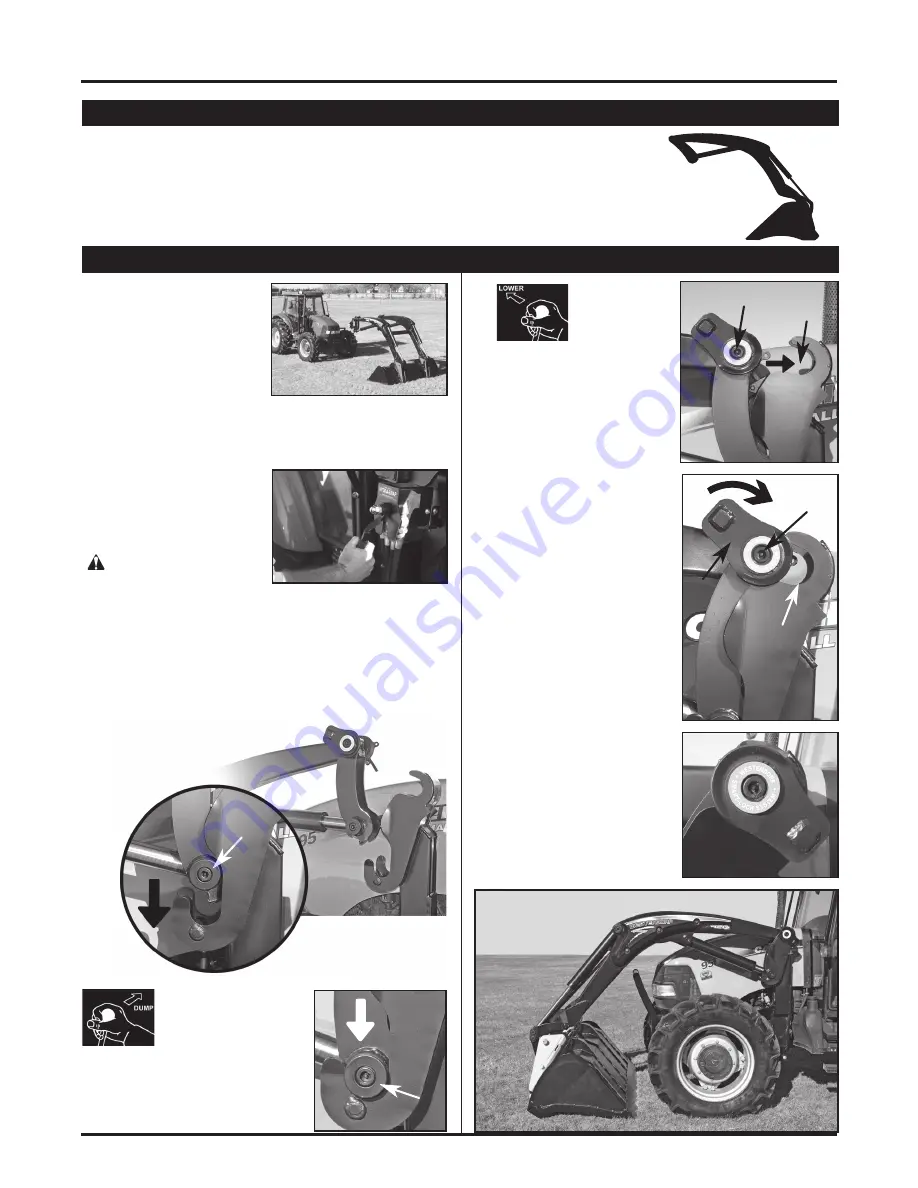
1. Slowly drive tractor
up to loader, centering
between loader arms.
Watch for obstructions.
Drive forward until
mounting brackets are
close to loader towers.
2. Place tractor transmission in park and relieve tractor
hydraulic pressure before continuing to step 3.
See
your tractor Operator’s Manual for correct procedure.
Loader Mounting
3. Connect hoses and
electronic circuit with
the Hydra-Snap™. See
section 4 for operation.
5. Extend BUCKET
cylinders to engage
lower tower bushing
(A) into mounting
bracket, as shown.
Mounting
Bracket
4.
Slowly
drive tractor forward between loader arms
aligning lower tower bushing (A) with mounting
bracket until bushings
contact bracket.
A
6.
With tractor
in neutral,
Retract LIFT
cylinders to
engage the upper tower
bushing (B) into the
receiver (C) on the
mounting bracket.
7. Continue retracting LIFT
cylinders until bushing (B)
is fully seated in receiv-
er (C) and Smart-Lock
latch (D) rotates over the
mounting bracket, locking
the loader to the tractor.
8. Be certain both latches
(D) have rotated over
the mounting brackets
into the locked position.
9. Lift arms and rollback
bucket. Loader is now
ready for operation.
YOUR LOADER
IS MOUNTED
Mounting
Bracket
Tower
B
C
• Quick mounting and dismounting to
free tractor for other chores
• Easily and sturdily stored…
Ready when needed in just minutes
C
D
B
Mounting
Bracket
LOCKED POSITION


