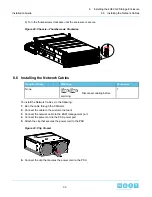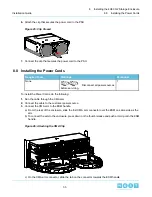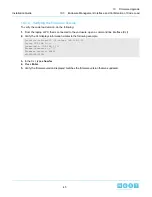
7. Verify a similar result appears.
00
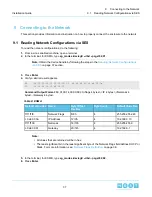
60 01 00 14 00 00 00 00 00
ff ff ff f0 c0 a8 00 0a
10
ff ff ff 00 c0 a8 00 01
Table 9: ESM B
Default Value Dec
Byte Count
Byte Offset
Dec/Hex
Name
Default Value Hex
255.255.255.240
4
8/8h
Network Flags
ff ff ff f0
192.168.0.10
4
12/Ch
IP Address
c0 a8 00 0a
255.255.255.0
4
16/10h
Netmask
ff ff ff 00
192.168.0.1
4
20/14h
Gateway
c0 a8 00 01
9.1.1
Network Flags Definition
The enclosure configuration can be modified by setting configuration options in Mode page 20h.
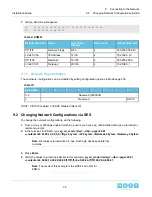
Table 10:
0
1
2
3
4
5
6
7
Bytes/Bits
Reserved (000000h)
0-2
DHCP
Reserved
3
DHCP: 1=DHCP enabled, 0=DHCP disabled (static IP)
9.2
Changing Network Configurations via SES
To change the network configurations, do the following:
1. From a Linux or Windows enabled machine, ensure you have sg3_utils installed and open a terminal or
command prompt.
2. In the terminal, for ESM A, type sg_wr_mode <dev> --dbd --page=20,01
--contents=e0,01,00,14,0,0,0,0,<flags 4 bytes>,<IP 4 bytes>,<Netmask 4 bytes>,<Gateway 4 bytes>.
Note: All values returned will be in hex. Each byte will be separated by
commas.
3. Press Enter.
4. Verify the values returned look similar to this example: sg_wr_mode /dev/sg3 --dbd --page=20,01
--contents=e0,02,00,14,00,00,00,00,ff,ff,ff,ff,c0,a8,00,0a,ff,ff,ff,00,C0,A8,00,01.
Note: The result of this example is the DHCP set to ON for
ESM A.
38
9
Connecting to the Network
Installation Guide
9.2
Changing Network Configurations via SES

