background image


18/24 


MIU.SHSB.I-GB.000.04.20 

9.3-Ventilconvettore – fan-coil 

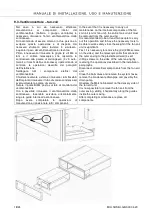
Nel 

caso 

in 

cui 

sia 

necessario 

effettuare 

manutenzione 

ai 

componenti 

interni 

del 

ventilconvettore  (batteria  o  gruppo  ventilante)  è 
necessario  rimuovere  l’intero  ventilconvettore  dalla 
controcassa. 
Si  raccomanda  di  essere  almeno  in  due  persone  a 
svolgere  questa  operazione  e  di  disporre  dei 
necessari  strumenti  poter  lavorare  in  sicurezza, 
inquanto il peso del ventilconvettore è rilevante. 
Prima  è  necessario  rimuovere  la  griglia  (2  viti  M4  ai 
lati)  e  il  collare  telescopico  che  raccorda  la 
controcassa  alla  parete  di  cartongesso  (4  viti  auto-
foranti  ai  fianchi  della  controcassa)  ripercorrendo  al 
contrario  le  operazioni  descritte  dei  paragrafi 
dell’installazione. 
Scollegare 

tutti 

componenti 

elettrici 

dal 

ventilconvettore. 
Chiudere le valvole a sfera e rimuovere i tubi flessibili 
dell’impianto; rimuovere il tubo di scarico condensa ed 
eventualmente la pompa di scarico. 
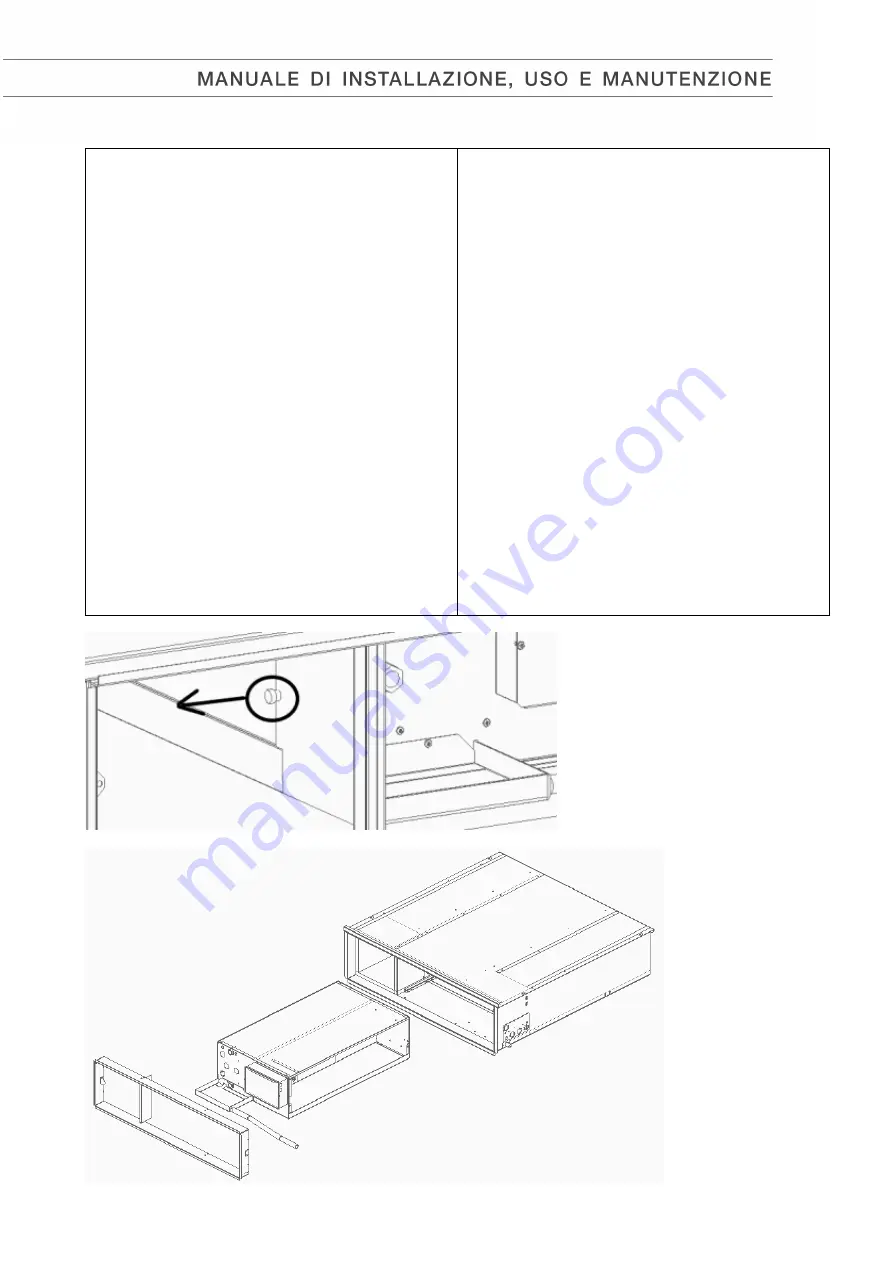
Svitare  il  pomello  M4  posto  sul  lato  di  mandata  del 
ventilconvettore. 
Ora  è  possibile  rimuovere  il  ventilconvettore  dalla 
controcassa,  facendolo  scivolare  orizzontalmente 
lungo le guide interne alla controcassa. 
Dopo 

avere 

completato 

le 

operazioni 

di 

manutenzione, riposizionare tutti i componenti. 

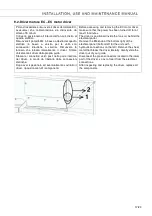
In the event that it is necessary to carry out 
maintenance on the internal components of the fan 
coil unit (coil or fan unit), the entire fan coil unit must 
be removed from the outer casing. 
It is recommended to be at least two people to carry 
out this operation and to have the necessary tools to 
be able to work safely, since the weight of the fan coil 
unit is significant. 
First, it is necessary to remove the grid (2 M4 screws 
on the sides) and the telescopic collar that connects 
the outer casing to the plasterboard wall (4 self-
drilling screws on the sides of the outer casing) by 
reversing the operations described in the installation 
paragraphs. 
Disconnect all electrical components from the fan coil 
unit. 
Close the ball valves and remove the system hoses; 
remove the condensate drain pipe and possibly the 
drain pump. 
Unscrew the M4 knob located on the delivery side of 
the fan coil unit. 
It is now possible to remove the fan coil from the 
outer casing, sliding it horizontally along the guides 
inside the outer casing. 
After completing maintenance, replace all 
components. 


Summary of Contents for SHS B Series

Page 1: ...SHS B S E R I E S Smart Hotel Solution I GB MANUALE INSTALLAZIONE USO E MANUTENZIONE INSTALLATION USE AND MAINTENANCE MANUAL ...

Page 2: ......

Page 3: ...E HYDRAULIC CONNECTIONS 11 6 1 TUBI ALIMENTAZIONE BATTERIA COIL PIPE 11 6 2 TUBO SCARICO CONDENSA DRAIN PIPE 12 7 INSTALLAZIONE DELLA GRIGLIA GRILLE INSTALLATION 14 8 CONNESSIONI ELETTRICHE ELECTRIC CONNECTIONS 15 9 MANUTENZIONE MAINTENANCE 16 9 1 Filtro filter 16 9 2 Driver motore EC EC motor driver 17 9 3 Ventilconvettore fan coil 18 10 RICERCA DEI GUASTI TROUBLE SHOOTING 19 14 SMALTIMENTO DISPO...

Page 4: ...tato del prodotto rispetto al momento del ricevimento Inoltre in questi casi si considera decaduta la garanzia ufficiale sul prodotto Il presente manuale deve essere conservato insieme alla macchina The SHS serie units are designed for cooling heating dehumidification and filtration in residential buildings offices public places or similar with false ceiling The following applications are not allo...

Page 5: ...l outlet 5 Scarico condensa Drain connection 6 Scarico condensa con pompa Drain connection with pump 7 Ingresso cavi elettrici Electrical wires inlet 8 Collare telescopico per griglia Telescopic collar for grille 9 Fori per ingresso tubi idraulici per versione base senza valvole Holes for hydraulic pipes inlet for basic version without valves Unità con batteria standard ST attacchi destri Unit wit...

Page 6: ...IONS 320 634 1260 A mm 750 1010 1270 B mm 950 950 1050 C mm 940 940 1040 D mm 260 260 270 1 1 2 2 1 2 3 1 2 4 1 2 5 mm d 16 6 mm d 6 PESI WEIGHTS 320 634 1260 Peso unità Unit weight kg 27 35 45 Volume interno batteria principale Inner volume main coil litri 1 02 1 59 2 16 Volume interno batteria ausiliaria Inner volume litri 0 26 0 40 0 54 ...

Page 7: ...e non impilare un maggior numero di scatole rispetto a come si trovano al momento della consegna Controllare che l etichetta identificativa riporti lo stesso codice ordinato e che non siano presenti danni all imballo o al prodotto In caso di non conformità contattare immediatamente la ditta produttrice o il venditore e non procedere con l installazione Non disperdere l imballaggio in ambiente smal...

Page 8: ...sempre l unità in posizione orizzontale Se dovesse essere necessario movimentare l unità in posizione verticale tenere sempre il pannello con la presa di aria sterna verso il basso Applicare quattro barre filettate M8 non fornite al soffitto tramite tasselli non forniti o altri dispositivi di fissaggio Assicurarsi che i componenti siano adatti a sopportare il peso della macchina La lunghezza delle...

Page 9: ... rods through the slots on the top panel of the machine and fix them with nut and M8 lock nut not supplied Check that the machine is perfectly horizontal and that it is aligned with the false ceiling If necessary adjust the height using the nut and lock nut that lock the threaded bar to the bracket Costruire la parete di cartongesso in modo che questa risulti a contatto con la parte frontale dell ...

Page 10: ... drilling screws using the holes already made on the sides of the collar Dopo aver completato tutti i collegamenti idraulici ed elettrici realizzare il cartongesso sotto all unità In funzione della tipologia di controsoffitto e di luogo di installazione si possono usare anche altre procedure purché siano conformi alle normative vigenti e non mettano a rischio l incolumità delle persone After compl...

Page 11: ...on on the outer casing surfaces during the summer when the fan is not in operation it is recommended to stop the flow of chilled water via a motorized valve All pipes especially those of chilled water must be insulated to avoid dripping condensation To facilitate maintenance it is recommended to provide manual ball valves in order to exclude the machine from the system When connecting the pipes in...

Page 12: ... circolazione finché non c è la certezza di aver eliminato tutte le bolle After completing the hydraulic installation and loading the system it is necessary to vent the battery using the special needle valve Repeat the bleeding operation after operating the circulation pump until there is certainty that all the bubbles have been eliminated 6 2 TUBO SCARICO CONDENSA DRAIN PIPE Collegare un tubo di ...

Page 13: ...ole indicated in the previous figure At the end of the vertical section upwards connect the pipe to another with a larger diameter 1 2 3 4 5 Vaschetta Galleggiante Pompa Tubo interno 6mm Tubo più grande Drain pipe Floating switch Pump Pipe 6mm inside Larger pipe Nel caso in cui il tubo di scarico sia più basso o allo stesso livello della pompa si consiglia l installazione della valvola stop siphon...

Page 14: ... ends These screws must be screwed into the flaps concealed At the end of the operation make sure that the grill is firmly fixed The fins of the grill can be oriented in two directions horizontal and vertical to spread the air in the environment in the most comfortable way NOTA tra la sezione di mandata e quella di ripresa è presente un divisorio che rompe i ponti termici In base alle condizioni d...

Page 15: ...ico dell unità fornito a corredo della macchina Dopo aver completato l installazione elettrica riposizionare il coperchio del quadro elettrico e fissarlo con le due viti Provide a manual disconnector near the machine to be able to exclude it from the power line during maintenance operations Provide a fuse or circuit breaker to protect the machine The power cables must be sized taking into account ...

Page 16: ...eggiato o troppo sporco è necessario sostituirlo Non utilizzare l unità se il filtro è danneggiato eccessivamente sporco o assente Per accedere al filtro rimuovere la griglia svitando le due viti M4 descritte nel paragrafo Installazione della griglia Il filtro è collocato nella parte posteriore della griglia dal lato degli attacchi idraulici Il bordo del filtro è realizzato con un tondino di accia...

Page 17: ...n modo da liberarlo dalle connessioni elettriche Dopo aver ispezionato ed eventualmente sostituito il driver riposizionare tutti i componenti Before accessing and removing the EC motor driver make sure that the power has been turned off for at least 15 minutes The driver is positioned inside the fan coil behind the electrical panel Remove the M4 knob at the bottom right of the electrical panel bot...

Page 18: ...alla controcassa facendolo scivolare orizzontalmente lungo le guide interne alla controcassa Dopo avere completato le operazioni di manutenzione riposizionare tutti i componenti In the event that it is necessary to carry out maintenance on the internal components of the fan coil unit coil or fan unit the entire fan coil unit must be removed from the outer casing It is recommended to be at least tw...

Page 19: ...e o superiore a 40 C in inverno Portata acqua bassa Controllare che il dT tra acqua in ingresso e uscita sia al massimo 7K Valvola chiusa Controllare che tutte le valvole manuali di intercettazione siano aperte Pompa rotta Il galleggiante ha chiuso la valvola per allarme pompa Attuatore valvola rotto Controllare che l attuatore abbia aperto la valvola Aria nella batteria Sfiatare la batteria e le ...

Page 20: ... Check water temperature is lower than 10 C in summer and higher than 40 C in winter Low water flow Check dT between in and out water is not higher than 7K Valve closed Check that all manual valve are open Valve actuator broken Check that the actuator have open the valve Air inside coil Remove air from coil and pipe using air vent valve Condensation on the grille Too cold water Increase water temp...

Page 21: ... normative locali sullo smaltimento dei rifiuti I principali materiali presenti sono rame alluminio acciaio polistirolo plastica At the end of its service the unit must be disposed of in compliance with local waste disposal regulations The main materials present are copper aluminum steel polystyrene plastic ...

Page 22: ...__________________ _________________________________________________ _________________________________________________ _________________________________________________ _________________________________________________ _________________________________________________ _________________________________________________ _________________________________________________ _______________________________...

Page 23: ...________________ _________________________________________________ _________________________________________________ _________________________________________________ _________________________________________________ _________________________________________________ Il produttore si riserva la facoltà di apportare in qualsiasi momento tutte le modifiche ritenute necessarie per il miglioramento del...

Page 24: ...MIU SHSB I GB 000 04 20 ...

Reviews: