background image


68 

Operation 

  Overloading may be caused by excessive feed motion or an obstacle in the 

work piece. 

  Check the work piece. 

  Wait a short time and then continue with a reduced feed motion. 

Straight Cuts 

You can use the cutting line guides located on the front and back of the base 
plate to follow a guide line marked on the work piece. 

For precision cuts, the offset of the kerf with respect to the marked guide line 
must be determined by performing a test cut. Any resulting deviation from the 
guide  line  indicates  how  the  new  line  must  be  marked  to compensate  for  the 
offset of the kerf so that you can perform a precision cut. 

Making Plunge Cuts 

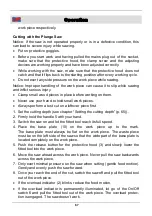
1.  Make sure that the material  you  intend to cut is not too hard for a plunge 

cut.  


Some very hard materials are not suitable for plunge cutting. 

2.  Place  the  base  plate  (10)  on  the  work  piece.  Make  sure  that  the  rear 

cutting line guide (12) is in line with the start of the cut.  

3.  Switch on the saw and let the fitted tool reach its full speed. 

4.  Slowly plunge the fitted tool into the material applying gentle pressure. 

5.  Move the saw ahead across the work piece. Never pull the saw backwards 

across the work piece. 

6.  Once  you  reach  the  end  of  the  cut,  switch  the  saw  off  and  pull  the  fitted 

tool out of the work piece. 

Cutting large Work Pieces 

Proceed as follows to work on large work pieces or cut long, straight edges: 

1.  Use screw clamps to secure a board or a strip for use as a temporary guide 

on the work piece. 

2.  While  cutting,  run  the  left  side  of  the  base  plate  (10)  along  the  temporary 

guide. 

Cutting Tiles 

Use  the  Diamond  cutting  disc  (15).  Attach  insulating  tape  to  the  tiles  to 
facilitate work and prevent scratches. 


Summary of Contents for 88 04 26

Page 1: ...Tauchsäge TSM85 600 Watt Artikel Nr 88 04 26 Plunge Saw TSM85 600 Watt Article No 88 04 26 Betriebsanleitung Operating Instructions ...

Page 2: ...and keep it for future reference Bedienungsanleitungen enthalten wichtige Hinweise für den Umgang mit Ihrem neuen Produkt Sie ermöglichen Ihnen alle Funktionen zu nutzen und sie helfen Ihnen Missverständnisse zu vermeiden und Schäden vorzubeugen Bitte nehmen Sie sich die Zeit diese Bedienungsanleitung in Ruhe durchzulesen und bewahren Sie diese für späteres Nachlesen gut auf Sehr geehrte Damen und...

Page 3: ...III Übersicht Overview 20 21 24 22 23 25 25 3 13 6 14 4 7 12 11 10 9 8 12 1 2 3 4 5 19 18 17 16 15 ...

Page 4: ...lamping Screw 12 Schnittlinienführung 2 Cutting line Guide 2 13 Laser Laser 14 Ein Ausschalter für Laser On Off Switch for the Laser 15 Diamanttrennscheibe Diamond Cutting Disc 16 TCT Sägeblatt 30 Zähne TCT Saw Blade 30 Teeth 17 HSS Sägeblatt 60 Zähne HSS Saw Blade 60 Teeth 18 HSS Sägeblatt 80 Zähne HSS Saw Blade 80 Teeth 19 Absaugschlauch Suction Hose 20 Absaugschlauchadapter Suction Hose Adapter...

Page 5: ...er Verwenden Seite 57 Batteriewechsel Seite 57 Überastungsschutz Seite 57 Absaugung Seite 58 Vorbereitung Seite 59 Mit der Säge schneiden Seite 59 Linienschnitt durchführen Seite 60 Tauchschnitt durchführen Seite 60 Große Werkstücke schneiden Seite 61 Fliesen schneiden Seite 61 Nach dem Sägen Seite 61 Sägeblattwechsel Seite 61 Die Schneidhilfe für Gehrungsschnitte Seite 62 Wartung und Reinigung Se...

Page 6: ...r Page 66 Replacing the Batteries Page 66 Overload Protection Page 66 Dust Extraction Page 67 Preparation Page 67 Cutting with the Plunge Saw Page 68 Straight Cuts Page 69 Making Plunge Cuts Page 69 Cutting large Work Pieces Page 69 Cutting Tiles Page 69 When you are finished cutting Page 70 Changing the Saw Blade Page 70 The Cutting Aid for Mitre Cuts Page 71 Cleaning and Maintenance Page 71 Tech...

Page 7: ...VII Übersicht Overview 4 26 28 11 20 27 1 8 29 24 27 19 20 21 ...

Page 8: ...r 11 Klemmschraube Clamping Screw 19 Absaugschlauch Suction Hose 20 Absaugschlauchadapter Suction Hose Adaptor 21 Adapterdeckel Adaptor Lid 24 Knopfzelle LR44 eingesetzt 2 Button Cell LR44 inserted 2 26 Spindelarretierung Spindle Lock 27 Staubabsaugöffnung Dust Extraction Port 28 Spindel Spindle 29 Batteriefach Battery Compartment Übersicht Overview ...

Page 9: ...nd Gehörschutz Handhaben Sie das Säge blatt immer mit Handschuhen Beachten Sie dass auch ein abgenutztes Sägeblatt noch sehr scharf ist Erfassen Sie das Sägeblatt immer an den Seiten Werfen Sie das Sägeblatt nicht und lassen Sie es nicht fallen Benutzen Sie die Tauchsäge niemals mit Schleifscheiben Greifen Sie nicht unter das Werkstück Die Schutzhaube kann Sie unter dem Werkstück nicht vor dem Säg...

Page 10: ... Sägeblätter in der richtigen Größe und mit passender Aufnahmebohrung Sägeblätter die nicht zu den Montageteilen der Säge passen laufen unrund und führen zum Verlust der Kontrolle Verwenden Sie niemals einen beschädigten oder falschen Außenflansch oder eine beschädigte Spannschraube Der Außenflansch und die Spannschraube wurden speziell für Ihre Säge konstruiert für optimale Leistung und Betriebss...

Page 11: ...nn entstehen wenn sich das Sägeblatt im Sägespalt verhakt oder verklemmt Das Sägeblatt blockiert und die Motorkraft schlägt die Tauchsäge in Richtung der Bedienperson zurück Ein Rückschlag kann entstehen wenn das Sägeblatt im Sägeschnitt verdreht oder falsch ausgerichtet wird Dadurch können sich die Zähne der hinteren Sägeblattkante in der Oberfläche des Werkstücks verhaken wodurch sich das Sä geb...

Page 12: ... aus dem Werkstück her aus bewegen oder einen Rückschlag verursachen wenn die Säge erneut gestartet wird Stützen Sie große Platten ab um das Risiko eines Rück schlags durch ein klemmendes Sägeblatt zu vermindern Große Platten können sich unter ihrem Eigengewicht durch biegen Platten müssen auf beiden Seiten sowohl in Nähe des Sägespalts als auch am Rand abgestützt werden Verwenden Sie keine stumpf...

Page 13: ...en lassen die untere Schutzhaube verzögert arbei ten c Legen Sie die Säge nicht auf der Werkbank oder dem Boden ab ohne dass die Schutzhaube das Sägeblatt bedeckt Ein ungeschütztes nachlaufendes Sägeblatt bewegt die Säge entgegen der Schnittrichtung und sägt was ihm im Weg ist Beachten Sie dabei die Nachlaufzeit der Säge d Verwenden Sie nur Sägeblätter mit Durchmessern entspre chend den Aufschrift...

Page 14: ... zerbrechen e Verwenden Sie immer unbeschädigte Spannflansche in der richtigen Größe und Form für die von Ihnen gewählte Schleif scheibe Geeignete Flansche stützen die Schleifscheibe und verringern so die Gefahr eines Schleifscheibenbruchs f Verwenden Sie keine abgenutzten Schleifscheiben von größeren Elektrowerkzeugen Schleifscheiben für größere Elektrowerkzeuge sind nicht für die höheren Drehzah...

Page 15: ...ützt werden die bei verschiedenen Anwendungen entstehen Staub oder Atemschutzmaske müssen den bei der Anwen dung entstehenden Staub filtern Wenn Sie lange lautem Lärm ausgesetzt sind können Sie einen Hörverlust erleiden k Achten Sie bei anderen Personen auf sicheren Abstand zu Ihrem Arbeitsbereich Jeder der den Arbeitsbereich betritt muss persönliche Schutzausrüstung tragen Bruchstücke des Werkstü...

Page 16: ...nden Sie das Elektrowerkzeug nicht in der Nähe brennbarer Materialien Funken können diese Materialien entzünden r Verwenden Sie keine Einsatzwerkzeuge die flüssige Kühlmit tel erfordern Die Benutzung von Wasser oder anderen flüssi gen Kühlmitteln kann zu einem elektrischen Schlag führen Rückschlag und entsprechende Sicherheitshinweise Rückschlag ist die plötzliche Reaktion infolge einer hakenden o...

Page 17: ...eug kann sich beim Rück schlag über Ihre Hand bewegen c Meiden Sie den Bereich vor und hinter der rotierenden Trennscheibe Der Rückschlag treibt das Elektrowerkzeug in die Richtung entgegengesetzt zur Bewegung der Schleifschei be an der Blockierstelle d Arbeiten Sie besonders vorsichtig im Bereich von Ecken scharfen Kanten usw Verhindern Sie dass Einsatzwerkzeuge vom Werkstück zurückprallen und ve...

Page 18: ... durch eine eingeklemmte Trennscheibe zu vermindern Große Werkstücke können sich unter ihrem eige nen Gewicht durchbiegen Das Werkstück muss auf beiden Seiten der Scheibe abgestützt werden und zwar sowohl in der Nähe des Trennschnitts als auch an der Kante j Seien Sie besonders vorsichtig bei Taschenschnitten in bestehende Wände oder andere nicht einsehbare Bereiche Die eintauchende Trennscheibe k...

Page 19: ...zu vermeiden Entsorgen Sie alte Kabel oder Stecker unmittelbar nachdem Sie durch neue ersetzt wurden Das Anschließen eines Steckers eines losen Kabels an eine Steckdo se ist gefährlich Verwendung von Verlängerungskabeln Benutzen Sie nur ein genehmigtes Verlängerungskabel das der Maschinenleistung entspricht Die Adern müssen einen Mindest querschnitt von 1 5 mm2 haben Befindet das Kabel sich auf ei...

Page 20: ... fixierte Reduzierringe parallelzueinan der sind Handhaben Sie Einsatzwerkzeuge mit Vorsicht Bewahren Sie diese am besten in der Originalverpackung oder speziellen Behältnissen auf Tragen Sie Schutzhandschuhe um die Griffsicherheit zu verbessern und das Verletzungsrisiko weiter zu mindern Stellen Sie vor der Benutzung von Einsatzwerkzeugen sicher dass alle Schutzvorrichtungen ordnungsgemäß befesti...

Page 21: ...eser Laser er zeugt Laserstrahlung der Laserklasse 2 gemäß EN 60825 1 2014 Dadurch können Sie Personen blenden Ein Laser ist kein Spielzeug und gehört nicht in Kinderhände Bei missbräuchlicher Benutzung können irreparable Augen schäden auftreten Der Laser enthält keine Serviceteile Warnung Tauschen Sie den Laser nicht gegen einen Laser anderen Typs Die Reparaturen dürfen nur vom Hersteller des Las...

Page 22: ... Kindern fern Verschlucken Sie die Batterie nicht es besteht die Gefahr einer chemischen Verätzung Wenn Sie vermuten dass eine Batterie verschluckt wurde oder auf andere Weise in den Körper gelangt ist suchen Sie sofort einen Arzt auf Vermeiden Sie den Kontakt von Batteriesäure mit Haut Augen und Schleimhäuten Falls Sie mit Batteriesäure in Kontakt kommen spülen Sie betroffene Stelle mit klarem Wa...

Page 23: ...blade on the sides Do not fling the saw blade and do not drop it Never use the plunge saw with grinding wheels Do not grip underneath the workpiece The protective cover cannot protect you from the saw blade under the workpiece Adjust the cutting depth to the thickness of the workpiece It should be visible less than a full tooth height under the work piece Do not cut very small workpieces When cutt...

Page 24: ...art the plunge saw and begin cutting when it reaches the full idling speed Never brake the saw blade using lateral pressure after switching it off Set the saw aside only when the saw blade comes to a standstill Do not place the saw on the workbench or the floor unless the saw blade is at a standstill An unprotected running saw blade moves the saw against the cutting direction and cuts whatever is ...

Page 25: ...propriate precautions as described below Hold the saw firmly with both hands and bring your arms into a position in which you can resist the kickback forces Always hold the saw blade on the side never bring the blade in line with your body In a kickback the saw can jump backwards but the operator can control the kickback forces if appropriate measures were taken If the saw blade jams or sawing is ...

Page 26: ... closing before each use Do not operate the saw if the guard does not move freely and close instantly Never clamp or tie the guard into the open position If the saw is accidentally dropped guard may be bent Make sure the guard moves freely and does not touch the blade or any other part in all angles and depths of cut b Check the operation of the guard spring If the guard and the spring are not ope...

Page 27: ...part d Wheels must be used only for recommended applications For example do not grind with the side of cut off wheel Abrasive cut off wheels are intended for peripheral grinding side forces applied to these wheels may cause them to shatter d Always use undamaged wheel flanges that are of correct diameter for your selected wheel Proper wheel flanges sup port the wheel thus reducing the possibility ...

Page 28: ...ure to high intensity noise may cause hearing loss j Keep bystanders a safe distance away from work area Anyone entering the work area must wear personal protective equipment Fragments of workpiece or of a broken wheel may fly away and cause injury beyond immediate area of operation k Hold the power tool by insulated gripping surfaces only when performing an operation where the cutting accessory m...

Page 29: ...ring into the pinch point can dig into the surface of the material causing the wheel to climb out or kick out The wheel may either jump toward or away from the operator depending on direction of the wheel s movement at the point of pinching Abrasive wheels may also break under these conditions Kickback is the result of power tool misuse and or incorrect operating procedures or conditions and can b...

Page 30: ...til the wheel comes to a complete stop Never attempt to remove the wheel from the cut while the wheel is in motion otherwise kickback may occur Investigate and take corrective action to eliminate the cause of wheel binding h Do not restart the cutting operation in the workpiece Let the wheel reach full speed and carefully re enter the cut The wheel may bind walk up or kick back if the power tool i...

Page 31: ...upply corresponds to the voltage on the rating plate Class II machine Double insulation You do not need any earthed plug Replacing cables or plugs If the power cord is damaged it must be replaced by the manu facturer or its service agent or a similarly qualified person in order to avoid a hazard Immediately throw away old cables or plugs when they have been replaced by new ones It is danger ous to...

Page 32: ...ter Make sure that fixed reducing rings are parallel to one another Handle the fitted tools carefully Ideally you should store them in the original packaging or special containers Wear protective gloves for better grip and to further reduce the risk of injury Before using fitted tools make sure that all protective devices are properly secured Before use make sure that the fitted tool complies with...

Page 33: ...s or other notes Comply with the labelled direction of rotation of the fitted tool If you are unsure which fitted tool to use consult the manufacturer or a qualified professional Observe the speed of the fitted tool and the power tool Before Use Fitted tools must undergo a visual check before each start up Do not use fitted tools that are damaged Secure the work piece you intend to work on Inserti...

Page 34: ...ool has come to a complete stop When performing cut off grinding insert the fitted tool straight into the cutting slit so that the power tool doesn t cant Do not move back and forth in the material instead steadily pull it through the applicable material Only work at a right angle and along a level axis to rule out any risk of cracks in the core or fragments breaking off Do not exert excessive pre...

Page 35: ...ctions and warning notes on the battery and the packaging When inserting the batteries always make sure that the polarity and indicated on the battery and battery com partment cover is correct Do not short circuit the battery terminals Do not attempt to recharge disposable batteries Do not use old and new batteries in combination with one another Replace all batteries with new batteries of the sam...

Page 36: ...h the affected area with clean water and consult a physician immediately If the battery compartment cannot be closed securely stop using the saw and keep it away from children Remove the batteries from the saw if you do not use them for several months Batteries do not belong in the household garbage For battery disposal please check with your local council ...

Page 37: ...ants et protections auditives Manipulez toujours la lame de scie avec des gants Il ne faut pas perdre de vue que même une lame usée reste toujours très tran chante Saisissez toujours la lame de scie par les bords Ne jetez pas et ne laissez pas tomber la lame de scie N aiguisez jamais la scie circulaire avec une meule Jamais mettre les mains sous la pièce Le capot de protection ne vous protégé pas ...

Page 38: ...ropriées ne scient pas de façon uniforme et conduisent à une perte de contrôle N utilisez jamais une bride externe endommagée ou incorrecte ou une vis de serrage endommagée La bride externe et la vis de serrage ont été spécialement conçues pour la scie pour garantir performance et fiabilité optimales Démarrez la scie circulaire et ne commencez à couper seulement quand il a atteint sa pleine vitess...

Page 39: ...ebond peut se produire lorsque la lame de scie se tort ou ne s aligne pas correctement pendant le coupe Suite à cela les dents du tranchant arrière de la lame peuvent se bloquer dans la surface de la pièce causant le soulèvement de la lame de la pièce et un déplacement de la lame en direction de l opérateur Un rebond est le résultat d une utilisation incorrecte ou défectueuse de la scie Cela peut ...

Page 40: ...ées Les lames de scie avec des dents émoussées ou mal alignées augmentent la friction le blocage et le rebond de la lame à cause d une fente de scie trop étroite Serrez la position de profondeur de coupe avant la coupe Si les réglages changent pendant la coupe la lame peut se bloquer et un rebond peut se produire Soyez particulièrement prudent si vous effectuez une coupe circulaire dans un endroit...

Page 41: ...quement des lames de scie recommandées par le fabricant Règles de sécurité pour les meuleuses a L outil de protection appartenant doit être monté et réglé de telle sorte que la sécurité maximale est atteinte soit la moindre quantité de corps abrasif est exposée vers l opéra teur L opérateur et les spectateurs doivent garder hors du plan de la meule en rotation La garde aide à protéger l opérateur ...

Page 42: ...e mandrin de l ajustement de l outil tourner de façon inégale vibrent beaucoup et peut conduire à une perte de contrôle i Ne pas utiliser les roues endommagées Avant chaque utilisation vérifier les roues des entailles et fissures Si l outil de puissance ou la meule chute vérifier si ils sont endomma gés ou utiliser une meule en bon état Si la roue a été testée et installée se tenir avec toutes les...

Page 43: ...l sous tension et provoquer un choc électrique m Gardez le cordon d alimentation à l écart des outils rotatifs Si vous perdez le contrôle de l appareil le cordon d alimentation peut être coupé ou capturé et votre main ou votre bras peut tomber dans l outil d application en rotation n Ne placez jamais l appareil avant qu il ne soit complètement arrêté Outil de coupe en rotation peut entrer en conta...

Page 44: ... forces de rebond Toujours utiliser la poignée supplémentaire d avoir en cas de besoin le contrôle maximum sur le rebond ou le temps de réaction dans la phase de démarrage L opéra teur peut contrôler le rebond et le temps de réaction si des mesures appropriées ont été prises b Ne mettez pas votre main à proximité d outils d insertion en rotation L insert peut aller sur votre main en cas de rebond ...

Page 45: ...duire au minimum le risque de rebond à d une lame coincée Pièces de grandes dimensions ont tendance à se fléchir sous leur propre poids La pièce doit être supporté sur les deux faces du disque aussi bien dans le voisinage de la découpe que sur le bord j Portez une attention particulière à la coupe cachée dans des murs existants ou d autres parties cachées La lame qui va plonger peut couper tuyaux ...

Page 46: ...ien qualifié Jeter les vieux câbles ou connecteurs immédiatement après qu ils ont été remplacés par de nouveaux La connexion d une fiche d un câble lâche à une prise de courant est dangereux Utilisation de rallonge Utilisez uniquement une rallonge approuvée qui correspond à la puissance de l appareil Les fils doivent avoir une section transversale d au moins 1 5 mm2 Si le câble est sur une bobine ...

Page 47: ... autres Gérer les outils d insertion avec soin Gardez les mieux dans son emballage d origine ou dans des conteneurs spéciaux Porter des gants de protection afin d améliorer l adhérence et de réduire davantage le risque de blessure Assurez vous avant d utiliser les outils d application que tous les dispositifs de sécurité sont solidement fixés Assurez vous avant utilisation que l outil d applicatio...

Page 48: ...eux Le laser ne contient pas de pièces de rechange Attention Ne pas modifier le laser avec d autres types de laser Les réparations du laser peuvent être faites que par le fabricant ou son mandataire Ne pas diriger le faisceau laser sur des matériaux fortement réfléchissants Ne pas insérer d objets durs dans l optique laser Nettoyez la lentille laser avec un pinceau doux et sec Règles de sécurité p...

Page 49: ...ans le corps consulter immédiatement un médecin Ne pas laisser l acide de la batterie au contact avec la peau les yeux et les muqueuses Si vous entrez en contact avec l acide de batterie rincer la zone touchée avec de l eau propre et consulter immédiatement un médecin Si le compartiment de la batterie ne se ferme pas correcte ment ne pas utiliser la scie et le tenir éloigné des enfants Retirez les...

Page 50: ...ma sempre con i guanti Si noti che anche una lama usurata è molto tagliente Afferrare la lama della sega sempre dai lati Non lanciare la lama e non lasciarla cadere Mai utilizzare la sega circolare con le mole Non mettere le mani sotto il pezzo La guardia non può proteggere dalla lama al di sotto del pezzo in lavorazione Regolare la profondità di taglio allo spessore del pezzo Un altezza piena den...

Page 51: ... esterna e il bullone di bloccaggio sono stati appositamente progettati per la sega per prestazioni e affidabilità ottimali Avviare la sega circolare e cominciare il lavoro solo quando ha raggiunto la piena velocità a regime minimo Non rallentare mai la lama dopo aver spento eseguendo pressione laterale Non collocare la sega sul banco o sul pavimento prima che la lama si sia completamente arrestat...

Page 52: ...un movimento della sega verso l operatore Il Contraccolpo è il risultato di un operazione falsa o errata della sega Può essere prevenuta adottando le dovute precauzioni come descritto di seguito Tenere la sega con entrambe le mani e portare le braccia in una posizione in cui si può resistere a forze di contraccolpo Mantenersi sempre sul lato della lama mai portare la lama in linea con il proprio c...

Page 53: ...lio con fermezza Se si cambia la regolazione durante il taglio la lama può incepparsi e verificarsi contraccolpi Usare la massima cautela quando si effettua un taglio nascosto in una zona nascosta per esempio una parete esistente La lama che va ad immergersi può bloccarsi in oggetti nascosti e causare contraccolpi Funzione della guardia a Prima di ogni utilizzo controllare se la guardia si chiude ...

Page 54: ...osto verso l operatore L operatore e persone vicine devono tenersi fuori dal piano della mola in rotazione La guardia aiuta a protegge re l operatore da frammenti e da contatti accidentali con la mola b Usare solo dischi da taglio diamantati per il vostro apparecchio elettrico Solo perché l accessorio può essere montato all apparecchio non assicura un uso sicuro c La velocità consentita dello stru...

Page 55: ...ni utilizzo controllare le mole su eventuali scheggiature e crepe Se l apparecchio elettrico o la mola cadono controllare se dan neggiate o utilizzare una mola non danneggiata Se la mola e stata controllata e installata si tenga insieme a tutte le perso ne vicine al di fuori del piano della mola rotante e far funziona re l apparecchio per un minuto alla massima velocità Mole danneggiate spesso si ...

Page 56: ...catturato e la vostra mano o il vostro braccio possono cadere nello strumento di applica zione roteante n Non appoggiare mai l apparecchio prima che sia completa mente arrestato Lo strumento di taglio ruotante può entrare in contatto con la superficie di appoggio ciò causa la perdita di controllo dello strumento di potere o Non far funzionare l apparecchio mentre lo si trasporta I vostri vestiti p...

Page 57: ...reazione in fase di avviamento L operatore può controllare il contraccolpo e il momento di reazione se sono state prese le misure del caso b Non mettere la propria mano in prossimità di utensili ad innesto in rotazione L inserto può dirigersi sulla vostra mano in caso di un contraccolpo c Evitare la zona davanti e dietro alla ruota rotante Il contrac colpo spingerà l utensile nella direzione oppos...

Page 58: ...to Pezzi di grandi dimensioni tendono a flet tersi sotto il loro stesso peso Il pezzo deve essere supportato su entrambi i lati del disco sia in prossimità del taglio che sul bordo j Prestare particolare attenzione al taglio nascosto in pareti esistenti o in altre parti nascosti La lama che va ad immerger si può tagliare tubi del gas o dell acqua cavi elettrici o altri oggetti e causare un contrac...

Page 59: ... Utilizzo di prolunghe Utilizzare solo una prolunga approvata che corrisponde alla potenza dell apparecchio I fili devono avere una sezione trasversale di almeno 1 5 mm2 Se il cavo è su una bobina esso deve essere completamente srotolato Prolunghe inadatto possono essere pericolose Se si utilizza una prolunga deve essere adatta ad uso esterno e la connessione deve essere asciutta e al di sopra del...

Page 60: ...di applicazione che tutti i dispositivi di sicurezza siano fissati saldamente Assicurarsi prima dell utilizzo che lo strumento di applicazione utilizzato soddisfi i requisiti tecnici di questo dispositivo elettri co e che sia fissato correttamente Utilizzare la lama in dota zione solo per tagliare il legno mai per lavorare metallo Norme di sicurezza e di utilizzo per dischi diamantati Utilizzo Uti...

Page 61: ...elle ottiche laser Pulire la lente laser con un pennello morbido e asciutto Norme di sicurezza per le batterie Le batterie possono esplodere o perdere liquido e provocare lesioni o incendi Le seguenti norme di sicurezza devono essere seguite per ridurre il rischio Seguire tutte le istruzioni e le avvertenze sulla batteria e l imballaggio Non mettere i terminali della batteria sotto cortocircuito N...

Page 62: ...ra in contatto con l acido della batteria lavare la zona interessata con acqua pulita e consultare im mediatamente un medico Se il vano batteria non si chiude bene non utilizzare la sega e tenerla lontano dalla portata dei bambini Rimuovere le batterie dalla sega se non se ne fa uso per diversi mesi Le batterie non appartengono nella spazzatura È possibile caricarla di nuovo a noi inviare o conseg...

Page 63: ...m Metall z B Aluminium mit hartmetallbestück ten oder HSS Sägeblättern im trockenen Zustand zum Schneiden von Fliesen Leiterplatten und glasfaserverstärkten Kunststoffen mit Diamanttrennscheiben im trockenen Zustand Alle weiteren Anwendungen sind ausdrücklich ausgeschlossen und gelten als nicht bestimmungsgemäße Verwendung Ein bzw Ausschalten der Tauchsäge 1 Stecken Sie den Netzstecker in eine ord...

Page 64: ...zuschalten drücken Sie auf den Ein Ausschalter für den Laser 14 5 Um den Laser auszuschalten drücken Sie erneut auf den Ein Ausschalter für den Laser Batteriewechsel Der Laser wird mit 2 Knopfzellen LR44 betrieben Sobald der Laser nicht mehr arbeitet müssen die Batterien ausgetauscht werden 1 Entfernen Sie den Batteriefachdeckel 1 vom Batteriefach 29 2 Entfernen Sie die alten Knopfzellen 24 3 Setz...

Page 65: ...schädigungen des Staubsaugers führen Die Staubabsaugung ist besonders sinnvoll wenn viele Arbeitsschnitte nacheinander ausgeführt werden Dann ist es seltener nötig Pausen zum Reinigen der Säge und des Arbeitsplatzes einzulegen Der Anschluss einer Staubabsaugung erlaubt eine optimale Absaugung von Stäuben und Spänen vom Werkstück Sie schonen sowohl die Säge als auch Ihre eigene Gesundheit Ihr Arbei...

Page 66: ...ch jedem Arbeitsgang in die Ausgangsposition zurückschnellt Üben Sie keinen seitlichen Druck während des Sägens auf das Werkstück aus Hinweis Unsachgemäße Handhabung der Werkstücke kann zum Abrutschen während des Sägens führen und schwere Verletzungen verursachen Spannen Sie kleine Holzteile vor der Bearbeitung fest ein Halten Sie kleine Werkstücke nie mit der Hand fest Führen Sie immer erst einen...

Page 67: ...Zeit und fahren Sie mit reduziertem Vorschub fort Linienschnitt durchführen Sie können mit Hilfe der Schnittlinienführungen die vorn und hinten an der Grund platte angebracht sind einer auf dem Werkstück eingezeichneten Hilfslinie folgen Für sehr präzise Schnitte muss der Versatz des Sägeschlitzes zur markierten Hilfslinie mit einem Probeschnitt festgestellt werden Die Abweichung von der Hilfslini...

Page 68: ...auf den Fliesen an Nach dem Sägen 1 Schalten Sie die Säge aus und lassen Sie das Einsatzwerkzeug vollständig zum Stillstand kommen 2 Ziehen Sie den Netzstecker aus der Steckdose 3 Lassen Sie die Säge vollständig abkühlen 4 Entfernen Sie das Zubehör für die Staubabsaugung und das Einsatzwerk zeug aus der Säge und reinigen Sie die Säge Sägeblattwechsel Hinweis Unsachgemäßer Einsatz und Wechsel der E...

Page 69: ...richtung der Sägezähne des Einsatzwerk zeugs korrekt ist siehe gezackten Pfeil am Gehäuse 7 Schrauben Sie die Klemmschraube 11 gegen den Uhrzeigersinn fest 8 Entnehmen Sie den Innensechsrundschlüssel aus der Klemmschraube 9 Prüfen Sie ob das Einsatzwerkzeug richtig montiert ist bewegliche Teile leicht gängig sind und die Klemmschraube fest angezogen ist Hinweis Bevor Sie mit der Säge arbeiten lass...

Page 70: ...arbeiten die ein Öffnen des Motorgehäuses erfordern dürfen nur von einer autorisierten Werkstatt durchgeführt werden Halten Sie die Tauchsäge stets sauber Reinigen Sie die Tauchsäge nach jeder Benutzung mit einem trockenen Tuch oder mit Druckluft Benutzen Sie zur Reinigung keine aggressiven Chemikalien Um Verletzungsgefahren zu vermindern ziehen Sie immer den Netzste cker bevor Sie das Gerät reini...

Page 71: ...en nehmen Sie bitte Kontakt mit dem Westfalia Kundenservice auf Wenn ein verstärktes Bürstenfeuer auftritt ist dies ein Zeichen dafür dass die Kohlebürsten ausgetauscht werden müssen Lassen Sie Kohlebürsten von einem Fachmann austauschen ...

Page 72: ...dry state for cutting tiles circuit boards and fibre reinforced plastics with dry diamond cutting discs Any other applications are expressly prohibited and are deemed improper use Switching the Plunge Saw ON and OFF 1 Connect the mains plug with a properly installed socket 2 To switch the saw on push the safety switch 7 forward and then push the On Off switch 6 3 To switch the saw off let go of th...

Page 73: ...eplacing the Batteries The laser is powered by 2 LR44 button cells If the laser stops working the batteries must be replaced 1 Remove the battery compartment lid 1 from the battery compartment 29 2 Remove the old button cells 24 3 Now insert the new button cells Make sure the polarity is correct 4 Put the battery compartment lid back on the battery compartment Overload Protection The saw is equipp...

Page 74: ... consecu tive cuts Thus breaks for cleaning the saw and the work area are not needed as frequently Connecting a dust extractor makes it possible to vacuum dust and chips off of the work piece This will protect both the saw and your own health This will also keep your work area clean and safe Most dry vacuum cleaners designed for household use are suitable for dust extraction 1 Insert the suction h...

Page 75: ...irst 1 Set the cutting depth see chapter Setting the cutting depth p 65 2 Firmly hold the handle 5 with your hand 3 Switch the saw on and let the fitted tool reach its full speed 4 Place the base plate 10 on the work piece up to the mark The base plate must always be flat on the work piece The waste piece must be on the left side of the saw so that the wide part of the base plate is located comple...

Page 76: ...me very hard materials are not suitable for plunge cutting 2 Place the base plate 10 on the work piece Make sure that the rear cutting line guide 12 is in line with the start of the cut 3 Switch on the saw and let the fitted tool reach its full speed 4 Slowly plunge the fitted tool into the material applying gentle pressure 5 Move the saw ahead across the work piece Never pull the saw backwards ac...

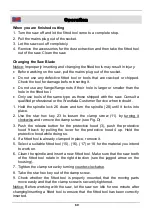
Page 77: ...own and turn the spindle 28 until it locks into place 2 Use the star hex key 23 to loosen the clamp screw 11 by turning it clockwise and remove the clamp screw see Fig D 3 Push the release button for the protective hood 3 push the protective hood 9 back by pulling the lever for the protective hood 4 up Hold the protective hood while doing so 4 If a fitted tool is already clamped in place remove it...

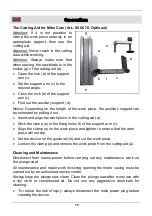
Page 78: ... the work piece in the cutting aid a Stick the clamp e in the fixing holes f of the support arm c Align the clamp e on the work piece and tighten to ensure that the work piece will not slip Set the device on the guide rail h and cut the work piece Loosen the clamp e and remove the work piece from the cutting aid a Cleaning and Maintenance Disconnect from mains power before carrying out any mainten...

Page 79: ...sure that no liquids get into the machine and never immerse the device in liquid Repairs inspections of the machine interior adjustments and the replacement of carbon brushes should only be performed by a qualified electrician Only identical replacement parts should be used For more information please contact the Westfalia customer service If an increased brush sparking occurs it is a sign that th...

Page 80: ...icht 2 kg Weight Kabellänge 3 m Cable Length Schutzklasse II Protection Class Max Schnitttiefe mit Führungsschiene 26 mm Max Cutting Depth with Guide Rail Schalldruckpegel Lpa 85 9 dB A K 3 dB A Sound Pressure Level Schalleistungspegel Lwa 96 9dB A K 3 dB A Sound Power Level Hand Arm Vibration Holz Metall Keramik 1 782 m s K 1 5 m s 2 091 m s K 1 5 m s 3 676 m s K 1 5 m s Hand Arm Vibration Wood M...

Page 81: ... the European Directives and their amendments 2011 65 EU 2011 65 EU Beschränkung der Verwendung bestimmter gefährlicher Stoffe in Elektro und Elektronikgeräten RoHS Restriction of the Use of certain hazardous Substances in electrical and electronic Equipment RoHS 2014 30 EU 2014 30 EU Elektromagnetische Verträglichkeit EMV Electromagnetic Compatibility EMC EN 55014 1 2006 A1 A2 EN 55014 2 2015 EN ...

Page 82: ...nd ch Internet www westfalia net Kundenbetreuung Customer Services Werter Kunde bitte helfen Sie mit Abfall zu vermeiden Sollten Sie sich einmal von diesem Artikel trennen wollen so bedenken Sie bitte dass viele seiner Komponenten aus wertvollen Rohstoffen bestehen und wiederverwertet werden können Entsorgen Sie ihn daher nicht in die Mülltonne sondern führen Sie ihn bitte Ihrer Sammelstelle für E...

Reviews: