background image


Safety Notes

ƒ

  Make sure the voltage corresponds to the type label on the unit. 

ƒ

  Secure the work pieces to avoid slipping. 

ƒ

  Always lay down the finishing sander before the moving parts have come to 

complete stop. 

ƒ

  Always attach the dust bag or a vacuum cleaner to the dust extraction 

flange while working with the finishing sander. Make sure that the integrated 
dust extraction system is functioning. 

ƒ

  Attention: The finishing sander is not designed for wet sanding. 

ƒ

  The dust forming during operation may be hazardous to your health, 

combustible or explosive. Take the necessary precautions as 

  Wearing 

Ear 

Protection 

  Wearing 

Dust 

Protection. 


To avoid malfunction, damage, and physical injury please follow 
the included General safety information and the following safety 
notes: 

Summary of Contents for S1B-250AB

Page 1: ...Westfalia Bedienungsanleitung Nr 106577 ...

Page 2: ...Schwingschleifer S1B 250AB Artikel Nr 43 45 71 Finishing Sander S1B 250AB Article No 43 45 71 Bedienungsanleitung Instruction Manual ...

Page 3: ...instructions for further reference Please pass it on along with the unit if it is handed over to a third party Der Schwingschleifer ist für Trockenschleifarbeiten geeignet Er kann für das Flächenschleifen von Holz Metall Gips und Spachtel flächen Entfernen von Rost Farben und für den Zwischenschliff verwendet werden Bitte machen Sie sich in der Reihenfolge der Kapitel mit dem Gerät vertraut und be...

Page 4: ...III Übersicht Overview 7 ...

Page 5: ... OFF Switch 2 Feststellknopf Locking Button 3 Staubabsaugadapter Dust Extraction Flange 4 Klemmhebel Clamping Lever 5 Schleifplatte Sanding Plate 6 Staubbeutel Dust Bag 7 Schleifpapierklemme Sand Paper Clamp Übersicht Overview ...

Page 6: ...ite 4 Staubbeutel entleeren Seite 4 Wartung und Pflege Seite 5 Technische Daten Seite 6 Table of Contents Inhaltsverzeichnis Safety Notes Page 8 Before first Use Page 9 Attaching Changing the Sand Paper Page 9 Attaching the Dust Bag Page 9 Turning the Unit ON and OFF Page 9 Sanding Page 10 Emptying the Dust Bag Page 10 Maintenance and Care Page 11 Technical Data Page 12 ...

Page 7: ...dapter an Achten Sie darauf dass die integrierte Staubabsau gung funktioniert Achtung Der Schwingschleifer ist nicht für Nass Schleifarbeiten geeignet Die beim Arbeiten entstehenden Stäube und Späne können gesundheitsge fährdend brennbar oder explosiv sein Treffen Sie geeignete Schutzmaß nahmen wie das Tragen eines Gehörschutzes das Tragen eines Atemschutzes Beachten Sie bitte zur Vermeidung von F...

Page 8: ...hleifpapier durch Herunterdrücken der Klemmhebel 4 Staubbeutel anbringen 1 Der Schwingschleifer ist mit einem Anschluss für eine Staubabsaugvorrich tung oder einen Staubbeutel ausgestattet 2 Schieben Sie den Staubbeutel 6 oder das Saugrohr einer Absaugvorrich tung oder eines geeigneten Staubsaugers auf den Absaugadapter 3 Arbei ten Sie niemals ohne Staubabsaugung oder angebrachten Staubbeutel EIN ...

Page 9: ...e übermäßige Erhöhung des Anpressdruckes führt nicht zu einer höheren Schleifleistung sondern zu stärkerem Verschleiß von Gerät und Schleifblatt Staubbeutel leeren 1 Entleeren Sie nach 5 10 Minuten Betriebszeit den Staubbeutel um ein einwandfreies Arbeiten zu ermöglichen 2 Schalten Sie den Schwingschleifer aus und ziehen Sie den Netzstecker 3 Ziehen Sie den Staubbeutel 6 von dem Absaugadapter ab 4...

Page 10: ...anzen welche die Kunststoffteile des Gerätes angreifen können Achten Sie darauf dass die Luftschlitze immer sauber und offen bleiben Achten Sie darauf dass keine Flüssigkeiten in die Maschine gelangen und tauchen Sie das Gerät niemals in Flüssigkeiten Reparaturen Inspektionen des Maschineninneren Einstellungen und der Kohlebürstenwechsel dürfen nur von einem Elektrofachmann vorgenom men werden Es ...

Page 11: ...30 V Frequenz 50 Hz Leistungsaufnahme 280 W Leerlauf Schwingungszahl 11 500 min 1 Gewichteter Schalldruckpegel 83 dB A Gewichteter Schallleistungspegel 97 dB A Hand Arm Vibration 7 73 m s2 Schutzklasse II Schleiffläche 230 x 115 mm ...

Page 12: ...7 Notizen Notes ...

Page 13: ...lange while working with the finishing sander Make sure that the integrated dust extraction system is functioning Attention The finishing sander is not designed for wet sanding The dust forming during operation may be hazardous to your health combustible or explosive Take the necessary precautions as Wearing Ear Protection Wearing Dust Protection To avoid malfunction damage and physical injury ple...

Page 14: ...extraction 4 Lock the sanding paper in place by flipping down the clamping levers 4 Attaching the Dust Bag 1 The finishing sander is equipped with a flange to connect a dust extractor or a dust bag 2 Slide the dust bag 6 or the suction tube of a dust extractor or a suitable vacuum cleaner over the dust extraction flange 3 Do not work without dust bag or dust extraction system Turning the Unit ON a...

Page 15: ...in circular motions 3 Excessive pressure during sanding will not lead to better results but just to increase wear of the unit and the sanding paper Emptying the Dust Bag 1 Empty the dust bag every 5 10 minutes of work for the best results 2 Turn off the finishing sander and disconnect the power plug 3 Pull the dust bag 6 off the dust extraction flange 4 Empty the dust bag and before continuing to ...

Page 16: ...damage the plastic parts Always keep the ventilation louvers clean and free from obstructions of any kind Do not allow liquids of any kind to enter the unit and do not immerse the unit in liquids of any kind Repairs inspections of the interior components adjustments and replace ment of the carbon brushes may only be undertaken by a professional Only original replacement parts may be used For furth...

Page 17: ...Voltage 230 V Frequency 50 Hz Rated Power 280 W No Load Speed 11 500 min 1 Weighted Sound Pressure Level 83 dB A Weighted Sound Power Level 97 dB A Hand Arm Vibration 7 73 m s2 Protection Class II Grinding Surface 230 x 115 mm ...

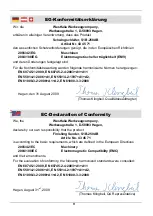
Page 18: ...1 A2 EN 61000 3 3 2008 Hagen den 31 August 2009 Thomas Klingbeil Qualitätsbeauftragter We the Westfalia Werkzeugcompany Werkzeugstraße 1 D 58093 Hagen declare by our own responsibility that the product Finishing Sander S1B 250AB Article No 43 45 71 is according to the basic requirements which are defined in the European Directives 2006 42 EC Machinery 2004 108 EC Electromagnetic Compatibility EMC ...

Page 19: ...h Internet www westfalia net Kundenbetreuung Customer Services Werter Kunde bitte helfen Sie mit Abfall zu vermeiden Sollten Sie sich einmal von diesem Artikel trennen wollen so bedenken Sie bitte dass viele seiner Komponenten aus wertvollen Rohstoffen bestehen und wiederverwertet werden können Entsorgen Sie ihn daher nicht in die Mülltonne sondern führen Sie ihn bitte Ihrer Sammelstelle für Elekt...

Reviews: