NOTE:
If your appliance fails to connect,
press and hold the Network button on the
appliance for 10 seconds, then attempt to
connect again.
You are now able to set the Coffee Maker’s
brew schedule, start or stop brewing and
check the Coffee Maker’s status from your
iCEBOX screen.
1.
On the iCEBOX: In My Kitchen mode,
choose
Appliances
. Tap the Coffee
Maker icon to make it active then
choose
Set Brew Schedule
.
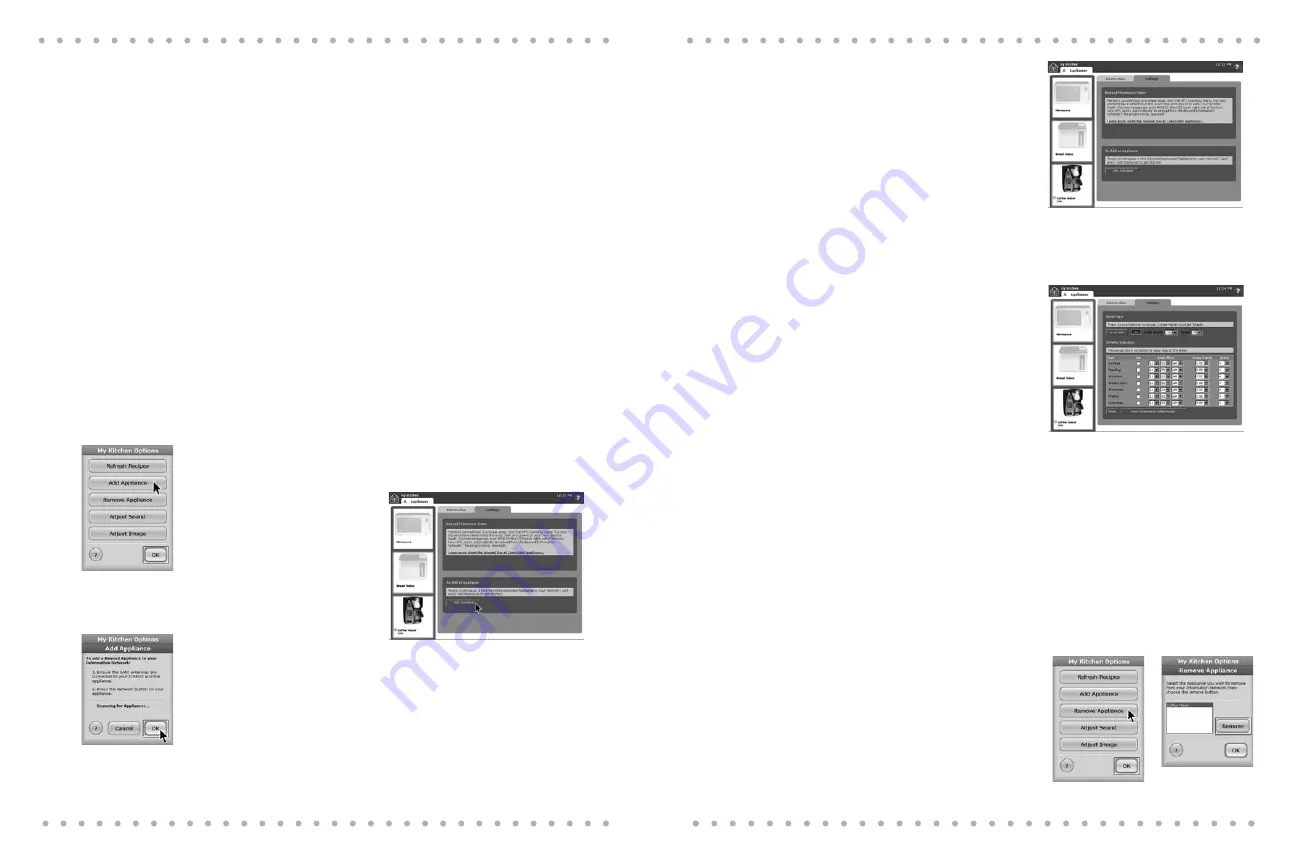
2.
Use the drop down menus to select
start time, “keep warm” and grind
settings. Make your settings active by
clicking the
On
box.
3.
To save your settings press
Save
Schedule to Coffee Maker
. To cancel
or clear your settings, press
Reset
.
NOTES:
§
The Coffee Maker must be armed in a ready state (
READY
appears in the Coffee Maker’s
display) in order for brewing to occur.
§
You may override the preset schedule at any time by selecting
Brew Now
on the iCEBOX
Appliance screen.
§
You can brew coffee manually at any time using the Coffee Maker’s control panel.
Programmed brew times set on the Coffee Maker’s control panel will take precedence
over the brew schedule set on the iCEBOX.
1.
On your iCEBOX front panel, keyboard
or remote, press the
Options
button
then tap the onscreen
My Kitchen
button. Select
Remove Appliance
.
2.
In the Remove Appliance dialog, tap
Coffee Maker
to select, then tap
Remove
and
OK
.
3.
The Coffee Maker icon will “gray
out.” On your Coffee Maker display
NETWORK
will disappear.
15
Your iCEBOX can act as a network gateway and command center for the Beyond Connected
Appliances, including the Beyond Microwave, Bread Maker and Coffee Maker. In order to net-
work your Beyond Appliances, you must connect the SANI antenna to your iCEBOX, and also
install SANI cards in the appliances you want to network.
Once the antennas are in place, and your appliances are connected, they can be monitored
through the iCEBOX My Kitchen mode.
NOTES:
§
If you do not have an
iCEBOX
, skip this procedure.
§
A SANI card is available for your Coffee Maker. For more information on using the
SANI Card
please refer to the instruction booklet provided with the
SANI
card.
§
Additional information can be found in your
iCEBOX
Owner’s Manual and on the
Beyond web site at www.beyondconnectedhome.com.
To add your Coffee Maker to your
iCEBOX
appliance network:
§
Make sure that the SANI antenna is connected to the rear of the
iCEBOX
.
§
Insert a SANI card into the slot at the base of the Coffee Maker’s control panel.
1.
On your iCEBOX front panel, keyboard
or remote, press the
Options
button
then tap the onscreen
My Kitchen
button. Select
Add Appliance.
2.
On the Appliances Screen, select
the
Settings
tab then press
Add
Appliance.
3.
On the Coffee Maker control panel,
press the
Network
button.
4.
The iCEBOX and the Coffee Maker
will attempt to connect. The iCEBOX
screen will display a
Scanning For
Appliances
dialog. Press
OK.
5.
When a connection is established,
NETWORK
will appear in the Coffee
Maker’s display and the Coffee Maker’s
time and date will be synchronized
with the iCEBOX’s time/date settings.
6.
The iCEBOX will display a message
Coffee Maker detected
. An active
Coffee Maker icon and the Coffee
Maker’s current status will appear on
the screen.
14
Coffee Maker Owner’s Manual
9. Using the iCEBOX to Set Your Coffee
Maker’s Brew Schedule
8. Adding Your Beyond Coffee Maker to
Your iCEBOX Appliance Network
10. Removing Your Coffee Maker from
the iCEBOX Network
1
2
4
1
2
Summary of Contents for Beyond WBYCM2
Page 1: ...WBYCM2 ...
Page 20: ......


