18 | Westinghouse Outdoor Power Equipment, LLC
Westinghouse Outdoor Power Equipment, LLC | 19
MAINTENANCE
NOTICE
DO NOT twist or tear the foam air filter element during
cleaning or drying. Only apply slow but firm squeezing
action.
5.
Rinse the air filter element by submerging it in fresh
water and applying a slow squeezing action. Allow the
filter to dry thoroughly.
NOTICE
Do not pollute. Follow the guidelines of the EPA or other
governmental agencies for proper disposal of hazardous
materials. Consult local authorities or reclamation facility.
6.
Dip the foam air filter in clean engine oil then squeeze
out all excess oil. The engine will smoke when started if
too much oil is left in the filter.
7.
Install the foam air filter in the housing and reinstall the
air cleaner cover.
8.
Install the engine service panel.
Air Filter: Part# 5291
ENGINE OIL LEVEL CHECK
CAUTION
Avoid skin contact with engine oil. Wear protective
clothing and equipment. Wash all exposed skin with
soap and water.
NOTICE
Always use the specified engine oil. Failure to use the
specified engine oil can cause accelerated wear and/or
shorten the life of the engine.
When using the generator under extreme, dirty, dusty
conditions or in extremely hot weather, change the oil
more frequently.
Ambient air temperature will affect engine oil performance.
Change the type of engine oil used based on weather
conditions.
-20
0
20
40
60
Ambient temperature
Recommended Engine Oil Type
80
100
120
-28.9
°F
°C
-17.8 -6.7 4.4
15.6 26.7 37.8 48.9
10W-30
5W-30 Synthetic
10W-40
5W-30
Check the engine oil level before each use or every 8
hours of operation.
1.
Place the generator on a level surface and allow the
engine to cool for several minutes.
2.
Remove the engine service cover.
3.
With a damp rag, clean around the oil dipstick.
4.
Remove the oil dipstick and wipe the dipstick clean.
5.
Screw the dipstick fully into the filler neck. Remove
the dipstick and verify that the oil level is within safe
operating range.
6.
If low, add recommended engine oil incrementally and
recheck until the level is between the L and H marks on
the dipstick. DO NOT overfill. If over the full mark on
dipstick, drain the oil to reduce oil level to the full mark
on dipstick.
7.
Replace the oil dipstick and hand-tighten.
8.
Install the engine service cover.
MAINTENANCE
MAINTENANCE SCHEDULE
Regular maintenance will improve performance and
extend the service life of the generator. Follow the hourly
or calendar intervals, whichever occurs first. More frequent
service is required when operating in adverse conditions
as noted below.
Before Each Use
Check engine oil
After First 25 Hours or First Month
Change engine oil
After 50 Hours or Every 6 Months
Change engine oil
1
Clean air filter
2
After 100 Hours or Every 6 Months
Inspect/clean spark arrestor
Inspect/clean spark plug
Replace fuel filter
3
Inspect/adjust valve clearance
3
After 300 Hours or Every Year
Replace spark plug
Replace air filter
1
Change oil every month when operating under heavy
load or in high temperatures.
2
Clean more often under dirty or dusty conditions.
Replace air filter if it cannot be adequately cleaned.
3
Recommend service to be performed by authorized
Westinghouse service dealer.
MAINTENANCE REPLACEMENT PARTS
Description
Part Number
Air filter
5291
Spark arrestor
6789
Fuel filter
516401
Spark plug
• Torch - E6RTC
•
NGK - BPR6HS
• Bosch - WR7BC
• Autolite - 284
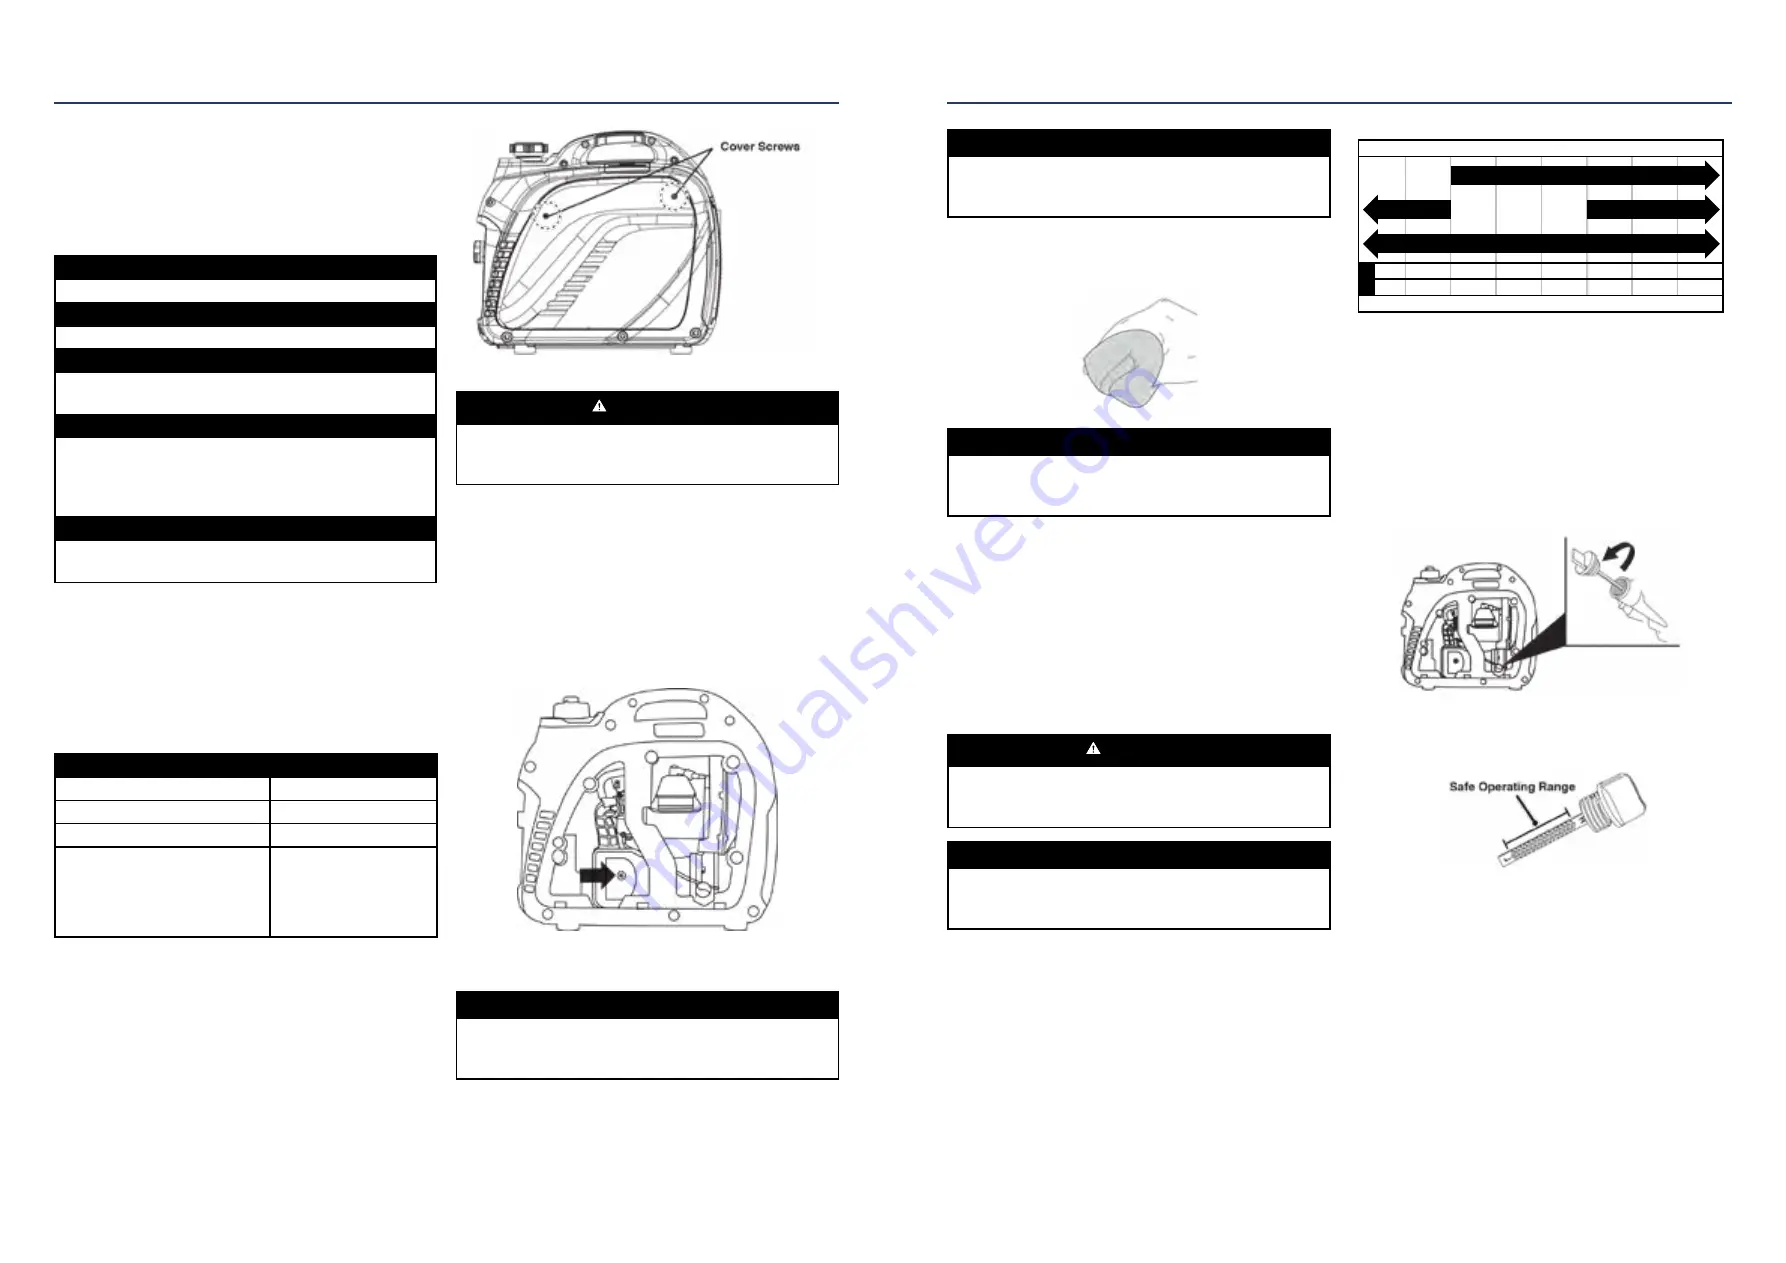
ENGINE SERVICE COVER
Remove the engine service cover to access the air filter,
carburetor, oil fill/drain, and oil dipstick. Remove the two
cover screws then carefully pull the cover out with both
hands to prevent damage to the grommet posts on the
cover.
AIR FILTER MAINTENANCE
WARNING
Fire hazard. Never use gasoline or other flammable
solvents to clean the air filter. Use only household
detergent soap to clean the air filter.
The air filter must be cleaned after every 50 hours of use or
six months (frequency should be increased if the generator
is operated in a dusty environment).
1.
Place the generator on a level surface and allow the
engine to cool for several minutes.
2.
Remove the engine service cover.
3.
Remove the screw securing the air cleaner cover. Tip
the cover down to remove.
Note:
The air filter element is oil soaked. Use an
appropriate cleaning container.
NOTICE
Avoid skin contact with engine oil. Wear protective
clothing and equipment. Wash all exposed skin with
soap and water.
4.
Remove the foam air filter from the air cleaner housing
and wash it by submerging the element in a solution
of household detergent soap and warm water. Slowly
squeeze the foam to thoroughly clean.


