14 | Westinghouse Outdoor Power Equipment, LLC
Westinghouse Outdoor Power Equipment, LLC | 15
OPERATION
GENERATOR CAPACITY
NOTICE
Do not overload the generator’s capacity. Exceeding the
generator’s wattage/amperage capacity can damage
the generator and/or electrical devices connected to it.
Make sure the generator can supply enough continuous
(running) and surge (starting) watts for the items you will
power at the same time.
The total power requirements (Volts x Amps = Watts) of all
appliances connected must be considered. Appliance and
power tool manufacturers usually list rating information
near the model or serial number.
To determine power requirements:
1.
Select the items you will power at the same time.
2.
Total the continuous (running) watts of these items. This
is the amount of power the generator must produce
to keep the items running. See the wattage reference
chart on the next page.
3.
Estimate how many surge (starting) watts you will need.
Surge wattage is the short burst of power needed to
start electric motor-driven tools or appliances such as a
circular saw or refrigerator. Because not all motors start
at the same time, total surge watts can be estimated by
adding only the item(s) with the highest additional surge
watts to the total rated watts from step 2.
Example:
Tool or Appliance
Running
Watts*
Starting
Watts*
TV (Tube Type)
300
0
RV Refrigerator
180
600
Radio
200
0
Light (75 Watts)
300
0
Coffee Maker
600
0
1580 Total
Running
Watts*
600
Highest
Starting
Watts*
Total Running Watts
1580
Highest Starting Watts
+ 600
Total Starting Watts Needed
2180
*Wattages listed are approximate. Verify actual wattage.
POWER MANAGEMENT
To prolong the life of the generator and attached devices,
use care when adding electrical loads to the generator.
There should be nothing connected to the generator
outlets before starting the engine. The correct and safe
way to manage generator power is to sequentially add
loads as follows:
1.
With nothing connected to the generator, start the
engine as described in this manual.
2.
Plug in and turn on the first load, preferably the largest
load you have.
3.
Permit the generator output to stabilize (engine runs
smoothly and attached device operates properly).
4.
Plug in and turn on the next load.
5.
Again, permit the generator to stabilize.
6.
Repeat steps 4 and 5 for each additional load.
Wattage Reference
Tool or Appliance
Estimated
Running
Watts*
Estimated
Starting
Watts*
Incandescent Lights
(4 Quantity x 75 Watts)
300
0
TV (Tube Type)
300
0
Sump Pump (1/3 hp)
800
1300
Refrigerator or Freezer
700
2200
Well Pump (1/3 hp)
1000
2000
Radio
200
0
Drill (3/8”, 4 amps)
440
600
Circular Saw
(Heavy Duty, 7-1/4”)
1400
2300
Miter Saw (10”)
1800
1800
Table Saw (10”)
2000
2000
*Wattages listed are approximate. Verify actual wattage.
OPERATION
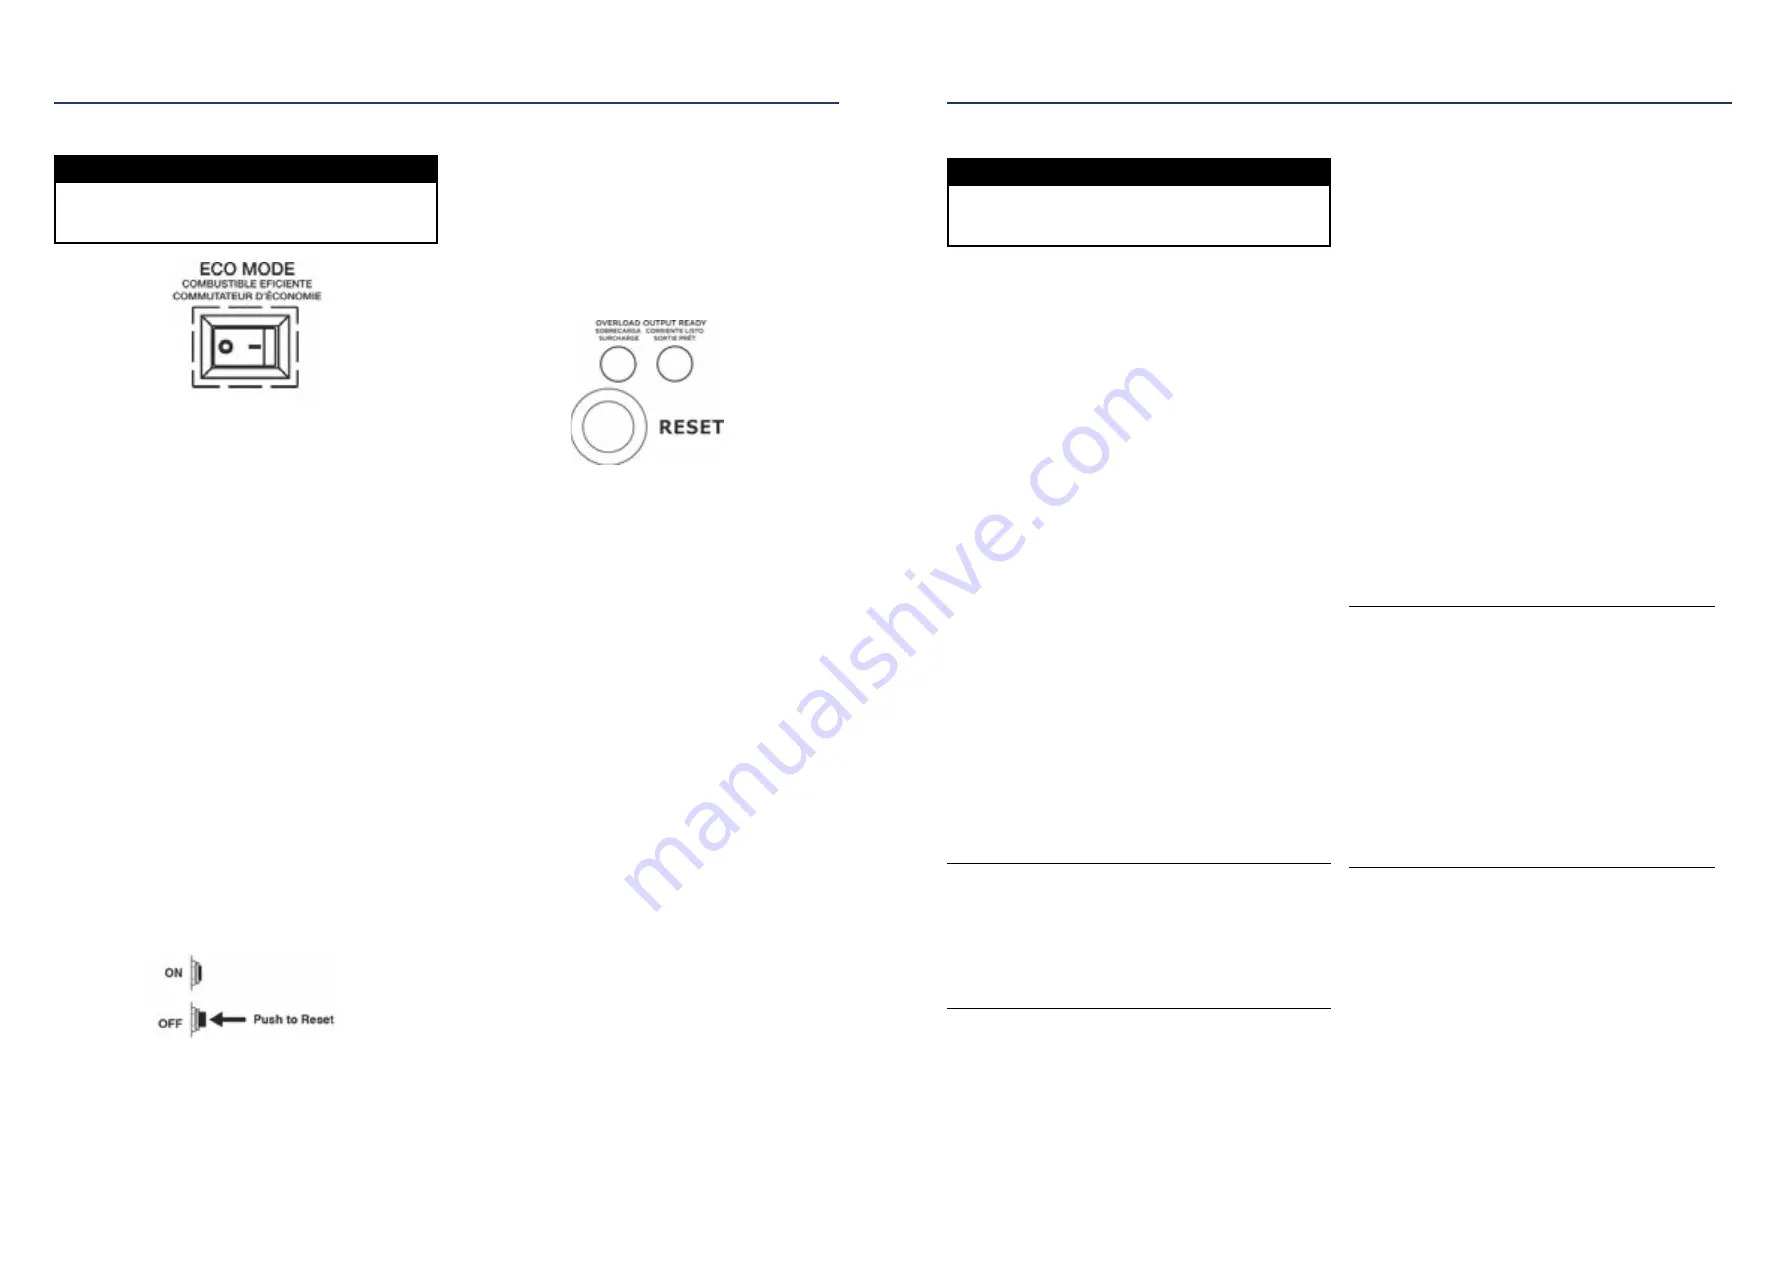
ECO MODE
NOTICE
Always start the generator with ECO MODE OFF. Allow
the engine speed to stabilize and the OUTPUT READY
LED to illuminate before switching ECO MODE ON.
Note:
Do not use ECO MODE when in parallel operation
with another Westinghouse generator.
ECO MODE minimizes fuel consumption and noise by
adjusting the engine RPM to the minimum required for the
current load.
Turn ECO MODE ON when powering small appliances
with continuous loads such as a computer or electric light.
Turn ECO MODE OFF when powering large surge loads
such as an air conditioner or electric pump.
To turn on ECO MODE, verify that the OUTPUT READY
LED is illuminated green, then push the switch to the ON
position. If no load is present, the generator RPM will drop
to idle speed. The generator will detect loads as they are
applied and increase engine RPM.
To run the generator at maximum power and RPM, push
the ECO MODE switch to the OFF position.
AC CIRCUIT BREAKER
The circuit breaker will automatically switch OFF if there
is a short circuit, a significant overload of the generator at
the receptacle, or if the combined load exceeds 15 Amps.
If the AC circuit breaker switches OFF automatically,
check that the appliance is working correctly and it does
not exceed the rated load capacity of the circuit before
resetting the circuit breaker.
OVERLOAD RESET
The generator will automatically switch OFF all AC output
to protect the generator if overloaded or if there is a short
circuit in a connected appliance. However, the engine will
continue to run. Marginal overloading that temporarily
illuminates the OVERLOAD LED may shorten the service
life of the generator.
OVERLOAD on the control panel will illuminate red and
the green OUTPUT READY will be OFF.
To restore AC output:
1.
Turn off and unplug all connected electrical loads.
2.
Push the RESET button on the control panel until the
OVERLOAD LED goes OFF and the OUTPUT READY
LED is illuminated.
3.
Reset the circuit breaker if OFF.
4.
Verify that the intended running and surge loads do not
exceed the generator’s capacity.
5.
Reconnect electrical loads sequentially, allowing the
generator to stabilize after each load is connected.


