background image

14

Operating sequence

Before the first wash we recommend that you pour 2
li

tres of water into the main wash compartment 

of the detergent drawer in order to activate the ECO
valve. Then run a cotton cycle at 60°C, with the
machine empty, in order to remove any
manufacturing residue from the drum and tub.
Pour half a measure of detergent into the main wash
compartment and start up the machine.

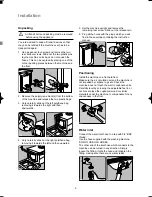
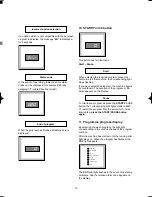
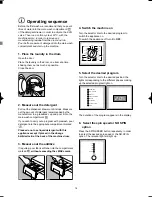
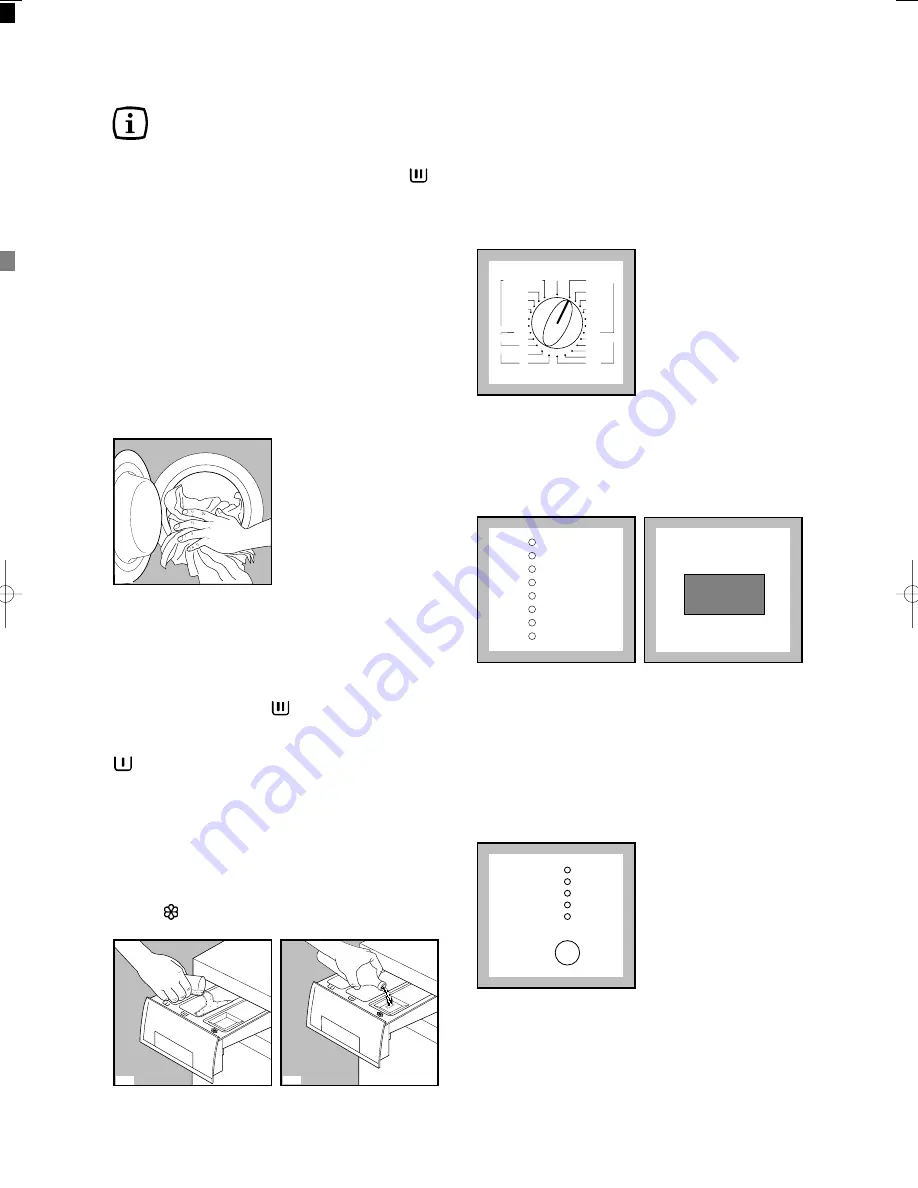
1. Place the laundry in the drum

Open the door.
Place the laundry in the drum, one item at a time,
shaking them out as much as possible.
Close the door.

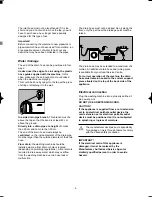
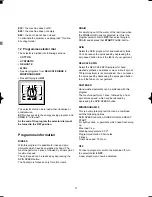
2. Measure out the detergent

Pull out the dispenser drawer until it stops. Measure
out the amount of detergent recommended by the
manufacturer in a graduated cup and pour it into the
main wash compartment 

.

If you wish to carry out a program with prewash, pour
detergent into the appropriate compartment marked

.

Please do not use liquid detergent with this
appliance except if placed in the dosage
ball/device & at the back of the machine drum.

3. Measure out the additive

If required, pour fabric softener into the compartment
marked , 

without exceeding the «MAX» mark.

C0112

C0111

P0004

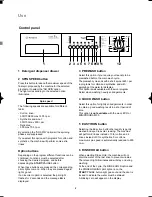
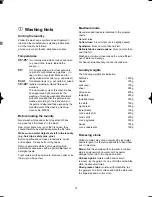
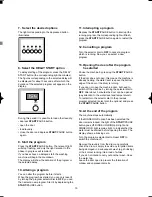
4. Switch the machine on

Turn the selector dial to the desired program to
switch the appliance on. 
To switch the appliance off turn it to 

OFF

.

5. Select the desired program

Turn the selector dial to the desired position: the
lights corresponding to the different phases making
up the selected program light on.

The duration of the program appears in the display.

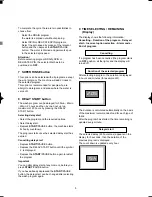
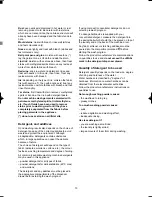
6. Select the spin speed or NO SPIN

option

Press the SPIN SPEED button repeatedly, in order
to select the desired spin speed or the NO SPIN
option. The relevant light will light up.

SPIN

SPEED

1200

900

700

500

NO SPIN

2.05

PRE-WASH

MAIN WASH

RINSES

RINSE HOLDING

DRAIN

END

SPINNING

CLEAN FILTER

SYNTHETIC

COTTON

COLD

COLD

OFF

WOOL

DELICATE

60 ECO

95

60

40 ECO

40
30

60
40 ECO
40
30

40

30

40

30

COLD

MINIPROGRAM 30

SPIN

DRAIN

SOFTENER

RINSES

DELICATE SPIN

132990940.qxd  04/06/2004  08:40  Pagina  14    (Nero/Process Black pellicola)

Summary of Contents for LF 652 D

Page 1: ...ECO 40 30 60 40 ECO 40 30 40 30 40 30 COLD MINIPROGRAM 30 SPIN DRAIN SOFTENER RINSES DELICATE SPIN PRE WASH MAIN WASH RINSES RINSE HOLDING DRAIN END SPINNING CLEAN FILTER DELAY START RINSE HOLD EASY...

Page 2: ...ergent dispenser drawer 7 Use 8 Control panel 8 Controls 8 11 Washing hints 12 Sorting the laundry 12 Temperatures 12 Before loading the laundry 12 Maximum loads 12 Laundry weights 12 Removing stains...

Page 3: ...cloth bag or pillowcase to prevent trapping between the drum and the tub Use only the recommended dosage of fabric softener Excessive amounts could damage the garments Leave the porthole door slightl...

Page 4: ...ightly soiled stains can be removed the laundry wash load can then be washed at a lower temperature Measure the detergent according to water hardness the degree of soiling and the quantity of laundry...

Page 5: ...7 P1126 P1124 2 3 1 P0001 P1129 5 Set the machine upright and remove the remaining rear screw Slide out the relevant pin 6 Plug all the holes with the plugs which you will find in the envelope contain...

Page 6: ...uld be installed where a floor drain or hole is located depending on plumbing regulations A floor drain is required to drain away water which may overflow from the washing machine due to a hose leak o...

Page 7: ...etergent and reduced water consumption saving energy Detergent dispenser drawer The detergent dispenser is divided into three compartments fig The table of Washing Programmes shows which compartment t...

Page 8: ...pressed the corresponding pilots lights come on When they are pressed again lights go out If an incorrect option is selected the pilot light flashes for 2 seconds and the message Err is displayed Spi...

Page 9: ...starts once the selected delay start has expired Cancelling delay start Depress START PAUSE button Depress the DELAY START button until the symbol 0 is displayed Depress the START PAUSE button again...

Page 10: ...lay start the machine begins its countdown The duration of the program or the delay appears on the display To interrupt a program depress the START PAUSE button the corresponding pilot lights starts t...

Page 11: ...S DELICATE SPIN DRAIN For emptying out of the water of the last rinse when the RINSE HOLD option is selected turn first the program selector dial to OFF then select program DRAIN and depress that STAR...

Page 12: ...ny belts or long tapes Remove persistent stains before washing Rub particularly soiled areas with a special detergent or detergent paste Treat curtains with special care Remove hooks or tie them up in...

Page 13: ...only Ball point pen and glue moisten with acetone lay the garment on a soft cloth and dab the stain Lipstick moisten with acetone as above then treat stains with methylated spirits Remove any residua...

Page 14: ...se liquid detergent with this appliance except if placed in the dosage ball device at the back of the machine drum 3 Measure out the additive If required pour fabric softener into the compartment mark...

Page 15: ...he START PAUSE button again to restart the program 12 Cancelling a program Turn the selector dial to OFF to cancel a program which is running Now you can select a new program 13 Opening the door after...

Page 16: ...Hold Super rinse Easy iron Spin NO SPIN COTTON 95 COTTON 60 ECO COTTON 60 COTTON 40 ECO COTTON 40 30 COLD SYNTHETIC 60 40 30 COLD SYNTHETIC 40 ECO Type of fabric Additional functions White cotton Cott...

Page 17: ...inse Hold Easy iron Spin NO SPIN RINSES For rinses hand washed items SOFTENER DRAIN For emptying out the water of the last rinse of programs with option RINSE HOLD SPIN Separate spin for cottons DELIC...

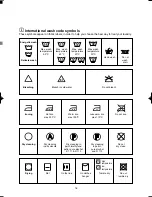
Page 18: ...e 30 C Hand wash Do not wash at all Bleaching Bleach in cold water Do not bleach Ironing Hot iron max 200 C Warm iron max 150 C Lukewarm iron max 110 C Do not iron Dry cleaning Dry cleaning in all sol...

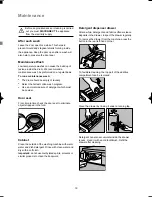
Page 19: ...be powder Door seal From time to time check the door seal to eliminate objects trapped in the fold Cabinet Clean the outside of the washing machine with warm water and dish detergent Rinse with clean...

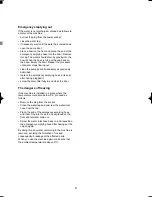
Page 20: ...ump guard Remove any objects from the pump impeller by rotating it P1097 P1096 P1095 Put the cap back on the emergency emptying hose and place the latter back in its seat Screw the pump guard fully in...

Page 21: ...ptying hose in its seat after having plugged it screw the drain filter fully in and close the door The dangers of freezing If the machine is installed in a place where the temperature could drop below...

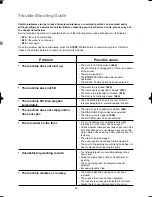
Page 22: ...erly closed E40 The machine fills then empties immediately The end of the drain hose is too low Refer to relevant paragraph in water drainage section The machine does not empty and or does not spin Th...

Page 23: ...s still not evenly distributed in the drum the machine will spin at a lower speed or will not spin If at the end of the program the laundry is not spun enough redistribute the load manually and select...

Page 24: ...responsibility for loss or damage prior to it being received by the Company or its Authorised Service Centre 9 This warranty is the only express warranty given by the Company 10 This Warranty does no...

Page 25: ...s to and from your home 9 If you are required to transport the appliance to the Company or its service agent you must ensure it is securely packed and insured The Company does not accept any responsib...

Reviews: