background image

Westinghouse Outdoor Power Equipment, LLC | 27

MAINTENANCE

SHORT TERM STORAGE

•  Allow the generator to cool a minimum of 30 minutes 

before storage.  

•  If operating on propane, turn the propane tank valve 

to the fully closed position and disconnect the LPG/

propane hose from the generator and propane tank. 

•  Replace all protective covers on the generator control 

panel. 

•  Wipe the generator with a moist cloth. Clean any debris 

from the muffler cooling vents.   

•  Store the generator in a well-ventilated, dry location 

away from sparks, open flames, pilot lights, heat, and 

other sources of ignition such as areas with a spark-

producing electric motor or where power tools are 

operated. 

•  Do not store the generator, gasoline, or propane tanks 

near furnaces, water heaters, or any other appliances 

that produce heat or have automatic ignitions.

•  With the engine and exhaust system cool and all 

surfaces dry, cover the generator to keep out dust. Do 

not use a plastic sheet as a dust cover. Non-porous 

materials trap moisture and promote rust and corrosion. 

LONG TERM STORAGE

Even properly stabilized fuel can leave residue and cause 

corrosion if left long term. If storing the generator for over 

six months, drain the fuel tank.  

DRAINING THE FUEL TANK

If storing the generator for longer than six months, drain 

the fuel tank to prevent fuel separation, deterioration, and 

deposits in the fuel system. 

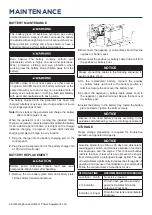
1. 

Unscrew the fuel tank cap. Remove the fuel screen filter 

by slightly compressing it while removing it from the 

tank. 

2. 

Using a commercially available gasoline hand pump 

(not included), siphon the gasoline from the fuel tank 

into an approved gasoline container. DO NOT use an 

electric pump.  

OR 

Disconnect the fuel line from the bottom of the fuel tank 

and allow the fuel to drain into an approved gasoline 

container. Reinstall the fuel line. 

3. 

Reinstall the fuel screen filter and the fuel tank cap. 

4. 

Start the generator and allow it to run until the generator 

engine stops. 

5. 

Push the battery switch to the OFF position. 

6. 

Disconnect the battery.  

VALVE CLEARANCE

NOTICE

Checking and adjusting valve clearance must be done 

when the engine is cold.

Perform this procedure on both cylinders. 

1. 

Remove the rocker arm cover and carefully remove 

the gasket. If the gasket is torn or damaged, it must be 

replaced.

2. 

Remove the spark plug so the engine can be rotated 

more easily.

3. 

Rotate the engine to Top Dead Center (TDC) by 

momentarily pushing the Start button. Looking through 

the spark plug hole, the piston should be at the top (both 

valves are closed).

4. 

Both the rocker arms should be loose at TDC on the 

compression stroke. If they are not, rotate the engine 

360°.

5. 

Insert a feeler gauge between the rocker arm and the 

valve stem to measure valve clearance.

Intake Valve

Exhaust Valve

Valve Clearance

0.0031 – 0.0047 in 

(0.08 – 0.12 mm)

0.0051 – 0.0067 in 

(0.13 – 0.17 mm)

Torque

8-12 N•m

8-12 N•m

6. 

If an adjustment is necessary, hold the rocker arm pivot 

and loosen the pivot adjusting nut.

7. 

Turn  the  rocker  arm  pivot  to  obtain  the  specified 

clearance. Hold the rocker arm pivot and re-tighten the 

pivot adjusting nut to the specified torque.

Torque: 106 inch-pound (12 N•m)
8. 

Perform this procedure for the other valve.

9. 

Install the gasket, rocker arm cover, and spark plug.

Summary of Contents for WGen12000DF

Page 1: ...table Generator Gasoline 12 000 Running Watts 15 000 Peak Watts Propane 10 800 Running Watts 13 500 Peak Watts DO NOT RETURN THIS PRODUCT TO THE STORE If you have questions or need assistance please c...

Page 2: ...ESE INSTRUCTIONS TABLE OF CONTENTS INTRODUCTION DISCLAIMERS 2 ALL RIGHTS RESERVED 2 SPECIFICATIONS 3 SAFETY SAFETY DEFINITIONS 4 SAFETY SYMBOLS 4 SAFETY INSTRUCTIONS 5 SAFETY LABELS AND DECALS 8 COMPO...

Page 3: ...to 104 F 40 C If needed this product can be operated at temperatures ranging from 5 F 15 C 122 F 50 C for short periods If the product is exposed to temperatures outside of this range during storage i...

Page 4: ...a hazardous situation which if not avoided could result in death or serious injury Indicates a hazardous situation which if not avoided could result in minor or moderate injury NOTICE Indicates a sit...

Page 5: ...properly installed and the electrical output has been verified by a qualified electrician The connection must isolate the generator power from utility power and must comply with all applicable laws a...

Page 6: ...e oil or gasoline Wear protective clothing and equipment Wash all exposed skin with soap and water FUEL SAFETY Store fuel in a container approved for gasoline Do not smoke when filling the generator w...

Page 7: ...require a certified plumber to install the fuel line to the generator and the loose regulator is not used the regulator that is attached to the fuel tank The pressure as measured at the regulator mou...

Page 8: ...8 Westinghouse Outdoor Power Equipment LLC SAFETY SAFETY LABELS AND DECALS...

Page 9: ...Westinghouse Outdoor Power Equipment LLC 9 COMPONENTS COMPONENTS GENERATOR COMPONENTS...

Page 10: ...Connects the Westinghouse ST Switch sold separately to the control panel 10 Battery Charging Port Used to charge the battery with the included battery charger 11 Ground Terminal The ground terminal i...

Page 11: ...e reminder codes will be shown on the Data Display based on unit lifetime hours The maintenance codes will be displayed until the unit is turned off Refer to the Maintenance section for specific proce...

Page 12: ...rench Wheel and lifting hook components Item Quantity Lifting hook 1 Flange bolt M8 4 Wheel 2 Axle pin 2 Washer 4 Cotter pin 4 If any parts are missing contact our service team at service wpowereq com...

Page 13: ...nto the engine 3 Replace the oil fill cap and tighten securely BATTERY INSTALLATION Battery posts terminals contain lead and lead compounds Wash hands after handling The battery shipped with the gener...

Page 14: ...spark or flame while fueling USING FUEL STABILIZER Adding a fuel stabilizer not included extends the usable life of fuel and helps prevent deposits from forming that can clog the fuel system Follow t...

Page 15: ...ell ventilated area 2 Verify that the propane tank valve is in the fully closed position 3 Remove the cover on the generator propane inlet valve 4 Use your fingers to hand thread the LPG propane hose...

Page 16: ...tairs next to walls or buildings or in any other location that will not allow for adequate cooling of the generator and or the muffler DO NOT contain generators during operation Asphyxiation hazard Pl...

Page 17: ...f your unit was shipped without a key fob contact Westinghouse customer service The generator can be started remotely from up to 99 feet 30 meter using the remote start key fob Note As the batteries i...

Page 18: ...when loads are turned back on Turn Low Idle ON when powering intermittent non electronic loads such as power tools at a construction site BEFORE STARTING THE GENERATOR Verify that The generator is pl...

Page 19: ...l tank valve to the ON position 2 Turn the fuel selector switch to gasoline operation 3 Turn the propane tank valve to the fully closed position Note When switching to propane operation the engine may...

Page 20: ...ts RV Air Conditioner 11 000 BTU 1010 1600 TV Tube Type 300 0 RV Refrigerator 180 600 Radio 200 0 Light 75 Watts 300 0 Coffee Maker 600 0 2590 Total Running Watts 1600 Highest Starting Watts Total Run...

Page 21: ...n death or serious injury Before connecting an AC appliance or power cord to the generator Use grounded 3 prong extension cords tools and appliances or double insulated tools and appliances Make sure...

Page 22: ...ionary and resting on a horizontal surface Do not use the handle to lift the generator entirely off the ground tow it or up end it Fire hazard Do not up end the generator or place it on its side Fuel...

Page 23: ...authorized Westinghouse service dealer MAINTENANCE REPLACEMENT PARTS Description Part Number Air filter 5061 Oil drain bolt crush washer 94242 Battery 21 AH 511015 Fuel filter 516401 Spark plug 97110...

Page 24: ...e the generator on a level surface and allow the engine to cool for several minutes 2 With a damp rag clean around the oil fill cap Remove the oil fill cap 3 Place an oil pan or suitable container und...

Page 25: ...ended replacement plug 6 Measure the spark plug electrode gap with a wire type feeler gauge If necessary correct the gap by carefully bending the side electrode Spark plug gap 0 024 0 032 in 0 60 0 80...

Page 26: ...attery posts terminals contain lead and lead compounds Wash hands after handling 1 Remove the two battery plate bolts and battery plate Tilt the battery forward and remove 2 Disconnect the negative ca...

Page 27: ...available gasoline hand pump not included siphon the gasoline from the fuel tank into an approved gasoline container DO NOT use an electric pump OR Disconnect the fuel line from the bottom of the fue...

Page 28: ...fuel Incorrect engine oil level Check engine oil level Dirty air filter Clean the air filter Contaminated fuel Drain the fuel tank Refuel with fresh gasoline Defective low oil level switch Contact Wes...

Page 29: ...ed Using a soap solution check each connection and tighten as needed Propane fuel regulator vent active The propane fuel regulator is equipped with a vent that will allow a small amount of propane fue...

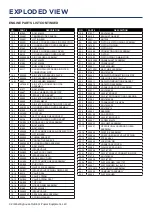
Page 30: ...30 Westinghouse Outdoor Power Equipment LLC EXPLODED VIEW EXPLODED VIEWS AND PARTS LISTS ENGINE EXPLODED VIEW...

Page 31: ...ASHER 6 4 329913 IMPELLER PRESSURE PLATE 6 5 324600 IMPELLER NO PART DESCRIPTION 6 6 320400 FLYWHEEL ASSEMBLY 7 50090059 WIND LEAD COVER ASSEMBLY 7 1 90043 NUT M6 7 2 324701 RECOIL COVER ASSEMBLY 7 3...

Page 32: ...ATE ASSEMBLY 18 9 261807 INTAKE VALVE SPRING LOWER SEAT 18 10 93513 VALVE SEAL 18 11 326000 VALVE SPRING 18 12 261805 VALVE SPRING SEAT 18 13 261806 TOP CAP 18 14 322100 ROCKER ARM ASSEMBLY 18 15 9138...

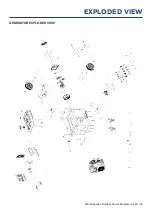
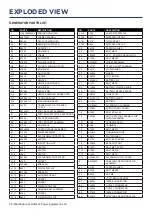
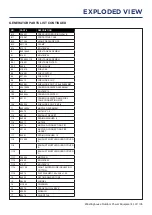
Page 33: ...Westinghouse Outdoor Power Equipment LLC 33 EXPLODED VIEW GENERATOR EXPLODED VIEW...

Page 34: ...CKET 4 1 14 6254 SOCKET 4 1 15 6850 WATERPROOF CAP 4 1 16 6386 GROUND BOLT ASSEMBLY 4 1 17 6385 SOCKET 4 1 18 6848 WATERPROOF CAP NO PART DESCRIPTION 4 1 19 6383 L5 30R RECEPTACLE 4 1 20 6847 WATERPRO...

Page 35: ...0 3 95121 CARBON CANISTER AND FUEL TANK CONNECTING PIPE 10 4 503034 FUEL HOSE CLIP 9 5 0 8 11 60030034 MUFFLER ASSEMBLY 11 1 90075 NUT M10 1 5 11 2 96140 EXHAUST GASKET 11 3 94206 SPRING WASHER 8 11 4...

Page 36: ...36 Westinghouse Outdoor Power Equipment LLC SCHEMATICS SCHEMATICS...

Reviews: