12
UNPACKING
unPaCKing tHE gEnErator
!
CAUTION
Always have assistance when lifting
the generator. The generator is heavy;
lifting it could cause bodily harm.
!
Avoid cutting on or near staples to
prevent personal injury.
1. Carefully cut the packing tape on top of the carton.
2. Fold back top flaps to reveal the Instruction
Manual lying on top of the unit. Remove the
manual and save it for reference.
3. Remove the Wheel Kit (if included).
4. Carefully cut down along the four vertical corners
of the carton and fold the sides flat onto the
ground.
5. Locate and remove the oil bottle, oil funnel and
tool bag (with spark plug socket wrench enclosed)
that are packed in together with the generator.
6. Proceed with attachment of the wheel kit
components, if included (see page 13).
7. Lift and move the generator off the carton and
then recycle or dispose of the packaging materials
properly.
WHEEl Kit
(Included with some models or may be purchased
separately.)
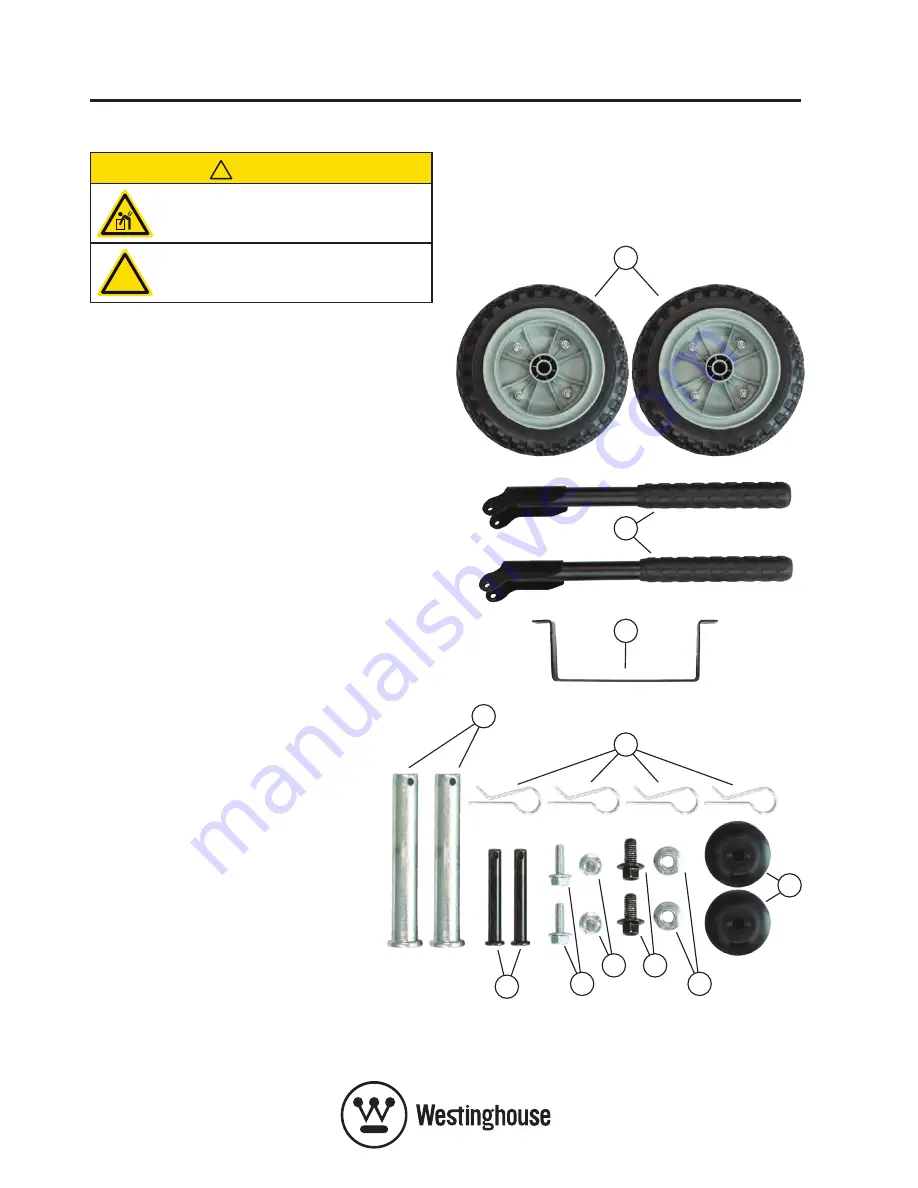
Check the wheel kit and verify its components against
those shown in Figure 3. If any parts are missing,
please contact your local Westinghouse dealer.
A – Wheel (qty 2)
b – Handle with Grip (qty 2)
C – Mounting Foot (qty 1)
D – Axle (qty 2)
E – Clevis Pin (qty 2)
F – Bolt M6 x 18 mm (qty 2)
G – Nut M6 (qty 2)
H – Bolt M8 x 16 mm (qty 2)
I – Nut M8 (qty 2)
J – Rubber Pad (qty 2)
k – Cotter Pin (qty 4)
Figure 3 - Wheel Kit Components
(Enlarged for clarity)
D
J
E
F
I
G
H
k
A
b
C
Summary of Contents for WHXC3750
Page 4: ...4...
Page 55: ...55 NOTES...

