-7-
-10-
PASTA MACHINE ASSEMBLY
Before using the
Pasta Machine,
clean all parts as outlined in the “
Cleaning Instructions”
in this booklet.
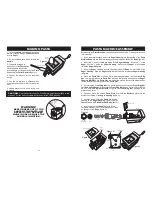
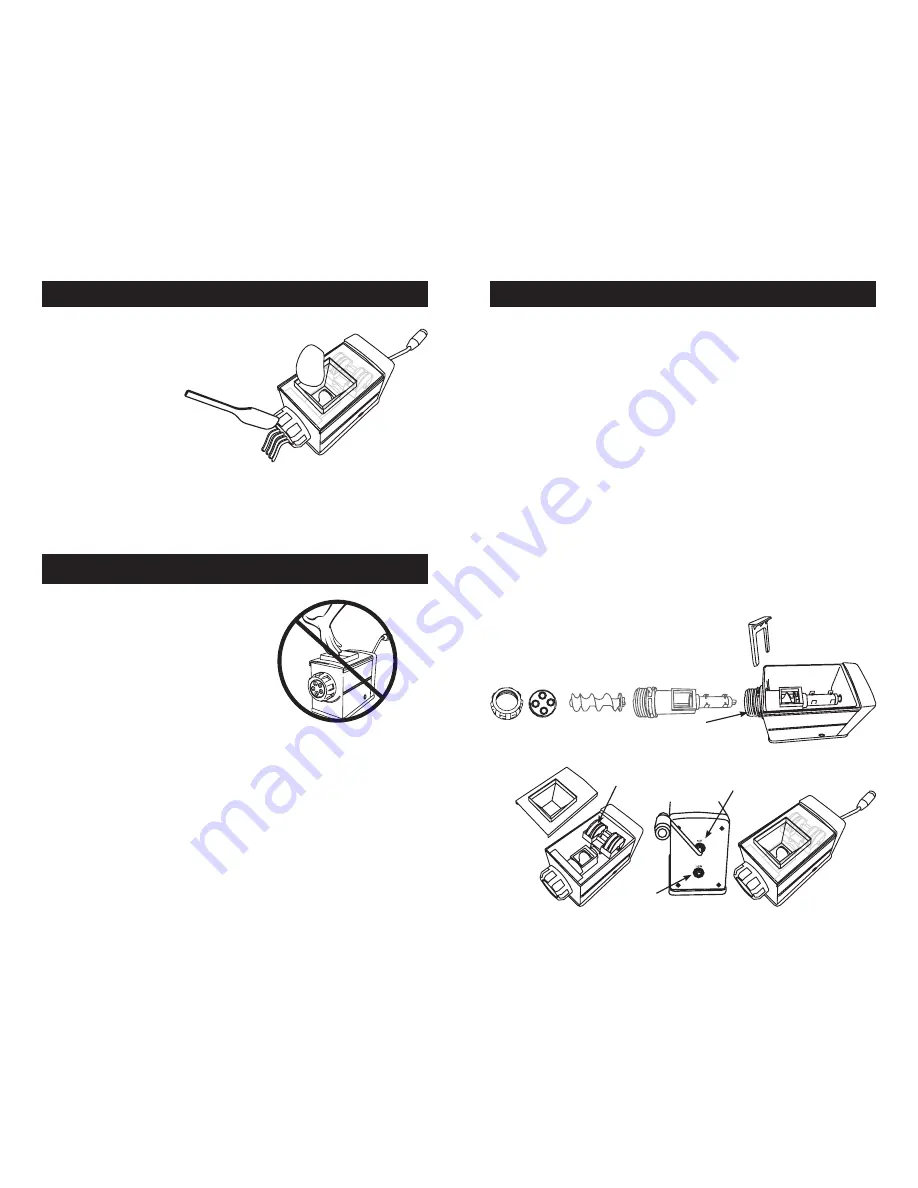
1. Insert the metal hexagon end of the
Auger Housing
into the opening of the
Pasta
Machine Body
and into the metal hexagon opening inside the back of the
Body
(figure F).
2. Insert the “+” end of the
Auger
inside of the
Auger Housing
. Align the “+” of the
Auger
with the “+” inside the
Auger Housing
. Make sure the
Auger
is fully seated
inside the
Auger Housing
.
3. Align the
Auger Lock
up with the channels inside the
Body
, on each side of the
Auger Housing
. Slide the
Auger Lock
into the channels, locking the
Auger Housing
into place.
4. Place the
Pasta Disc
of choice, metal side facing outwards, into the
Front Ring
Nut
. There are 4 tabs on the
Pasta Disc
the need to align with 4 notches on the
Auger
Housing
.
NOTE:
Each
Pasta Disc
is made of two pieces. Be sure the plastic portion
is lined up with the metal portion of the
Pasta Disc
.
5. By turning the
Front Ring Nut
in a clockwise direction, screw the
Front Ring Nut
onto the
Auger Housing
. Make sure the
Front Ring Nut
is snug, but do not overtighten.
NEVER use the
Ring Nut Wrench
to tighten the
Front Ring Nut
, damage to the
machine may occur.
6. Optional: Place the unused
Pasta Discs
into the
Disc Rack
and place into the
brackets on the top of the
Auger Housing
(figure G).
7. Align the funnel hole in the
Pasta Lid
with the
opening on the
Auger Housing
. Gently snap the
Pasta Lid
onto the
Pasta Machine Body
(figure I).
8. Insert the end of the
Handle
into the “Slow”
(for pasta making) (“Fast” (for mixing dough)) drive
on the back of the
Body
(figure H).
Figure F.
Figure G.
Figure I.
Figure H.
Auger
Auger Housing
Pasta
Disc
Front
Ring Nut
Auger Lock
Body
Pasta Cover
Disc
Rack
Fast Drive
Slow Drive
Handle
MAKING PASTA
1. Turn the
Handle
clockwise while feeding
a piece of dough through the
Pasta Lid
and
into the
Auger
.
2. At a consistent pace, keep turning the
Handle
.
3. The pasta will begin to
extrude out of the
Pasta Disc
.
Once the pasta reaches the
desired length, cut the pasta off of the
Pasta
Disc
using the
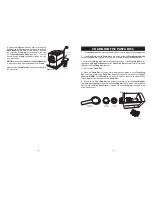
Cutter Spatula
(figure L).
4. Repeat this process for the remaining
dough.
5. Lay the cut pasta on a cheesecloth or
non-stick surface and let it dry for about an
hour.
If making pasta to store, extra drying time
is needed.
Figure L.
Cutter Spatula
Pasta
Dough
CAUTION!
It is important to follow the “Food Safety” guidelines outlined in this
manual. For the most up to date instruction visit the USDA website.
WARNING!
KEEP FINGERS OUT OF THE
CHUTE OF THE PASTA LID!
NEVER TOUCH THE AUGER
WHILE IN USE OR WHILE THE
AUGER IS IN MOTION.


