-8-
-9-
CHANGING THE PASTA DISC
1. Turn the
Handle
a half of a turn counter-clockwise to reverse the dough in the
Auger
a bit.
2. If the
Disc Rack
and the
Pasta Discs
are stored inside the
Pasta Machine Body
,
remove the
Pasta Lid
by gently pulling up from one side, popping the
Pasta Lid
off.
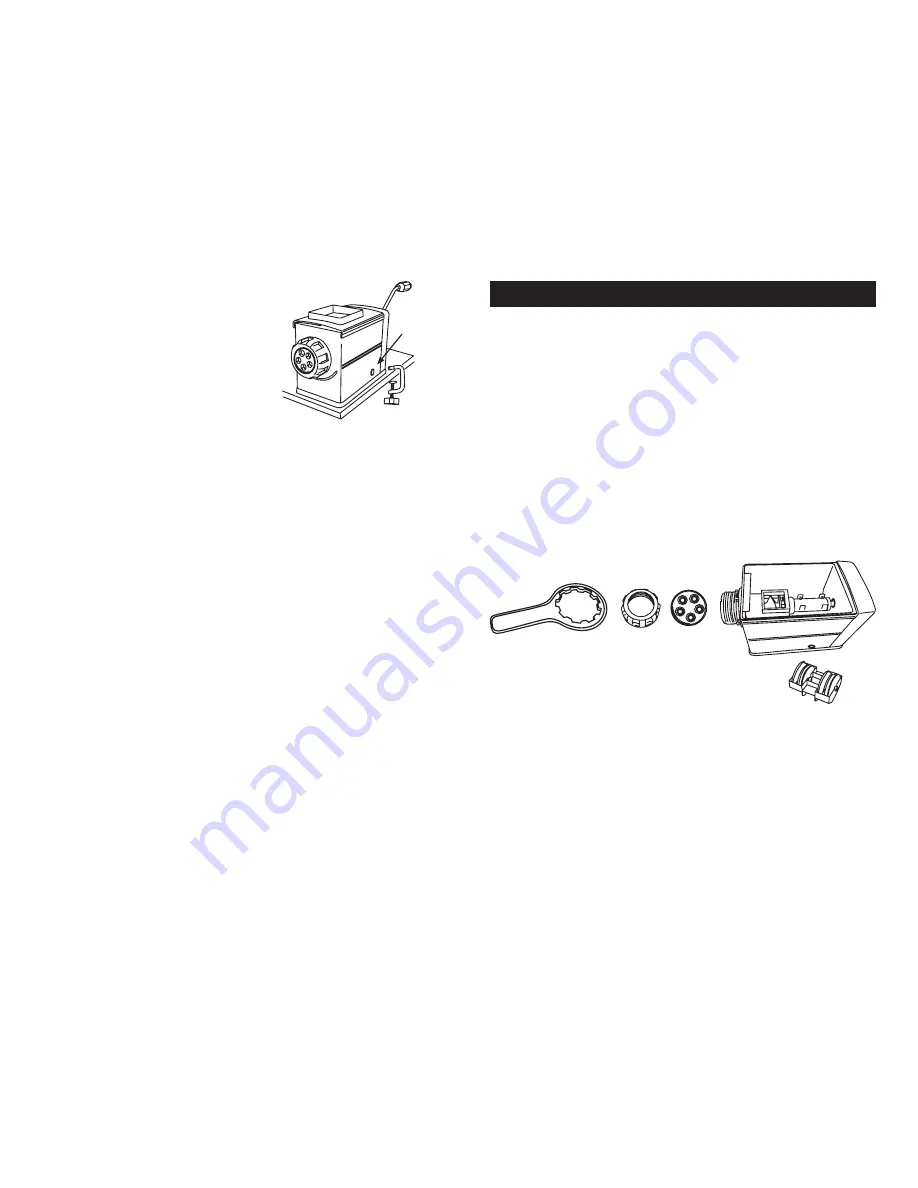
3. Twist the
Front Ring Nut
counter-clockwise and remove. If the
Front Ring Nut
is too
tight, place the
Ring Nut Wrench
over the
Front Ring Nut
and twist counter-clockwise
to loosen the
Front Ring Nut
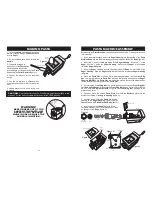
(figure K).
4. Remove the
Pasta Disc
.
5. Place the
Pasta Disc
of choice, metal side facing outwards, into the
Front Ring
Nut
. There are 4 tabs on the
Pasta Disc
the need to align with 4 notches on the
Auger
Housing
.
NOTE:
Each
Pasta Disc
is made of two pieces. Be sure the plastic portion
is lined up with the metal portion of the
Pasta Disc
.
6. By turning the
Front Ring Nut
in a clockwise direction, screw the
Front Ring Nut
onto the
Auger Housing
. Make sure the
Front Ring Nut
is snug, but do not overtighten.
NEVER use the
Ring Nut Wrench
to tighten the
Front Ring Nut
, damage to the
machine may occur.
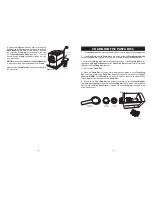
9. Open the
C-Clamp
all the way open by turning the
handle of the
C-Clamp
counter-clockwise. Attach the
Pasta Machine
to a table or countertop by inserting
the end of the
C-Clamp
into the opening on the side
of the
Pasta Machine Body
(figure J.). Turn the
handle of the
C-Clamp
clockwise to tighten the vice
onto the counter.
NOTE:
Make sure the
Handle
of the
Pasta Machine
is able to turn freely before tightening the
C-Clamp
.
Make sure the
Pasta Machine
is sturdy and tight onto
the countertop.
Figure J.
C-Clamp
C-Clamp
Housing
Figure K.
Disc
Rack
Pasta
Disc
Front
Ring Nut
Ring Nut
Wrench


