V
Batterien einlegen
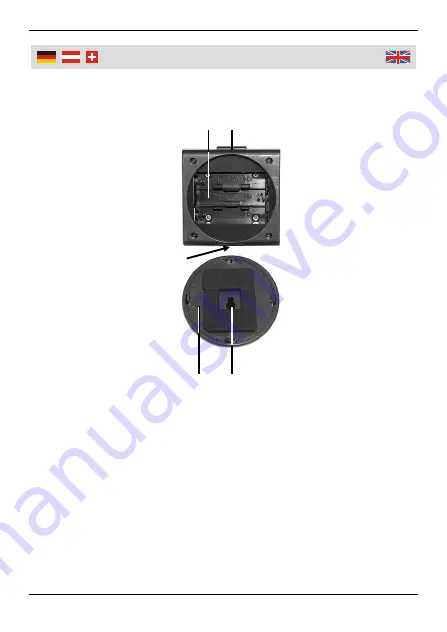
Ziehen Sie die rückseitige
Abdeckung (4) ab, indem Sie
mit den Fingern zwischen die
Aussparung (3) am Gehäuse
und der Abdeckung drücken.
Legen Sie drei LR03 (AAA)
Batterien polungsrichtig in
das Batteriefach (1) ein, sie-
he Abbildung im Batterie-
fach. Drücken Sie danach
die Abdeckung auf die Rück-
seite auf.
Einschalten
Für maximale Helligkeit,
drücken Sie den Taster (2)
einmal. Drücken Sie den
Taster ein weiteres Mal für
den Batteriesparmodus und
Sie erhalten eine reduzierte
Leuchtkraft.
Zum Ausschalten, des
Lichts, drücken Sie den Tas-
ter ein drittes Mal.
Der LED-Leuchtkopf ist in
alle Richtungen schwenkbar.
Drehen und kippen Sie den
Leuchtkopf, um den Licht-
strahl in die gewünschte
Richtung zu lenken.
Reinigung
Benutzen Sie nur ein be-
feuchtetes Tuch zum Reini-
gen des Gehäuses und ver-
wenden Sie keine Chemika-
lien.
Wenn Sie die LED Leuchte
längere Zeit nicht gebrau-
chen, entfernen Sie die drei
Batterien.
Inserting the Batteries
Pull the rear attachment
(4) out of the unit by
grasping between the
notch (3) and the attach-
ment: Press your fingers
against the housing.
Insert three batteries of
the type LR03 (AAA), into
the battery compartment
(1), observing the right
polarity in the compart-
ment. Firmly press the
attachment on the unit.
Switching ON
Press the button (2) once
to achieve full brightness.
Press the button once
more to use the battery
saving mode and you
achieve reduced illumi-
nance.
To switch off the spotlight,
press the button a third
time.
The spotlight head is
pivotable to all directions.
Tilt and turn the spotlight
head in order to point the
light beam to the desired
direction.
Cleaning
Clean the housing with a
moistened cloth only and
do not use aggressive
chemicals for cleaning.
If you do not plan to use
the spotlight for some
time, remove the three
batteries.
1 2
3
4
5


