background image

Model # JCS110605-D 

Please call for replacement parts or assistance: 

1-866-942-5362


Whalen Furniture Mfg., Inc.   


     Page 8 


         Factory No. 33-10944 

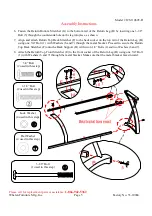
Assembly Instructions 


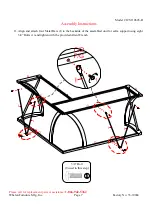
12.


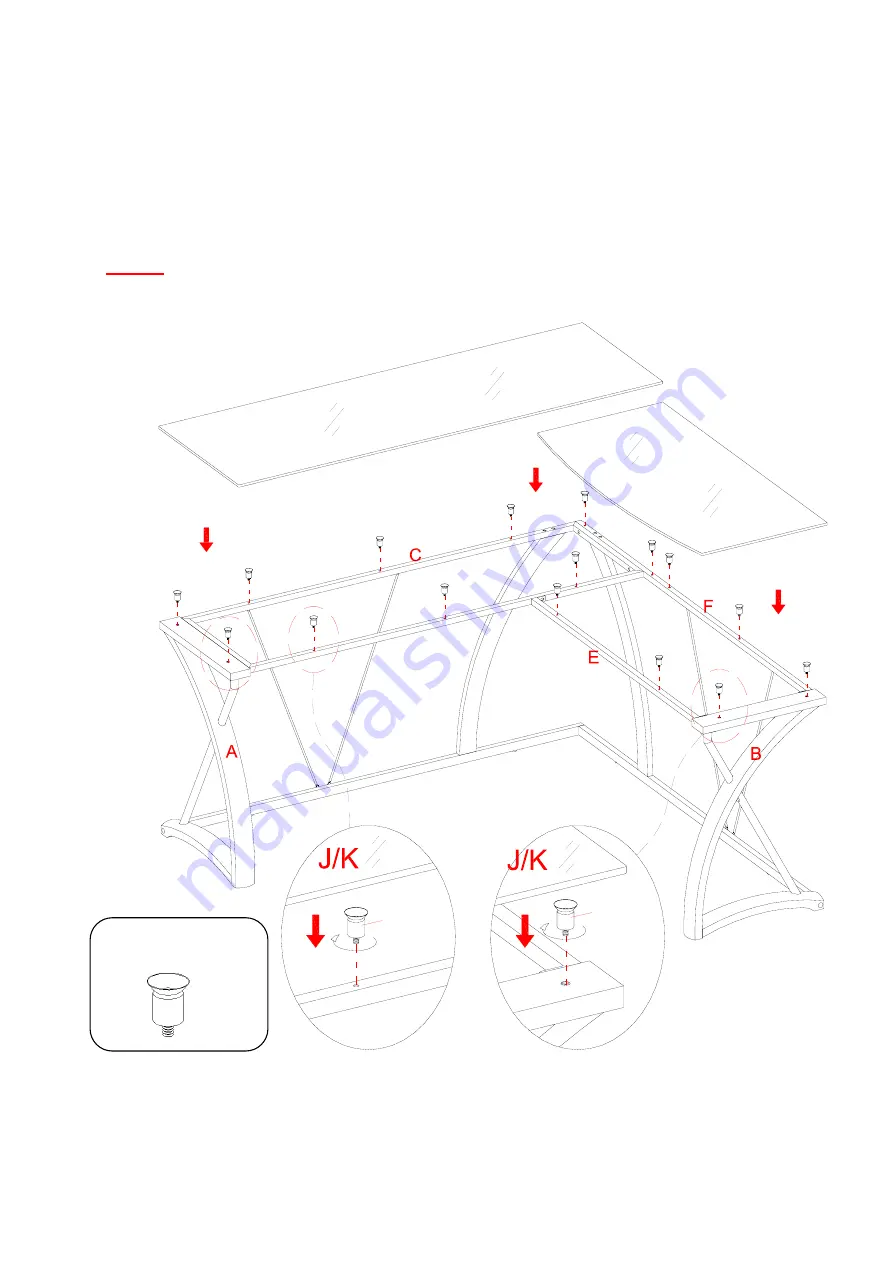
Screw 16 Glass Risers (9) all the way into the top sockets of the assembled unit. 


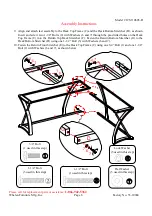
13.


Set the Desk Top (J) and the Return Top (K) onto place with the black side of glass down, as shown. 
Make sure that the glass tops are properly centered. 


NOTE: If the glass top is scratched, you can minimize the damage by using a BLACK marker 
and filling in scratched area from underneath. 


Glass Riser  

(16 used in this step) 


J

K

9

C/E/F

A/B

9

Summary of Contents for JCS110605-D

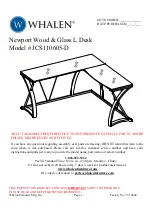
Page 1: ...y questions regarding assembly or if parts are missing DO NOT return this item to the store where it was purchased Please call our toll free customer service number and have your instructions and parts list ready to provide the model name part name or factory number 1 866 942 5362 Pacific Standard Time 8 30 a m 4 30 p m Monday Friday Or visit our website 24 hours a day 7 days a week for product as...

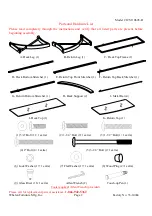
Page 2: ...eg 1 B Return Leg 1 C Desk Top Frame 1 D Desk Bottom Stretcher 1 E Return Top Front Stretcher 1 F Return Top Back Stretcher 1 G Return Bottom Stretcher 1 H Back Support 2 I Metal Bar 4 J Desk Top 1 K Return Top 1 1 3 4 Bolt 11 1 extra 2 1 1 4 Bolt 9 1 extra 3 1 1 2 Bolt 1 1 extra 4 2 Bolt 4 1 extra 5 3 1 8 Bolt 2 1 extra 6 Lock Washer 17 1 extra 7 Flat Washer 17 1 extra 8 Wood Plug 2 1 extra 9 Gla...

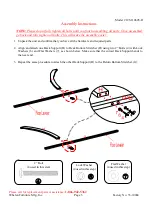
Page 3: ... will make the assembly easier 1 Unpack the unit and confirm that you have all the hardware and required parts 2 Align and attach one Back Support H to Desk Bottom Stretcher D using two 2 Bolts 4 with Lock Washers 6 and Flat Washers 7 as shown below Make sure that the curved Back Support bends to the near end 3 Repeat the same procedure to attach the other Back Support H to the Return Bottom Stret...

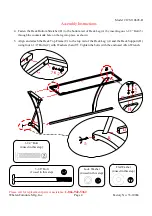
Page 4: ...k Leg A by inserting one 3 1 8 Bolt 5 through the countersunk hole on the leg into place as shown 5 Align and attach the Desk Top Frame C to the top rail of the Desk Leg A and the Back Support H using four 1 1 4 Bolts 2 with Washers 6 and 7 Tighten the bolts with the enclosed Allen Wrench 3 1 8 Bolt 1 used in this step 1 1 4 Bolt 4 used in this step Lock Washer 4 used in this step Flat Washer 4 us...

Page 5: ...et on the top rail of the Return Leg B using one 3 4 Bolt 1 with Washers 6 and 7 through the metal bracket Proceed to secure the Return Top Back Stretcher F onto the Back Support H with two 1 1 4 Bolts 2 and two Washers 6 and 7 8 Attach the Return Top Front Stretcher E to the front socket of the Return Leg B using one 3 4 Bolt 1 with Washers 6 and 7 through the metal bracket Make sure that the met...

Page 6: ...7 through the pre drilled holes on the Desk Top Frame C into the Return Top Back Stretcher F Fasten the Return Bottom Stretcher G to the Desk Bottom Stretcher D using one 1 1 2 Bolt 3 with Washers 6 and 7 10 Fasten the Return Front Stretcher E to the Desk Top Frame C using one 3 4 Bolt 1 and one 1 1 4 Bolt 2 with Washers 6 and 7 as shown below 1 1 4 Bolt 3 used in this step Flat Washer 5 used in t...

Page 7: ...62 Whalen Furniture Mfg Inc Page 7 Factory No 33 10944 Assembly Instructions 11 Align and attach four Metal Bars I to the backside of the assembled unit for extra support using eight 3 4 Bolts 1 and tighten with the provided Allen Wrench 3 4 Bolt 8 used in this step F D A I I I I ...

Page 8: ...l the way into the top sockets of the assembled unit 13 Set the Desk Top J and the Return Top K onto place with the black side of glass down as shown Make sure that the glass tops are properly centered NOTE If the glass top is scratched you can minimize the damage by using a BLACK marker and filling in scratched area from underneath Glass Riser 16 used in this step J K 9 C E F A B 9 ...

Page 9: ... and assure stability KEEP THESE INSTRUCTIONS FOR FUTURE REFERENCE If the glass is chipped or broken stop using the product and consult the manufacturer or supplier 1 Do not place very hot or very cold items on the glass surface s unless adequately thick tablemats are used to prevent such items from coming into contact with the glass 2 Do not sit or stand upon the glass surface s 3 Do not use the ...

Page 10: ...n them if necessary Further advice about wood furniture care It is best to keep your furniture in a climate controlled environment Extreme temperature and humidity changes can cause fading warping shrinking and splitting of wood It is advised to keep furniture away from direct sunlight as sun may damage the finish Proper care and cleaning at home will extend the life of your purchase Following the...

Page 11: ... JCS110605 D 17 LW Lock Washer JCS110605 D 6 DBS Desk Bottom Stretcher JCS110605 D 18 FW Flat Washer JCS110605 D 7 RTFS Return Top Front Stretcher JCS110605 D 19 WP Wood Plug JCS110605 D 8 RTBS Return Top Back Stretcher JCS110605 D 20 GR Glass Riser JCS110605 D 9 RBS Return Bottom Stretcher JCS110605 D 21 AW Allen Wrench JCS110605 D 10 MB Metal Bar JCS110605 D 22 TUP Touch up Pen JCS110605 D 11 BS...

Reviews: