background image


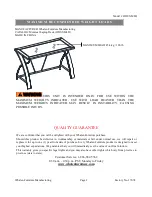
THIS INSTRUCTION BOOKLET CONTAINS IMPORTANT SAFETY INFORMATION.  
PLEASE READ AND KEEP FOR FUTURE REFERENCE. 

Whalen Furniture Manufacturing 


            Page 1                                           Factory No. 17074 

                         Date 2015-03-16 Rev. 1 Factory: WUHIND 


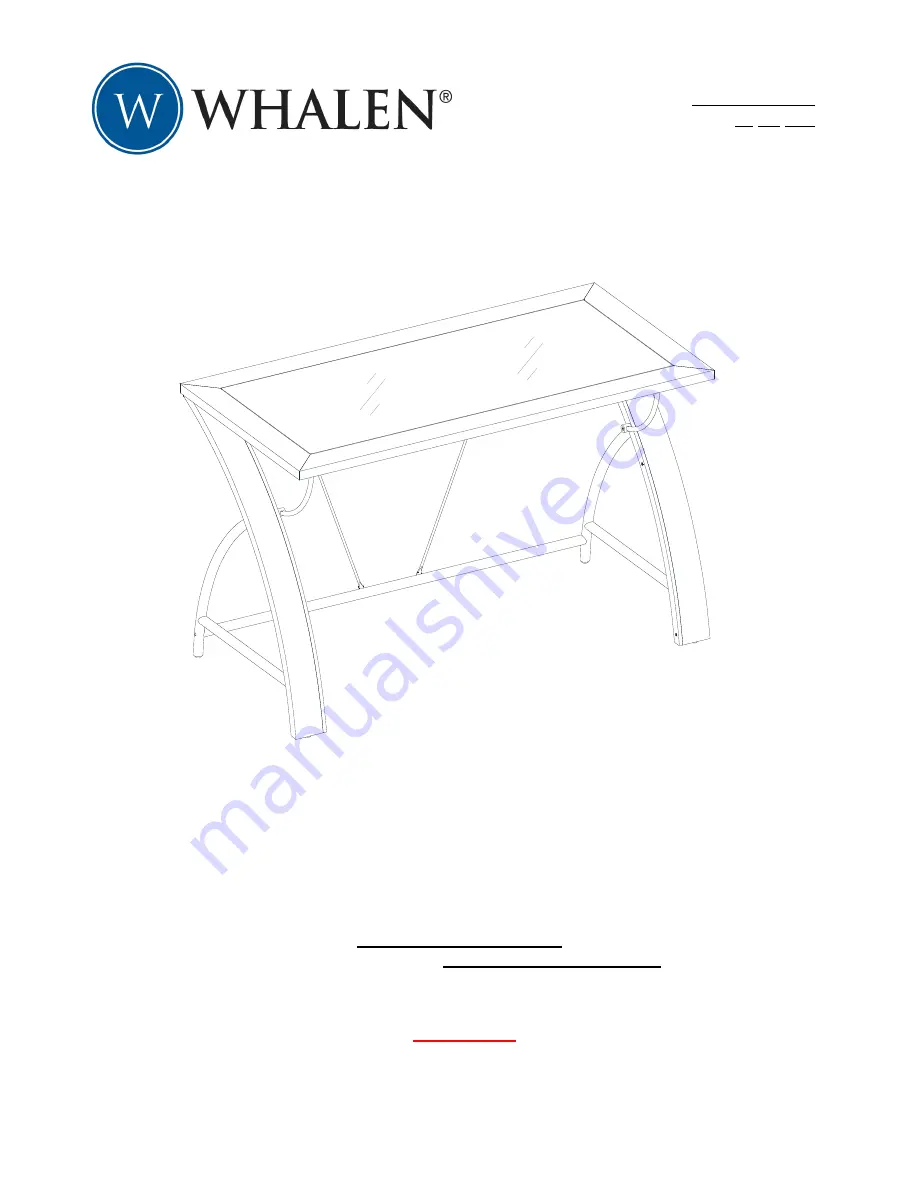
Montreal Laptop Desk 

Model # ODUS-MLD 


ADULT ASSEMBLY REQUIRED


If you have any questions regarding assembly or if parts are missing, DO NOT return this item to the 
store  where  it  was  purchased.  Please  call  our  toll-free  customer  service  number  and  have  your 
instructions and parts list ready to provide the model name, part name or factory number: 


1-866-942-5362 

Pacific Standard Time: 8:30 a.m. - 4:30 p.m., Monday - Friday 

Or visit our web site 24 hours a day, 7 days a week for product assistance at 

www.whalenfurniture.com 

Or e-mail your request to parts@whalenfurniture.com 


LOT NUMBER:       


DATE PURCHASED:    /     /   


Summary of Contents for Montreal Laptop Desk

Page 1: ... assembly or if parts are missing DO NOT return this item to the store where it was purchased Please call our toll free customer service number and have your instructions and parts list ready to provide the model name part name or factory number 1 866 942 5362 Pacific Standard Time 8 30 a m 4 30 p m Monday Friday Or visit our web site 24 hours a day 7 days a week for product assistance at www whal...

Page 2: ...Every Whalen Furniture product is designed to meet your highest expectations We guarantee that you will immediately see the value of our fine furniture This warranty gives you specific legal rights and you may also have other rights which vary from province to province state to state Customer Service 1 866 942 5362 8 30 a m 4 30 p m PST Monday to Friday www whalenfurniture com M AXIMUM RECOMME NDE...

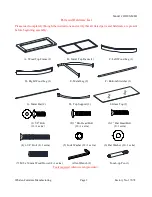
Page 3: ... assembly A Wood Top Frame 1 B Metal Top Frame 1 C Left Wood Leg 1 D Right Wood Leg 1 E Metal Leg 2 F Bottom Stretcher 1 G Metal Bar 2 H Top Support 2 I Glass Top 1 1 5 8 Bolt 2 1 Pan Head Bolt 3 1 Flat Head Bolt 12 1 extra 12 1 extra 2 1 extra 4 1 3 4 Bolt 2 1 extra 5 Lock Washer 12 1 extra 6 Flat Washer 12 1 extra 7 M8 x 30 mm Wood Dowel 4 1 extra Allen Wrench 2 Touch up Pen 1 Tools required All...

Page 4: ...ten all bolts This will make the assembly easier 1 Unpack the unit and confirm that you have all the hardware and required parts 2 Fasten 2 Top Supports H to the side rails of Metal Top Frame B using the 1 Bolts 2 As shown Make sure that the stand off of Top Support H points towards the back rail of Metal Frame B that has two threaded sockets for the Metal Bars G 1 Pan Head Bolt 2 used in this ste...

Page 5: ... with the holes facing up As shown 4 Align and attach the Metal Top Frame B to the Wood Top Frame A by using six 1 Bolts 2 As shown Make sure that the stand off of Top Supports H point towards the back of the Wood Top Frame A NOTE the rail included the threaded sockets for Wood Legs C and D is back rail 1 Pan Head Bolt 6 used in this step 2 B A 2 2 2 2 2 ...

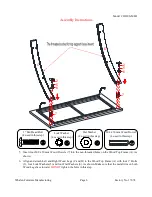
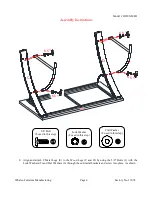
Page 6: ...and attach Left and Right Wood Legs C and D to the Wood Top Frame A with four 1 Bolts 2 four Lock Washers 5 and four Flat Washers 6 As shown Make sure that the metal trim on both Wood Legs face inward DO NOT tighten the bolts in this step 1 Pan Head Bolt 4 used in this step Flat Washer 4 used in this step Lock Washer 4 used in this step M8 x 30 mm Wood Dowel 4 used in this step 7 7 A D C 2 5 6 2 5...

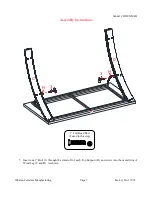
Page 7: ...anufacturing Page 7 Factory No 17074 Assembly Instructions 7 Insert one 1 Bolt 3 through the stand off of each Top Support H and screw into the metal trim of Wood Leg C and D As shown D H 3 C H 3 A 1 Flat Head Bolt 2 used in this step ...

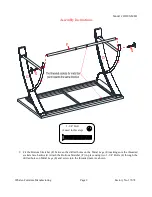
Page 8: ...d attach 2 Metal Legs E to the Wood Legs C and D by using the 5 8 Bolts 1 with the Lock Washers 5 and Flat Washers 6 through the end metal brackets and screw into place As shown Lock Washer 8 used in this step Flat Washer 8 used in this step 5 8 Bolt 8 used in this step 1 5 6 1 5 6 1 5 6 1 5 6 C D E E A ...

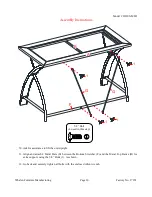
Page 9: ...Bottom Stretcher F between the drilled holes on the Metal Legs E making sure the threaded sockets face backward Attach the Bottom Stretcher F in place using two 1 3 4 Bolts 4 through the drilled holes on Metal Legs E and screw into the threaded nuts As shown E C 4 E D 4 F 1 3 4 Bolt 2 used in this step ...

Page 10: ... for assistance to lift the unit upright 11 Align and attach 2 Metal Bars G between the Bottom Stretcher F and the Metal Top Frame B for extra support using the 5 8 Bolts 1 As shown 12 Go back and securely tighten all bolts with the enclosed Allen wrench 5 8 Bolt 4 used in this step 1 1 1 1 A F G G B ...

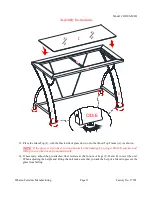
Page 11: ...hown NOTE If the glass is scratched you can minimize the damage by using a BLACK marker and filling in scratched area from underneath 14 If necessary adjust the pre attached floor levelers at the bottom of Legs C D and E to level the unit When adjusting the height and tilting the unit make sure that you ask the help of a friend to prevent the glass from falling I C D E C D E E B A ...

Page 12: ...it may cause damage to the finish Always use coasters under beverage glasses and flowerpots Liquid spills should be removed immediately Using a soft clean cloth blot the spill gently Avoid rubbing Always use protective pads under hot dishes and plates Heat can cause chemical changes that may create spotting within the furniture finish Stains or marks from crayons or ink markers will be difficult t...

Page 13: ... ODUS MLD 13 1FHB 1 Flat Head Bolt ODUS MLD 4 RWL Right Wood Leg ODUS MLD 14 1 3 4B 1 3 4 Bolt ODUS MLD 5 ML Metal Leg ODUS MLD 15 LW Lock Washer ODUS MLD 6 BS Bottom Stretcher ODUS MLD 16 FW Flat Washer ODUS MLD 7 MB Metal Bar ODUS MLD 17 M8x30WD M8 x 30 mm Wood Dowel ODUS MLD 8 TS Top Support ODUS MLD 18 AW Allen Wrench ODUS MLD 9 MTF Metal Top Frame ODUS MLD 19 TUP Touch up Pen ODUS MLD 10 FL F...

Reviews: