9
Assembly Instructions
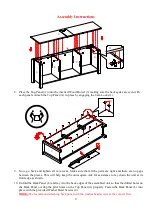
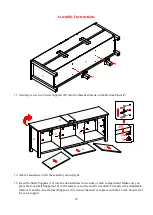
8.
Place the Top Panel (A) onto the inserted Wood Dowel (3) making sure the back egdes are even with
each panels. Attach the Top Panel (A) in place by engaging the Cam Locks (1).
9.
Now, go back and tighten all cam locks. Make sure that all the parts are tight and there are no gaps
between the pieces. This will help keep the unit square. Ask for assistance to lay down the unit at its
front edge as shown.
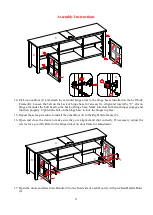
10.
Unfold the Back Panel (L) and lay it to the back edges of the assembled unit so that the drilled holes on
the Back Panel overlap the pilot holes on the Top Panel (A) properly. Fasten the Back Panel (L) into
place with the provided Washer Head Screws (4).
NOTE:
We recommend attaching back panel with the washer head screws at the corners first.
A
C
B
E
D
G
A
1
4
L
C


