background image

Please call for replacement parts or assistance: 

1-866-942-5362


Whalen Furniture Mfg. Inc 

Factory # 7-1564 

Page # 6 

Assembly Instructions 


1.


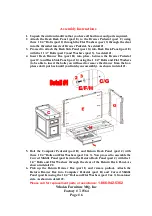
Unpack the unit and confirm that you have all hardware and parts required. 

2.


Attach  the  Desk  Back  Panel  (part  E)  to  the  Drawer  Pedestal  (part  C)  using 
three 1 1/4" Bolts (part 2) through the Flat Washers (part 3) through the cleat 
into the threaded inserts of Drawer Pedestal. See detail #1. 

3.


Proceed to attach the Desk Side Panel (part G) into Desk Back Panel (part E) 
with the 1 1/4" Bolts (part 2) and Washers (part 3). See detail #1. 

4.


Insert  Desk  Drawer  Box  (part  H)  into  place,  between  the  Drawer  Pedestal 
(part C) and Desk Side Panel (part G) using the 1 1/4" Bolts and Flat Washers 
(to be able to insert the bolts you will need to remove the drawer from the box, 
please don’t put back until you finish your assembly). As shown in detail #1. 


5.


Bolt  the  Computer  Pedestal  (part  D)  and  Return  Back  Panel  (part  J)  with 
three 1 1/4" Bolts and Flat Washers (part 2 & 3). Now proceed to assemble the 
Curved Middle Panel (part K) into the Return Back Panel (part J) with the 1 
1/4"  Bolts  and  Flat  Washers  through  the  cleat  of  the  Return  Back  Panel.  As 
shown in detail #2. 

6.


Pick  up  the  Return  Drawer  Box  (part  I)  and  remove  pullout.  Attach  the 
Return  Drawer  Box  into  Computer  Pedestal  (part  D)  and  Curved  Middle 
Panel (part K) using the 1 1/4" Bolts and Flat Washers (part 2 & 3) from inner 
side. As shown in detail #2. 

Summary of Contents for Villa Tuscano

Page 1: ...SHARP EDGES If you have any questions regarding assembly or if you are missing parts do not return this item to Costco Wholesale Club Please call our customer service number and have your instructions...

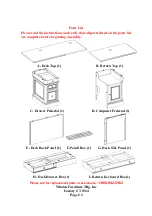
Page 2: ...age 2 Parts List Please read the instructions and verify that all parts listed on the parts list are complete before beginning assembly A Desk Top 1 B Return Top 1 C Drawer Pedestal 1 D Computer Pedes...

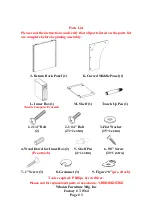
Page 3: ...parts list are complete before beginning assembly J Return Back Panel 1 K Curved Middle Panel 1 L Inner Box 1 M Shelf 1 Touch Up Pen 1 Inside Computer Pedestal 1 2 1 4 Bolt 2 1 1 4 Bolt 3 Flat Washer...

Page 4: ...4 How to adjust the European adjustable hinges on doors Shipping may cause doors to become out of alignment If you find that the doors need to be adjusted slightly turn the appropriate screw as illust...

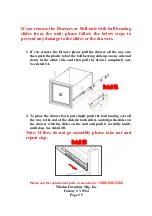
Page 5: ...Drawer please pull the drawer all the way out then push the plastic tab of the ball bearing slide up on one side and down in the other side and then pull the drawer completely out See detail A 2 To pl...

Page 6: ...between the Drawer Pedestal part C and Desk Side Panel part G using the 1 1 4 Bolts and Flat Washers to be able to insert the bolts you will need to remove the drawer from the box please don t put bac...

Page 7: ...s part 1 and Flat Washers part 3 Insert the Bolts and Flat Washers from inside the Desk Drawer Box part H through the Curved Middle Panel part K See detail 3 8 Finish attach you need insert three 1 1...

Page 8: ...s part 6 through the figure 8 part 9 to attach the Tops When attach the Return Top part B you need insert and screw three 1 Screws part 7 through the pre drilled holes included on the front rail of th...

Page 9: ...CPU configuration Insert the Shelf Pins part 5 into the holes of the Inner Box part L and side of the Computer Pedestal part D Now install the Shelf part M if space available See detail 5 For Tower C...

Reviews: